
Cake should be eaten without any hint of guilt whatsover. Even when wanting another slice…..
This post gives key tips for making several types of cake successfully, along with recipes for cakes and icings, troubleshooting and general ideas for decorating. I have also given the quantities needed to make a Victoria Sandwich cake for different sized tins.
Sections in this post:
-
- Off days?
- Less is often more!
- Flavour must come first
- The amount of ingredients needed for different sized tins (Victoria sponge)
- About cupcake sponges
- Flavouring a cake mixture
- Preparing the tins
- Baking the cakes
- Flavouring a baked cake
- Different types of icing: glacé, buttercreams; adding flavours to buttercreams; crumb-coating a cake in buttercream; fondant icings; ganache; mirror glaze
- Top tips for covering a cake in ganache or glaze
- The finishing touches to a cake (including piping, tempering chocolate and simple chocolate work)
- Recipes for standard cakes (cupcake sponge; Victoria sandwich sponge; whisked sponge; genoise sponge; Madeira cake. Click link to jump to this section
- Recipes for icings and fillings (salted caramel; standard ganache; quick fruity ganache; the silkiest buttercream; mirror glaze; drizzle cake topping). Click link to jump to this section
- My top 5 tips Click link to jump to this section
- Some of my favourite cake recipes Click link to jump to this section
I can think of very few pleasures that are up there with eating cake that someone else has made – and I love eating other people’s cakes and bakes: somehow eating something that someone else has made is more special.

I will happily bow to the professionals when it comes to novelty cakes and cakes involving artistic flair and amazing sugar craft; I am certainly not the most confident when it comes to the more elaborate decoration of cakes such as novelty artistic cakes (my attempts at sugarcraft figurines, for instance, would not be out of place at Halloween!), so I tend to stick to a few tricks that work well for me in terms of flavour and visuals – most crucially, causing me the minimum of stress!

It is mostly about being prepared and thinking ahead to what you want to achieve. I have found that a few rough sketches of my ideas has been invaluable for getting my thoughts together coherently and thinking through practicalities.
")
Off days?
Perhaps an odd thing to start with, but nonetheless I will do! I most definitely have off days, sometimes more frequently than I would like. Actually, one day I will post a selection of my disasters!
But whenever things do not go to plan, whether it is a cake that looks somewhat “naff” or a cake that is poorly cooked, it is important to try to figure out why things have not worked: for me, disasters occur when I rush or when I am trying to do too many things at once or when I lose track of time and forget that cake is still in the oven!
A second attempt at an unsuccessful bake can often be much more successful, which then does wonders for the confidence.
Less is often more!
The notes in this post are merely guidelines and are in no way exhaustive in terms of the variety of decorating methods out there, but I often find that less is more: a few little flourishes done well can make all the difference.
In fact most of the time I tend to favour simplicity, focusing on the flavours: a Victoria Sandwich cake or a sharp drizzle cake are sheer perfection for me!

Mind you, even chocolate collar surrounds (see “The finishing touches to a cake” below), which are one of my signature decorative touches, are very easy to do but look impressive.
However, when I am making miniature cakes, such as those I would have as petits fours or if I am making Afternoon Tea for a gathering of friends, then I can quite happily spend some time on the decorating as it then becomes a very theraputic couple of hours.


Flavour must come first
Substance rules over style every time for me!
Whatever approach is taken with decorating a cake, the most important thing is that no matter how amazing a cake looks, it has to taste good: I have eaten some stunning looking professional cakes, many with some highly memorable flavours, but my heart sinks on those occasions when some have not tasted anywhere near as good as they looked: frustrating “sins” such as dry sponge, overly sweet icing, lack of real flavour etc…

And while I am in constant awe of what cake artistes can do visually, once a cake is cut a lot of the visual magic has gone, meaning it is then all down to the flavour.

Aiming to put in excellent flavours at each stage of the process is essential and with the flavour absolutely spot-on, a less-than-perfect-looking cake can be forgiven!

But get both flavour and simple decoration spot on and you have an impressive cake. In the fruit basket cake above, I used a lemon curd-flavoured buttercream and decorated it with fresh fruit. The basket weave effect is easy to achieve (the pictures below demonstrate the method). I used a basket weave nozzle but you get a good effect using many standard nozzles:


The amount of ingredients needed for different sized tins (Victoria sponge)
I use free-range eggs, weighing them in their shells and then weigh the caster sugar, self-raising flour and softened unsalted butter so that each of these is the same weight as the eggs. This approach never fails to give a perfect cake.

The list below is a guide to the amount of eggs needed for different sized tins (2 layers), along with the amount of baking powder (needed for the quicker all-in-one method). You omit the baking powder if making the traditional creamed method, but otherwise go for about 1 teaspoon baking powder per 100g flour.
The actual method for making and baking the cake are towards the bottom of the post here.
I have also given typical weights of the other ingredients if you don’t want to go for the weighing out the eggs, but the egg-weighing is the most reliable approach.
- Two 6″ tins: 3 medium eggs, 1.5 tsp baking powder (then approx. 175g butter, 175g self-raising flour, 175g caster sugar)
- Two 7″ tins: 4 medium eggs, 2 tsp baking powder (then approx. 225g butter, 225g self-raising flour, 225g caster sugar)
- Two 8″ tins: 5 medium eggs, 2.5 tsp baking powder (then approx. 275g butter, 275g self-raising flour, 275g caster sugar)
- Two 9″ tins: 7 medium eggs, 3.5 tsp baking powder (then approx. 400g butter, 400g self-raising flour, 400g caster sugar)
- Two 10″ tins: 9 medium eggs, 4.5 tsp baking powder (then approx. 500g butter, 500g self-raising flour, 500g caster sugar)
- Two 11″ tins: 11 medium egg , 6 tsp baking powder (then approx. 650g butter, 650g self-raising flour, 650g caster sugar)
- Two 12″ tins: 13 medium eggs, 7.5 tsp baking powder (then approx. 750g butter, 750g self-raising flour, 750g caster sugar)
As a general guide fill a tin no more than about 3/4 deep with mixture.
I am aware that most recipes use slightly smaller amounts for the given sized tins, but I make no apologies as I feel just a little more gives a more generous depth of sponge.
The baking time (at 160C fan/180C non-fan) ranges from about 20 minutes for the 6″ cake to about an hour for the larger cakes: roughly, each extra inch of tin needs about a further 5-10 minutes cooking. For the larger cakes, turn the oven down to 150C after about 40 minutes if the tops look as if they are browning too much and cover with a sheet of greaseproof.
About cupcake sponges
An almost ubiquitous cake, a cupcake is nonetheless a joyful cake to eat, especially with a light, moussey and well flavoured icing.
You can use a Victoria Sandwich mixture but I usually go for an even lighter sponge, such as the recipe I give at the bottom of the page.
The mixture is very versatile, too: different flavours (chocolate chips, orange or lemon zest, coffee, fruit powder, a few little pieces of fudge that melt into the mixture as it bakes……..) can be added to it, ideally to reflect the chosen icing and topping. And a little drizzle topping on the just-baked sponge adds extra flavour and sharpness, that goes well with the rich icing on top.

Flavouring a cake mixture
Vanilla:
Vanilla sugar is an excellent ingredient to use in place of the caster sugar: simply scrape the seeds from a few vanilla pods into a large jar of sugar along with the pods and leave for at least a few weeks to allow the flavour to infuse. Just top up with more sugar as you use it. You can instead use vanilla extract or paste (about 2 teaspoons of vanilla extract for a 7″ cake).
Fruity:
The finely grated zest of lemons or oranges added to a basic mixture gives a lovely subtle citrus note to the baked cakes. A few tablespoons of dried fruit powder also adds a wonderful flavour to cakes.

Chocolate:
For a chocolate sponge, I replace about one third of the amount of flour with cocoa powder, which gives a rich chocolate flavour.

Coffee:
I find instant coffee granules dissolved in just a little hot water gives the best coffee flavour in a cake (and in an icing).
Typically, when making a coffee cake or a coffee icing, I use 2 tablespoons of coffee granules to 1 tablespoon of hot water. This amount of intensely coffee-flavoured liquid will be enough for a 7″ sponge, giving just the right depth of flavour and aroma.
Additional goodies:
If using the mixture for miniature cakes or cupcakes, I often throw in some roughly chopped chocolate which gives little gooey bites inside. Roughly chopped nuts and dried soured cherries (soaked overnight in something indulgent such as rum, brandy or Amaretto) also work well.
Preparing the tins
Whether or not the tins are non-stick, I always grease them lightly and base-line them with greaseproof. This ensures the base does not crisp up.
I also dust the sides with a little flour, tapping out the excess, which helps give a smooth finish to the cakes and gives something for the cakes to grip onto as they rise in the oven.
Baking the cakes
I bake Victoria Sandwich cakes in a fan oven at 160C and the baking times can be anywhere between about 20 minutes for a 6″ cake, about 30 minutes for an 8″ cake to about an hour or so for larger cakes.
I judge the bake by how the cake looks and feels: if it is well-risen, light golden brown, a little springy on top and with the cake just coming away from the sides of the tin then it done. As an extra check, a skewer poked into the centre should come out clean.
As cakes are especially reliant of correct temperatures, I thoroughly recommend an oven thermometer, especially if your oven doesn’t seem quite right. For example, one of my ovens is about 10°C too low compared to what it should be. So with a recipe that asks me to bake at 190C, I set the oven to 200°C.
Flavouring a baked cake
Alcohol:
For a dessert-type cake, when I would typically make a light whisked sponge of some type, I like to splash alcohol over the sponge layers. My favourites include Amaretto, brandy, framboise or rum, and if I am using fruit to decorate the cake I often go for a liqueur to match the fruit.

Fruit purées or curds:
A thin spreading of a fruit purée or a fresh fruit curd on the layers of the cake (before the cream, mousse, ganache etc..are used to layer them up) adds a lovely sweet-sharpness.
Different types of icing
Buttercream, fondant icing (the roll-out type or the powdered, naturally flavoured fondant you add liquid to), ganache and mirror icing are excellent ways to cover a cake.
If you are aiming for full coverage of a cake (top and sides), coat the cake in a crumb-coat of buttercream, jam or fruit curd before decorating it (see section below).
TOP TIP: freezing the cake for an hour or so before applying icing can help prevent get cake crumbs in the icing or prevent a cake from crumbling a little while you try to ice it.
Glacé icing:
The simplest of all icings, this is just icing sugar mixed with a little water until it forms a smooth paste. It is a great icing to use for creating a feathering effect (as in the custard slices below) or for drizzling over cakes. Instead of water, you can use flavours such as orange juice, lemon juice or coffee liquid.

A little liquid goes a long way when added to icing sugar so less is very much more: you want an icing that is neither so liquid that it runs everywhere nor so thick that you can stand a spoon in it. I add enough liquid so that is just holds it shape without spreading too much.
Buttercream: standard & luxurious
Standard buttercream
A standard buttercream is a simple and effective way to fill and top cakes.
For the simplest buttercream, whisk together softened unsalted butter and icing sugar, using the same amount of icing sugar as butter, until very light: I go for about 150g icing sugar per 100g butter, which gives a very soft, melt-in-the-mouth buttercream.
A food mixer makes this effortless and the more it gets whisked, the lighter the buttercream. I often let the mixer do its thing for about 10 minutes to allow the sugar to dissolve completely and give a very smooth buttercream.

This buttercream can then be flavoured in many ways, such as ideas I have given below.
You can increase the amount of icing sugar to about twice the amount of butter if you prefer a sweeter, slightly firmer buttercream, but you might need to add a splash of milk to help the icing sugar work into the butter.
Luxurious buttercream (French):
For the much more luxurious French buttercream – a rich, silky and almost moussey affair – you add boiling sugar syrup into egg yolks, before whisking in the butter. This buttercream is a joy to eat and is especially great with dessert-type cakes.

The recipe for French buttercream is at the bottom of the page. French buttercream can also be flavoured in the same ways as standard buttercream.
Getting great flavours into your buttercreams

The trick is to add the extra flavours a little at a time, whisking well after each addition.
- fruit powders are excellent to flavour buttercreams and I use these more than any other flavourings. They are natural, very zingy and pack a real flavour wallop. They are not cheap but these are one ingredient I would find it hard to live without in the kitchen
- fresh herbs work well in cakes: pop lavender, thyme or even rosemary into a jar of caster sugar or icing sugar for a few weeks to give a flavoured sugar that can then be used for icing
- chocolate is great to use. Simply melt the chocolate and leave it to cool (but not set) before whisking into the buttercream. I tend to use about 100g melted chocolate per 300g buttercream
- fruit purées also work well, but they need to be added carefully to the buttercream to stop it from splitting (like adding oil to the eggs when making mayonnaise!). If it does split, beat in some cooled melted white chocolate and all will be well
- fruit curds are an excellent way to add a subtle flavour: just beat in a few tablespoons of good quality curd until you get the right depth of flavour
- salted caramel works a treat: I often have a jar of it in the fridge and a few tablespoons of this beaten into buttercream works a treat. I have given the recipe at the bottom of the page.

Crumb-coating a cake with buttercream
Buttercream can also be used very thinly as a crumb-coating for a cake that is to have a runnier icing, ganache or fondant poured over it: this thin layer allow a poured-over icing to stick easily to the cake without running off it. It also means that any loose crumbs from the cake remain in the buttercream coating without getting into the main icing.

Fondant icings
Give the cake a crumb-coat of buttercream, jam or a fruit curd before covering with fondant icing (the roll-out icing or the softer fondant icing that you simply pour over and leave it to set).

I am quite partial to the powdered fondant that you simply add liquid to, which gives a soft, sticky finish and is actually quite lovely. I often add extra flavours such as fruit powders to fondant icing sugar although you can also buy fondant powder that is already flavoured with fruit powder.

– Roll-out fondant:
- If using a fondant that you want to roll out, make sure your hands are dry: moisture is bound to pick up any stray crumbs and embed it into the icing!
- Use a light dusting of cornflour on the work surface, your hands and the rolling pin to avoid sticking and a palette knife periodically run underneath the icing to help ease it off when you are ready to lay it over the cake. When you are ready to cover the cake, gently roll the fondant back over the rolling pin (like a swiss roll) and the unroll it over the cake. Don’t use icing sugar to roll out the icing onto as it can make the icing go too sticky – especially if working with it on a warm day!
- Use a clean paint brush to brush off the excess icing sugar and press an icing smoother or some other flat surfaced implement with a large surface area against the fondanted cake to help it stick and eliminate any air bubbles. An icing smoother is quicker and cooler than hands, and it helps avoid leaving fingerprints and the like!
– Liquid fondant:
The runny fondant comes in powdered form and you simply add liquid to it. It is softer than roll-out fondant and has a lovely sticky texture: perfect for fondant fancies.
To use fondant icing:
- spread buttercream or cream thinly around the cake to give it a crumb-coat: a frozen cake makes this easier. You can even use melted buttercream (honestly!): just pour it over the frozen cake and it sets almost instantly, giving a perfectly smooth finish with no effort at all
- put the crumb-coated cake on a wire rack with a tray or a sheet of greaseproof underneath (to catch the drips)
- pour the fondant over the cake and leave it to firm up
- remove the cake from the wire rack once it has set – a palette knife is invaluable here


Ganache (a simple coating or a great filling)
The basic ganache is simply hot double cream poured over small chunks of whichever chocolate you are using, and mixed until totally smooth and glossy: 300g cream to 200g chocolate gives a ganache that will pour over and fully cover a 9″ cake, doing so with ease and resulting in a smooth finish.
You can let the ganache set further to a thick, spreadable texture, at which point it will be like the most luxurious chocolate spread you can imagine, it is excellent used to fill a cake generously.
You can add whatever flavour you want to the ganache: alcohol is great, as is a little strong coffee, crushed nuts, orange zest, passion fruit juice, salted caramel, praline paste…….the list is endless!
For a quick fruit ganache, heat up fruit curd until it become runnier but not until it boils, and pour it over chopped white chocolate. Stir gently until it has melted. As the curd is quite firm to begin with, equal quantities of each gives a nice set. Lemon curd or passion fruit are wonderful, but go for the best quality curd you can.
The full recipe for ganache is at the bottom of the page.

Mirror glaze
A mirror glaze gets poured over a crumb-coated cake before being left to set, giving a lovely shine.

In the recipe section below I have given a recipe for a very simple mirror glaze. There are many differrent recipes for mirror glaze but I often use this quick version, which was given to me many years ago when on holiday in New York.
For a more stunning mirror glaze, including getting simple pattern effects, such as in the photos below of cakes I have made, please see my post: mirror glazes


Top tips for covering a cake in ganache or glaze
When coating a cake in ganache or glaze, the cake should be crumb-coated first in a thin layer of buttercream, whipped cream or even jam, and smoothed as much as possible: apricot jam is particularly terrific with a chocolate ganache coating.
The cake should then be very well chilled or, ideally, frozen for a couple of hours. You also need to let the ganache cool down before pouring it over a cake, but it still needs to be runny enough to pour easily.
(1) Place a sheet of clingfilm in a baking tray and place a tin or wide glass on top. Put the cold crumb-coated cake on a board or cake tin base that is slightly smaller than the actual cake’s base and place on the tin/glass. The photo below, with a cake that had just been covered in ganache, shows this set-up:

(2) Pour the cooled ganache or glaze over the top of the cold cake, letting it cascade down the sides, and leave it for about 15 minutes for the ganache/glaze to set a little on the cake. You can smooth off any drips hanging off the bottom. The ganache or glaze that drips onto the clingfilm can be re-used.
(3) Chill the covered cake, still on its tin/glass. It can then be left as it is, decorated with fresh fruit or grated chocolate for simplicity, or it can be adorned with any flourish you fancy!

NB: once the covered cake has chilled for a few hours and the ganache or glaze has set, remove it from the fridge and carefully transfer it to a flat plate or cake board: I find it easiest sliding a large flat pizza sheet underneath it and using a large palette knife to ease it off the sheet and onto the cake board.
The finishing touches to a cake
It is very easy to go over-board when decorating a cake but sometimes just a dusting of fruit powder, cocoa powder or edible glitter is all that is needed to give nice finishing touches to a cake.

A random drizzling of melted chocolate over the top of a cake can also lift it somewhat.
Piping
Although I am not the most careful or precise when it comes to piping when lettering or writing is involved, I do find it theraputic.
I use disposable piping bags: they are far easier and more hygenic than the cloth ones. I sometimes use nozzles for more decorative flourishes such as with cupcakes, but I often don’t: in which case I fill the bag with the icing or melted chocolate, snip off the end and then casually drizzle over a cake.


Piping needs a steady hand and calm frame of mind. If I have a fair bit of piping to do, I prefer to sit down while I pipe, listening to music. There is no shame in practising piping skills on a plate, a work surface, a biscuit…….!

Simple chocolate shapes can also work very well: melt chocolate and drizzle over acetate randomly or going for specific shapes. Once set, peel them carefully off the acetate and pop on top of the cake. On a warm day, though, be prepared to pop them in the fridge as they can melt very quickly!
If you are more adventurous with piping, then you might find this link very useful for types of nozzle and the effect you get: piping nozzles
Simple chocolate work: temper, temper!
One of my favourite ways to decorate a cake is using a chocolate collar: melted chocolate is spread or drizzled (depending on whether you want a lacy effect or a full chocolate wrap) over acetate sheets until the chocolate just loses its tackiness, at which point it shouldn’t run when you lift the acetate.
Tempered chocolate (guidelines below) has a better shine and is crisp as you bite into it, although chocolate that has just been melted without the tempering is easier, quicker and can still look impressive.

The acetate is then wrapped gently around the cake and left until set. The acetate is carefully peeled off to reveal a very smooth chocolate collar.
A double-thickness of greaseproof paper instead of acetate works very well.
About 200g chocolate will give a full collar surround for an 8″ cake (about 80g will give the lace effect). In the photos below, the left cake uses the chocolate drizzle/lace effect.

Tempering in the microwave:
If I am tempering chocolate, I now tend to do so in the microwave: I put small pieces of the chocolate (about 250g) in a bowl and heat on high for about 10 seconds before leaving it alone and then giving it another 10 seconds on high. I repeat this just until the chocolate has melted. I then heat again on high in small bursts until the temperature reaches:
- 42C for dark chocolate
- 32C for milk chocolate
- 31C for white chocolate
Stir about 100g chopped chocolate into this melted chocolate, which will bring the temperature down. Add more of the chocolate and keep stirring until the temperature reaches:
- 31C for dark chocolate
- 28C for milk chocolate
- 28C for white chocolate
It is now ready to use.
NB: a hand-held laser thermometer is invaluable for this!
Chocolate curls:
For simple chocolate curls, temper (or melt) whichever chocolate you want to use, spread it thinly over some acetate or greaseproof and when it is just starting to set, run a decorating comb across it slowly to form thin parallel strips of chocolate.

Loosely curl up the acetate with the chocolate facing inwards and place it vertically in a large mug to hold it in place. Once set, the chocolate will slide easily off the acetate in curls. Any excess chocolate can be stored in an airtight container to be tempered or melted at a later stage.


Alternatively, chocolate cigarellos/scrolls are an excellent way to surround a cake. They are fun to make (albeit very time-consuming to get the amount needed), but to be honest I rarely make these from scratch now as there are many good quality stockists for these.

Fresh fruit:
One of the simplest and most striking way to decorate a cake is to spread some whipped cream or buttercream on top of a cake and then top with fresh fruit: strawberries, raspberries, blueberries are particularly excellent. The juicyness of the fruits works well with the richness of the rest of the cake.
Fruit powder and freeze-dried fruit
These are not cheap but they are wonderful for effective touches to a cake and adding a wonderful tangy flavour. Top or coat the cake lightly in buttercream or cream first and then just dust the powder over a cake or sprinkle over freeze-dried fruit pieces.
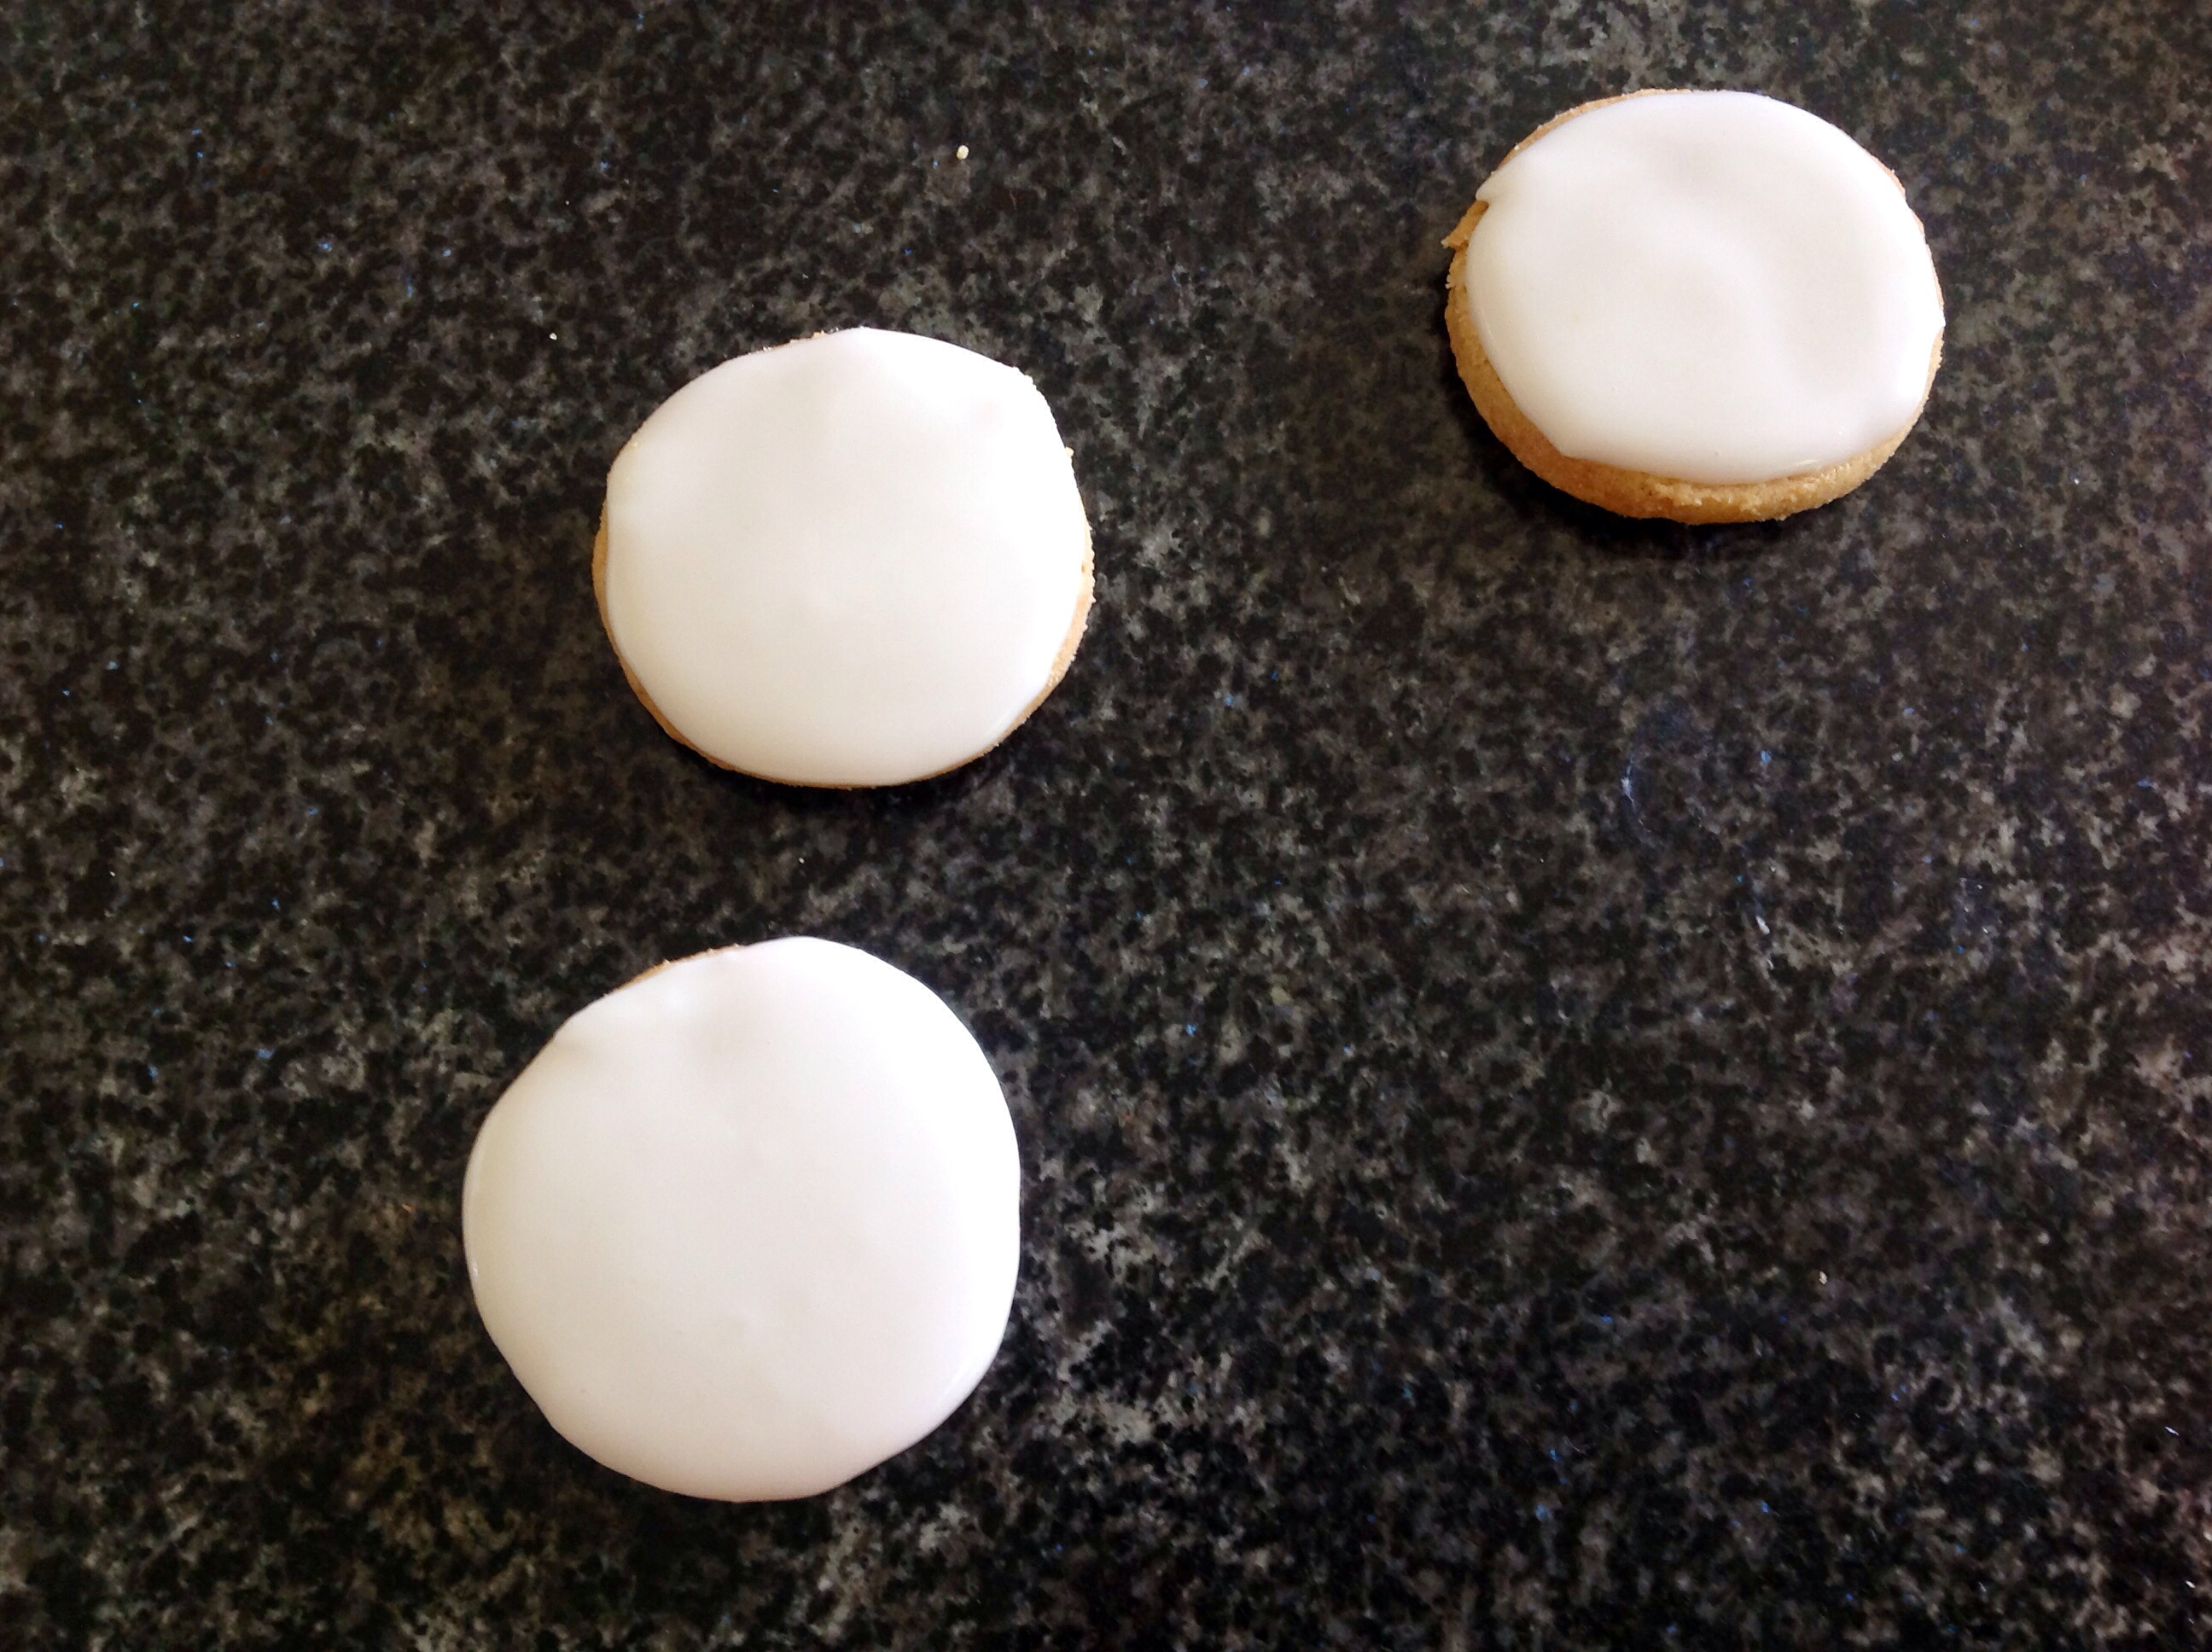
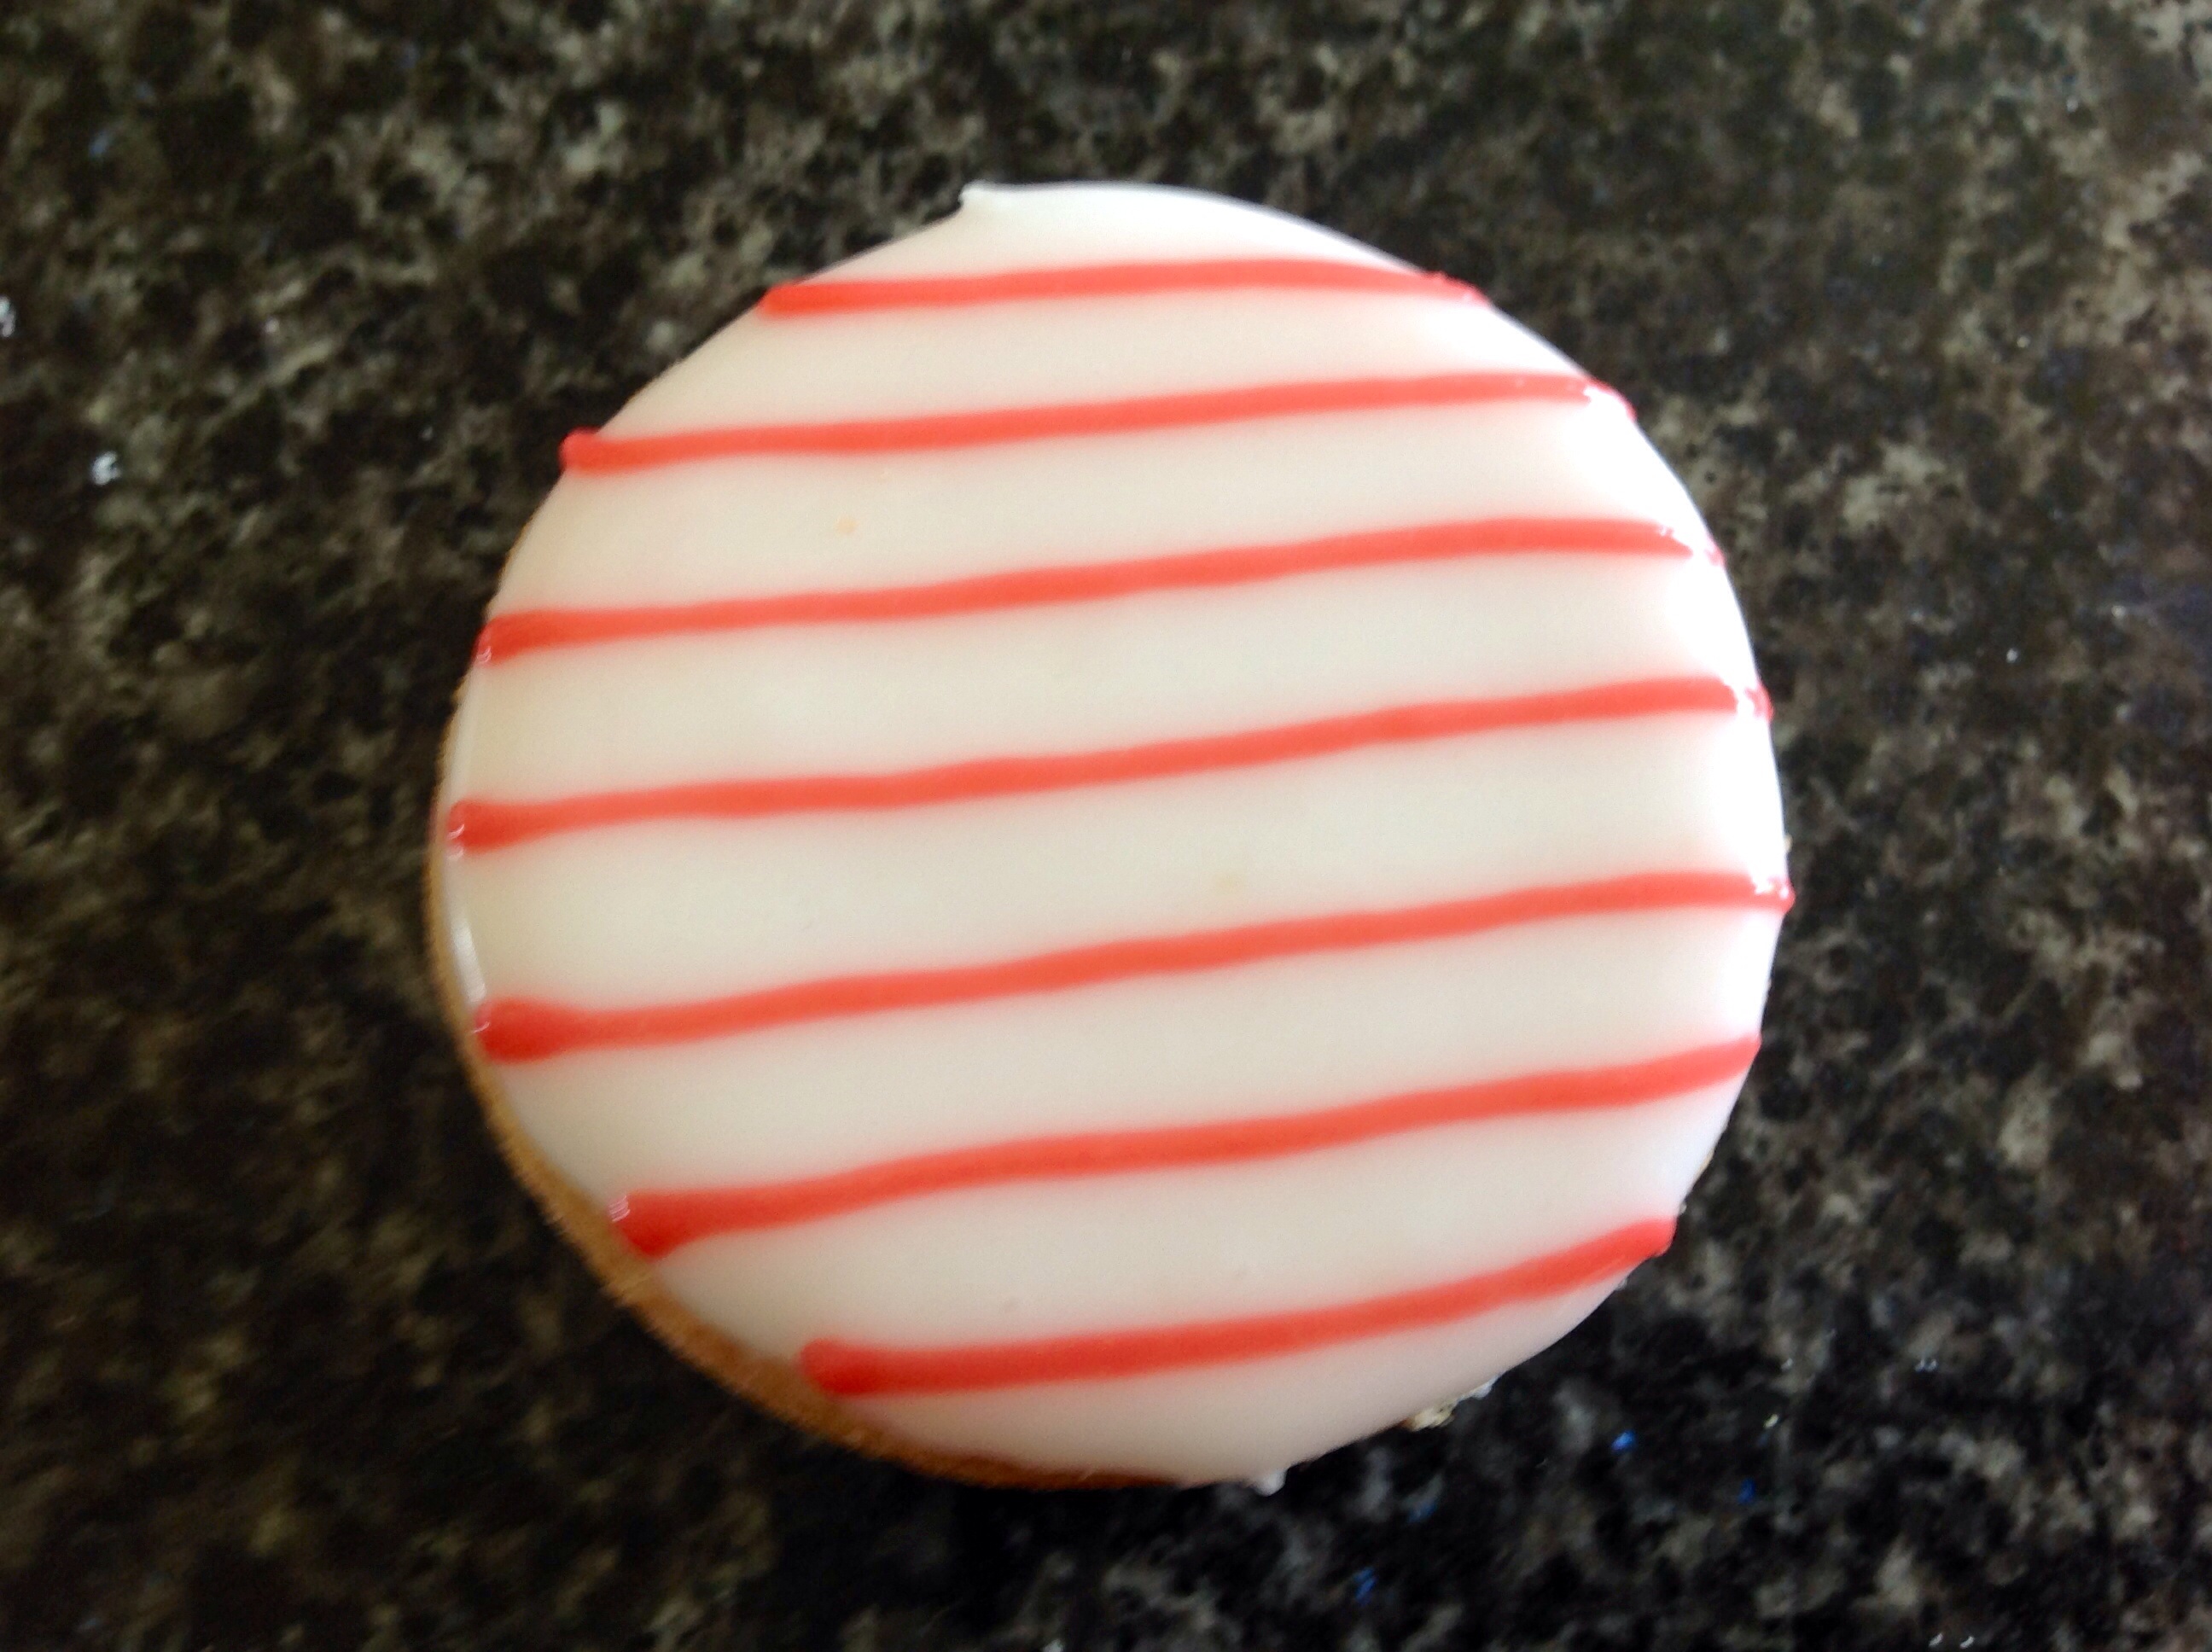
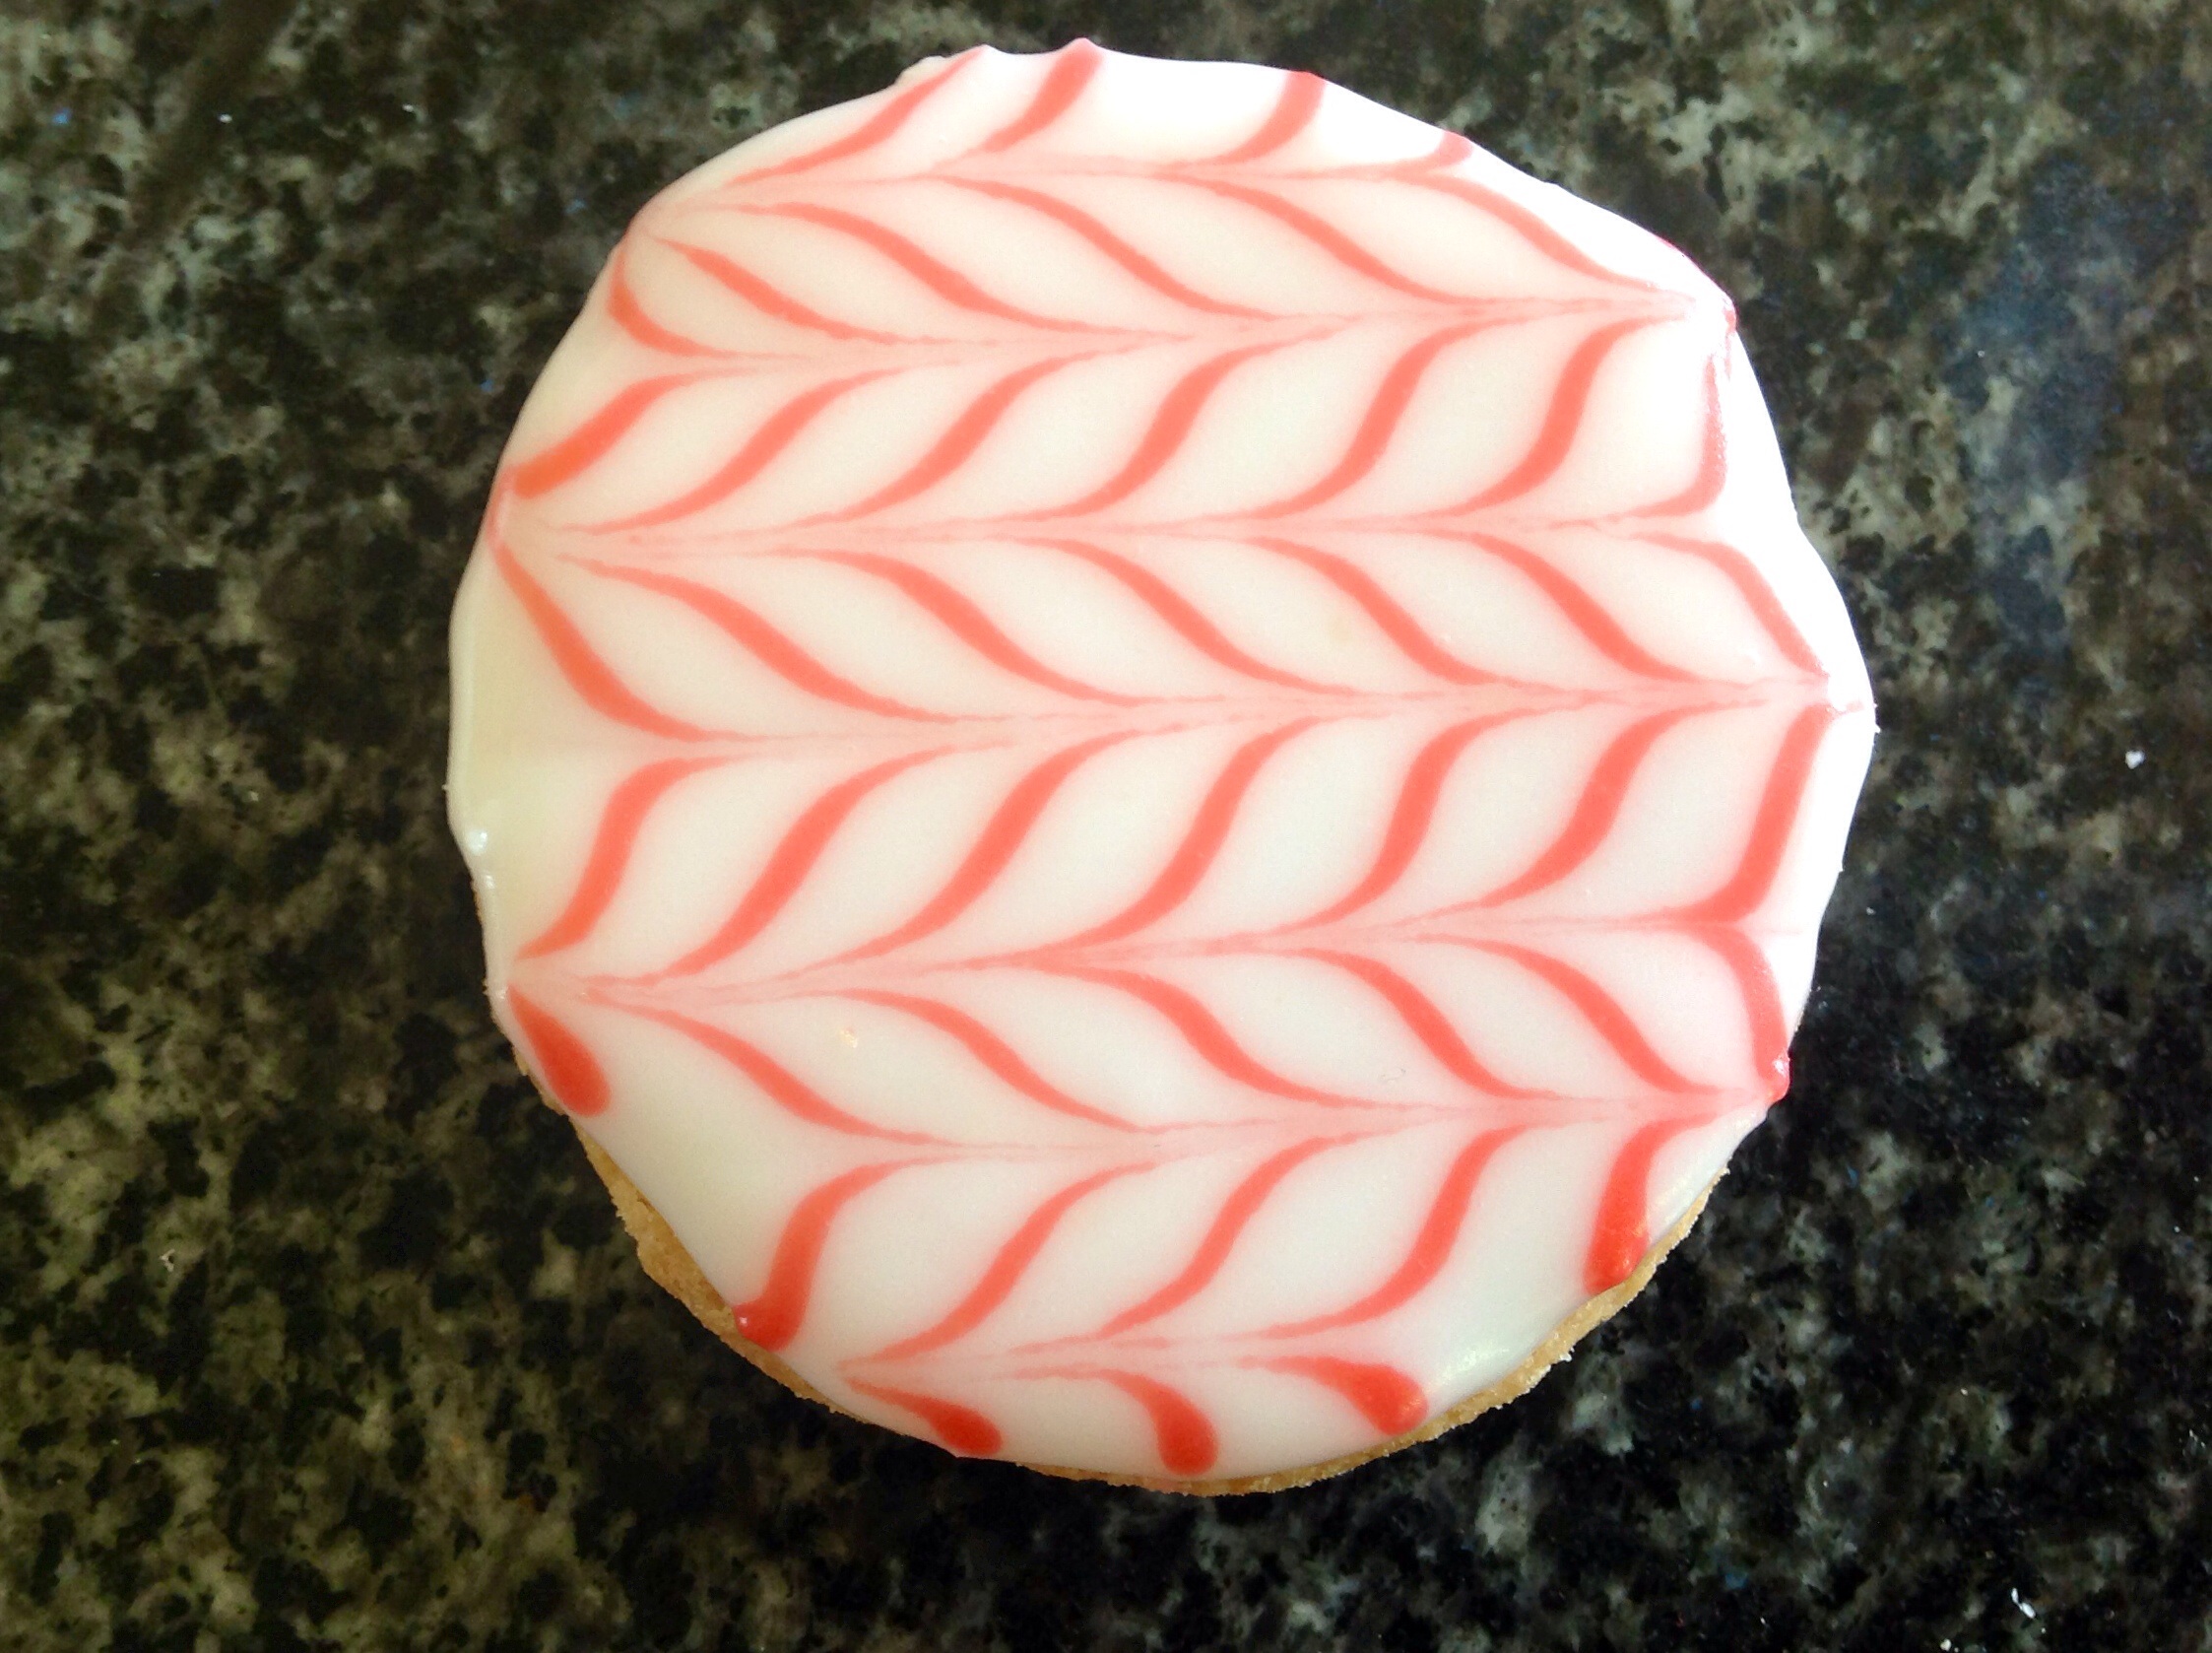
Feathered icing
This is a very simple effect for biscuits and cakes, usually using two colours although you can pipe more colours over. The important thing for feathering is that the icing shouldn’t be too runny: if it is too runny, the piped colour(s) will simply run into each other and look a mess.

The pictures below show how to create a simple feathering effect. I used biscuits for these pictures, but the idea is the same for cakes, although I would recommend a crumb-coat of buttercream if using feathering for cakes.


Recipes for standard cakes
I give the basic recipes for a basic cupcake sponge, a basic whisked sponge, a Victoria sandwich sponge and Maderia cake.
(I) Basic cupcake sponge (makes 12 cupcakes)


- 120g plain flour
- 120g golden caster sugar
- 1 ½ teaspoons baking powder
- a pinch of salt
- 40g unsalted butter, melted
- 120ml milk
- 1 large egg, at room temperature
- grated zest of one lemon
(1) Preheat the oven to 160C(fan). Sift the flour and baking powder into a large mixing bowl. Add the sugar, salt and lemon zest and mix well.
(2) Whisk the egg, milk and melted butter together and pour over the rest of the mix, stirring well until there are no lumps without over-beating (which will result in heavier, more dense cupcakes). You should have a fairly thick batter at this point.
(3) Pour or spoon the batter into cupcake cases, coming to just under half-full (they will rise a lot!), and bake for about 15-20 minutes until well risen, golden-brown with a springy feel to them. Leave to cool in their tins before decorating. NB: For chocolate cupcakes, replace 20g of the flour with cocoa powder and mix in 50g melted chocolate. I increase the eggs to two medium eggs if adding chocolate to keep the sponge light. Other flavours can also be added to match the icing: coffee, chopped nuts, fruit powder, powdered ginger……
(II) Basic whisked sponge (gives 2 thick layers; is also great for Swiss rolls and dessert-style cakes)


- 4 large eggs, at room temperature
- 125g golden caster sugar
- 125g self-raising flour, sifted
(1) Whisk the eggs and the sugar over a pan of barely simmering water for 5-10 minutes until it increases significantly in volume, is very aerated and moussey: when you lift the whisk out of the mixture, a trail should remain for about 30 seconds until slowly disappearing back into the mixture (the ribbon stage):


(2) Pour into two tins that have been lined with greaseproof paper, gently flatten out and bake in an oven pre-heated to 170C(fan) for about 10 minutes until risen, light golden brown and the sponge has just started to shrink away from the sides.
(3) Leave to cool in the tins and turn onto a large sheet of greaseproof that has been lightly sprinked with caster sugar Carefully peel off the greaseproof (trying not to tear the sponge!).
NB: this makes enough for a 7″ cake, splitting the mixture between two 7″ tins (or more if you want thinner layers for more of a gateau). Alternatively, the mixture will be enough for a rectangular Swiss roll tin (about 25cm by 40cm) For a genoise sponge, fold in 25g melted unsalted butter at the end, until there are no streaks of butter remaining.
(III) Basic all-in-one Victoria Sponge

The exact proportions of the eggs, butter, sugar and flour for whichever size cake you are going for are further up the post: here
(1) Simply put the butter, sugar and eggs into a large bowl, ensuring the butter is very soft and the eggs are at room temperature. I sometimes beat the butter and sugar first to just start to incorporate them. Sift the flour and the baking powder into the bowl.
(2) Mix gently until the ingredients just come together into a soft, smooth mixture: try not to over-beat as the more you beat, the more the gluten in the flour will develop, resulting in a heavier sponge.
(3) Spoon into tins lined with greaseproof paper and bake at 160C (fan) or 180C(non-fan) for about 20 minutes for a 7″ cake to about an hour for a 12-inch cake: it is ready when the sponge is well risen, is golden brown and the top springs back when you gently prod it. The sponge should also just shrink away from the edges.
NB: for larger cakes, keep an eye on it after about 30 minutes, checking every 5 minutes or so, turning down the oven to 150C after about 40 minutes if the tops are browning too much and covering with a sheet of greaseproof.
(4) Leave the cakes to cool for about 5 minutes in the tins before turning out onto a wire rack until cool.
For a classic Victoria sponge, which has a lighter, more melt-in-the-mouth feel, whisk the butter and the sugar together until very pale and light. Add the eggs, a little at a time, whisking well between each addition. You can omit the baking powder for this method, but gently fold in the sifted flour until it has been fully incorporated before putting into tins and baking.
(IV) Madeira cake:

- 175g softened unsalted butter
- 175g golden caster sugar
- 3 large eggs, at room temperature
- 200g self-raising flour
- 50g ground almonds
- about 3 tablespoons full-cream milk
- finely grated zest of 1 lemon
(1) Beat the butter, sugar and lemon zest in a bowl until pale and very fluffy. Beat in the eggs, a little at a time, beating very well between each addition. You might need to beat in a little of the flour when most of the egg has been incorporated to prevent the mixture from curdling.
(2) Very gently fold the flour and almonds in, adding just enough of the milk to give a mixture that drops slowly but surely off the spoon.

(3) Transfer the mixture into a greased and base-lined tin 7″ cake tin or loaf tin and flatten the top. Bake in an oven preheated to 160C (fan) for 30-40 minutes for a 7″ tin or between 50-60 minutes for a loaf tin, until the top is golden-brown on top and a skewer inserted into the centre comes out clean.

Recipes for icings and fillings
Some of my favourite ways to decorate cakes are using buttercream, chocolate ganache and chocolate mirror glaze. I have also given the recipe for salted caramel, something I use a lot and cannot do without! Salted caramel is particularly great beaten in to or marbled through buttercream.
(I) Salted Caramel: makes about 500g
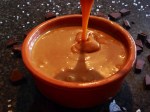
This will keep quite happily in a screw-top jar in the fridge for a few weeks. Wonderful eaten just as it is (!), salted caramel is excellent beaten into buttercream or ganache.
- 200g granulated sugar (caster is more prone to chrystallising!)
- 50ml water
- 100g unsalted butter, roughly chopped
- 150ml double cream
- 2 teaspoons fine sea salt
(1) Put the sugar and water in a small pan and bring slowly to a gentle boil, shaking the pan from time to time to dissolve the sugar: don’t stir it as the sugar could crystallise. Don’t use a non-stick pan as the mixture is more prone to chrystallising.
(2) Let the syrup boil for about 5 minutes until it turns golden brown, although you can take this a little further to a darker brown. However, don’t go too far or it can become too bitter.
(3) Remove the pan from the heat and stir in the butter until it has melted. Slowly pour in the cream, stirring continuously. Take care as the cream will make the mixture sputter somewhat. Once the cream has been incorporated leave to cool and stir in the salt until it has dissolved. Cool before using.
(II) Chocolate ganache: makes enough to cover a 9″ cake generously
- 300ml double cream
- 200g chocolate, chopped small (any variety) – go to 500g for a thick ganache to fill a cake
(1) Put the chocolate in a bowl and the cream in a small pan. Heat the cream, but only just until it simmers. Remove from the heat and pour over the chocolate. Leave it allng for a couple of minutes and then stir slowly until the chocolate has melted and you get a smooth, glossy mixture.
NB: if the mixture starts to split, possibly because the cream is too hot for the chocolate, immediately stir in some cold milk and it will come back together.
(2) Leave it to cool, but not set, before pouring over a cake that has ideally been crumb-coated with buttercream or cream, keeping the cake at room temperature to keep it shiny.
NB: If you want the ganache to be shinier, add about 80g liquid glucose to the cream as it comes to the boil.
Once the chocolate has melted you can also stir in alcohol such as rum, brandy or whatever you want.
(III) A very quick fruit ganache
- 300g fruit curd of choice (lemon, passion fruit or raspberry are wonderful)
- 200g white chocolate, chopped (dark chocolate is excellent if using a raspberry curd)
Heat the curd until it is runny, but do not let it boil (if it does get too hot the chocolate will split). Pour it over the chocolate and stir gently until it has melted.
(IV) The silkiest buttercream: enough to fill and cover one 9″ round cake
- 240g unsalted butter, softened
- 200g caster sugar (or vanilla caster sugar)
- 60ml water
- 5 large egg yolks
(1) Put the egg yolks in a large bowl. Put the sugar and water in a small pan and slowly bring to the boil, shaking the pan from time to time to help it dissolve. Allow it to boil for about 5 minutes or so until it becomes syrupy (about 120C if using a thermometer).
(2) Slowly pour the syrup over the egg yolk, using an electric whisk. Keep whisking for few minutes until you have a pale, thick mixture. Leave to cool and add the butter, a little at a time, whisking well until all the butter has been incorporated.
NB: for a standard buttercream that is very light and melt-in-the-mouth, whisk very soft unsalted butter in a bowl until very light. Add an equal amount of icing sugar, a few tablespoons at a time, whisking well for a few minutes until you get a very light buttercream. You could add a little milk, a bit at a time, for a looser buttercream if preferred.
I sometimes make a flavoured version of this buttercream. For example, mocha flavoured, as used with my Opera Gateau

(V) Simple chocolate mirror glaze: enough to coat one 10″ round cake (top and sides)

- 150ml double cream
- 150ml water
- 135g caster sugar
- 55g cocoa powder
- 3 gelatine leaves, soaked in cold water for 5 minutes
(1) Put the cream, water, sugar and cocoa powder into a saucepan and heat gently until the sugar has dissolved, stirring all the time. Bring to the boil, stirring all the time and let it simmer gently for a few minutes. Remove from the heat and strain into a bowl. Let the mixture cool for about 5 minutes, stirring periodically.
(2) Squeeze the excess water from the gelatine and stir it into the mixture until the gelatine has completely dissolved. Let the mixture cool at room temperature until it is just starting to thicken; if you do not allow it to start to thicken, it will be far too liquid and you will not get enough of it to stick to the cake. Pour over a cake that has had a smooth crumb-coat of buttercream and let it drip down the sides. To help with full coverage of the sides, spoon the glaze at the top edge and let it cascade down: it will smooth out uniformly.
For further tips on mirror glazes, including coloured and patterned mirror glazes, please see my post here.

(VI) Drizzle cake topping
This is great poured over just-baked cupcakes, left to cool fully and then iced in the normal way.
- about 80ml freshly squeezed juice eg) lime, lemon, orange, grapefruit, passionfruit……
- 100g granulated sugar
You simply mix the juice and the sugar together and pour generously over a warm cake. There is no need to let the sugar dissolve: as the cake cools, the sugar will chrystallise nicely giving a sharp, fragrant crunch.

My top 5 tips
I have limited myself to 5 of the tips that I feel are the most useful. Please do contact me if you would like any further tips or questions answered – I will be delighted to try and help.
(1) Don’t beat a cake mixture too much: mix only until the ingredients come together smoothly: too much beating develops the gluten in the flour, resulting in a tougher, denser cake rather than a light, melt-in-the mouth cake. With everything at room temperature and the butter very soft, it shouldn’t need much mixing anyhow.
(2) Base-line buttered cake tins with greasproof: even if the tin is non-stick, butter the base and up the sides. Lining the base with greaseproof also ensures the bottom of the cake does not crisp up.
(3) Don’t open the oven door too early: leave the oven door shut until at least 20 minutes of baking has elapsed (30 minutes for a larger cake), and only then to rotate the tins if your oven has particular hotspots. If you do open the door too soon, the sudden change in temperature with a barely set cake can cause it to collapse immediately. After about 20 minutes, a Victoria Sandwich cake, depending on its size, will have risen and set enough for the change in temperature not to affect its structure.
(4) Whisk the buttercream a lot: the longer you beat or whisk buttercream, the smoother and lighter it becomes as the icing sugar dissolves. I often whisk it for up to 15 minutes in a free-standing mixer, resulting in a wonderfully smooth, almost moussey buttercream.
(5) To rescue a curdled flavoured buttercream beating in cooled melted white chocolate: if you add fruit purées, curds and liquid flavours to a buttercream too quickly (and a well flavoured buttercream is a joy) it can curdle, so about about 50g melted (and cooled) white chocolate per 100g butter used in the buttercream will bring it back together. The chocolate also allows you to add more flavour without it splitting, so you can get the intensity of flavour you want.

Some of my favourite cake recipes
The links to a selection of my favourite cake recipes are here:
- classic Victoria Sandwich cake
- pina colada fondant fancies
- spiced lime poppy seed bundt cake
- sticky gingerbread cake
- chocolate and orange bundt cake
- lemon and thyme drizzle layer cake
- Earl Grey tea cupcakes
- galangal and lime cake
- salted mocha and walnut battenberg cake
- lemon drizzle cake
- chocolate and orange spiral cake
- rich fruit cake
- Black Forest gateau
- mocha and salted caramel Angel cake

Philip, this is an amazing post, filled with so much invaluable information. I have already bookmarked this. Thanks so much for taking the time to write it. The details regarding tin sizes and the cupcake recipe is so useful.
Thanks for writing!
LikeLike
Thank you for your kind words. A pleasure. Regards
LikeLike
This post is so informative and clear, with such stunning photos. Definitely cookbook level.
LikeLike
Thanks, Ronit. That’s very nice of you to say so.
LikeLike
Thank you. I hope it proves to be of use
LikeLike
This is an encyclopaedia on cakes and baking. thanks. i will bookmark this.
LikeLike
Thank you. I hope it is useful; and I keep finding bits to add!
LikeLiked by 1 person
Is it possible to freeze a butter free genoise sponge my ingredients where
4eggs,125g caster sugar,125 g flour,
The cake has baked well but I don’t actually need it till Sunday and its Wednesday today
LikeLike
Hello Nicky. Yes definitely; it will freeze wonderfully wrapped in clingfilm or a plastic bag. Regards
LikeLike
Wow, so many great ideas!! Thank you for sharing! #Brillblogposts
LikeLike
Hi Phil
Are fruit powders really worth it? They seem really expensive on line for small quantities. Trying to boost the flavour of my strawberry ice cream and wondered if these would be the best method?
LikeLike
Most definitely to fruit powders: a little goes a long way and the intensity you get from the powder is immense. And a teaspoon or so in a buttercream will give great flavour without risk of curdling the buttercream that you can get if you add a lot of pureed fruit.
But there are some fruit powders that contain fruit and sugar etc (avoid at all costs): the fruit powders that is just 100% fruit is great.
I often add 2 teaspoons to about 500ml ice cream or sorbet mix and it really does boost the flavour.
LikeLike