

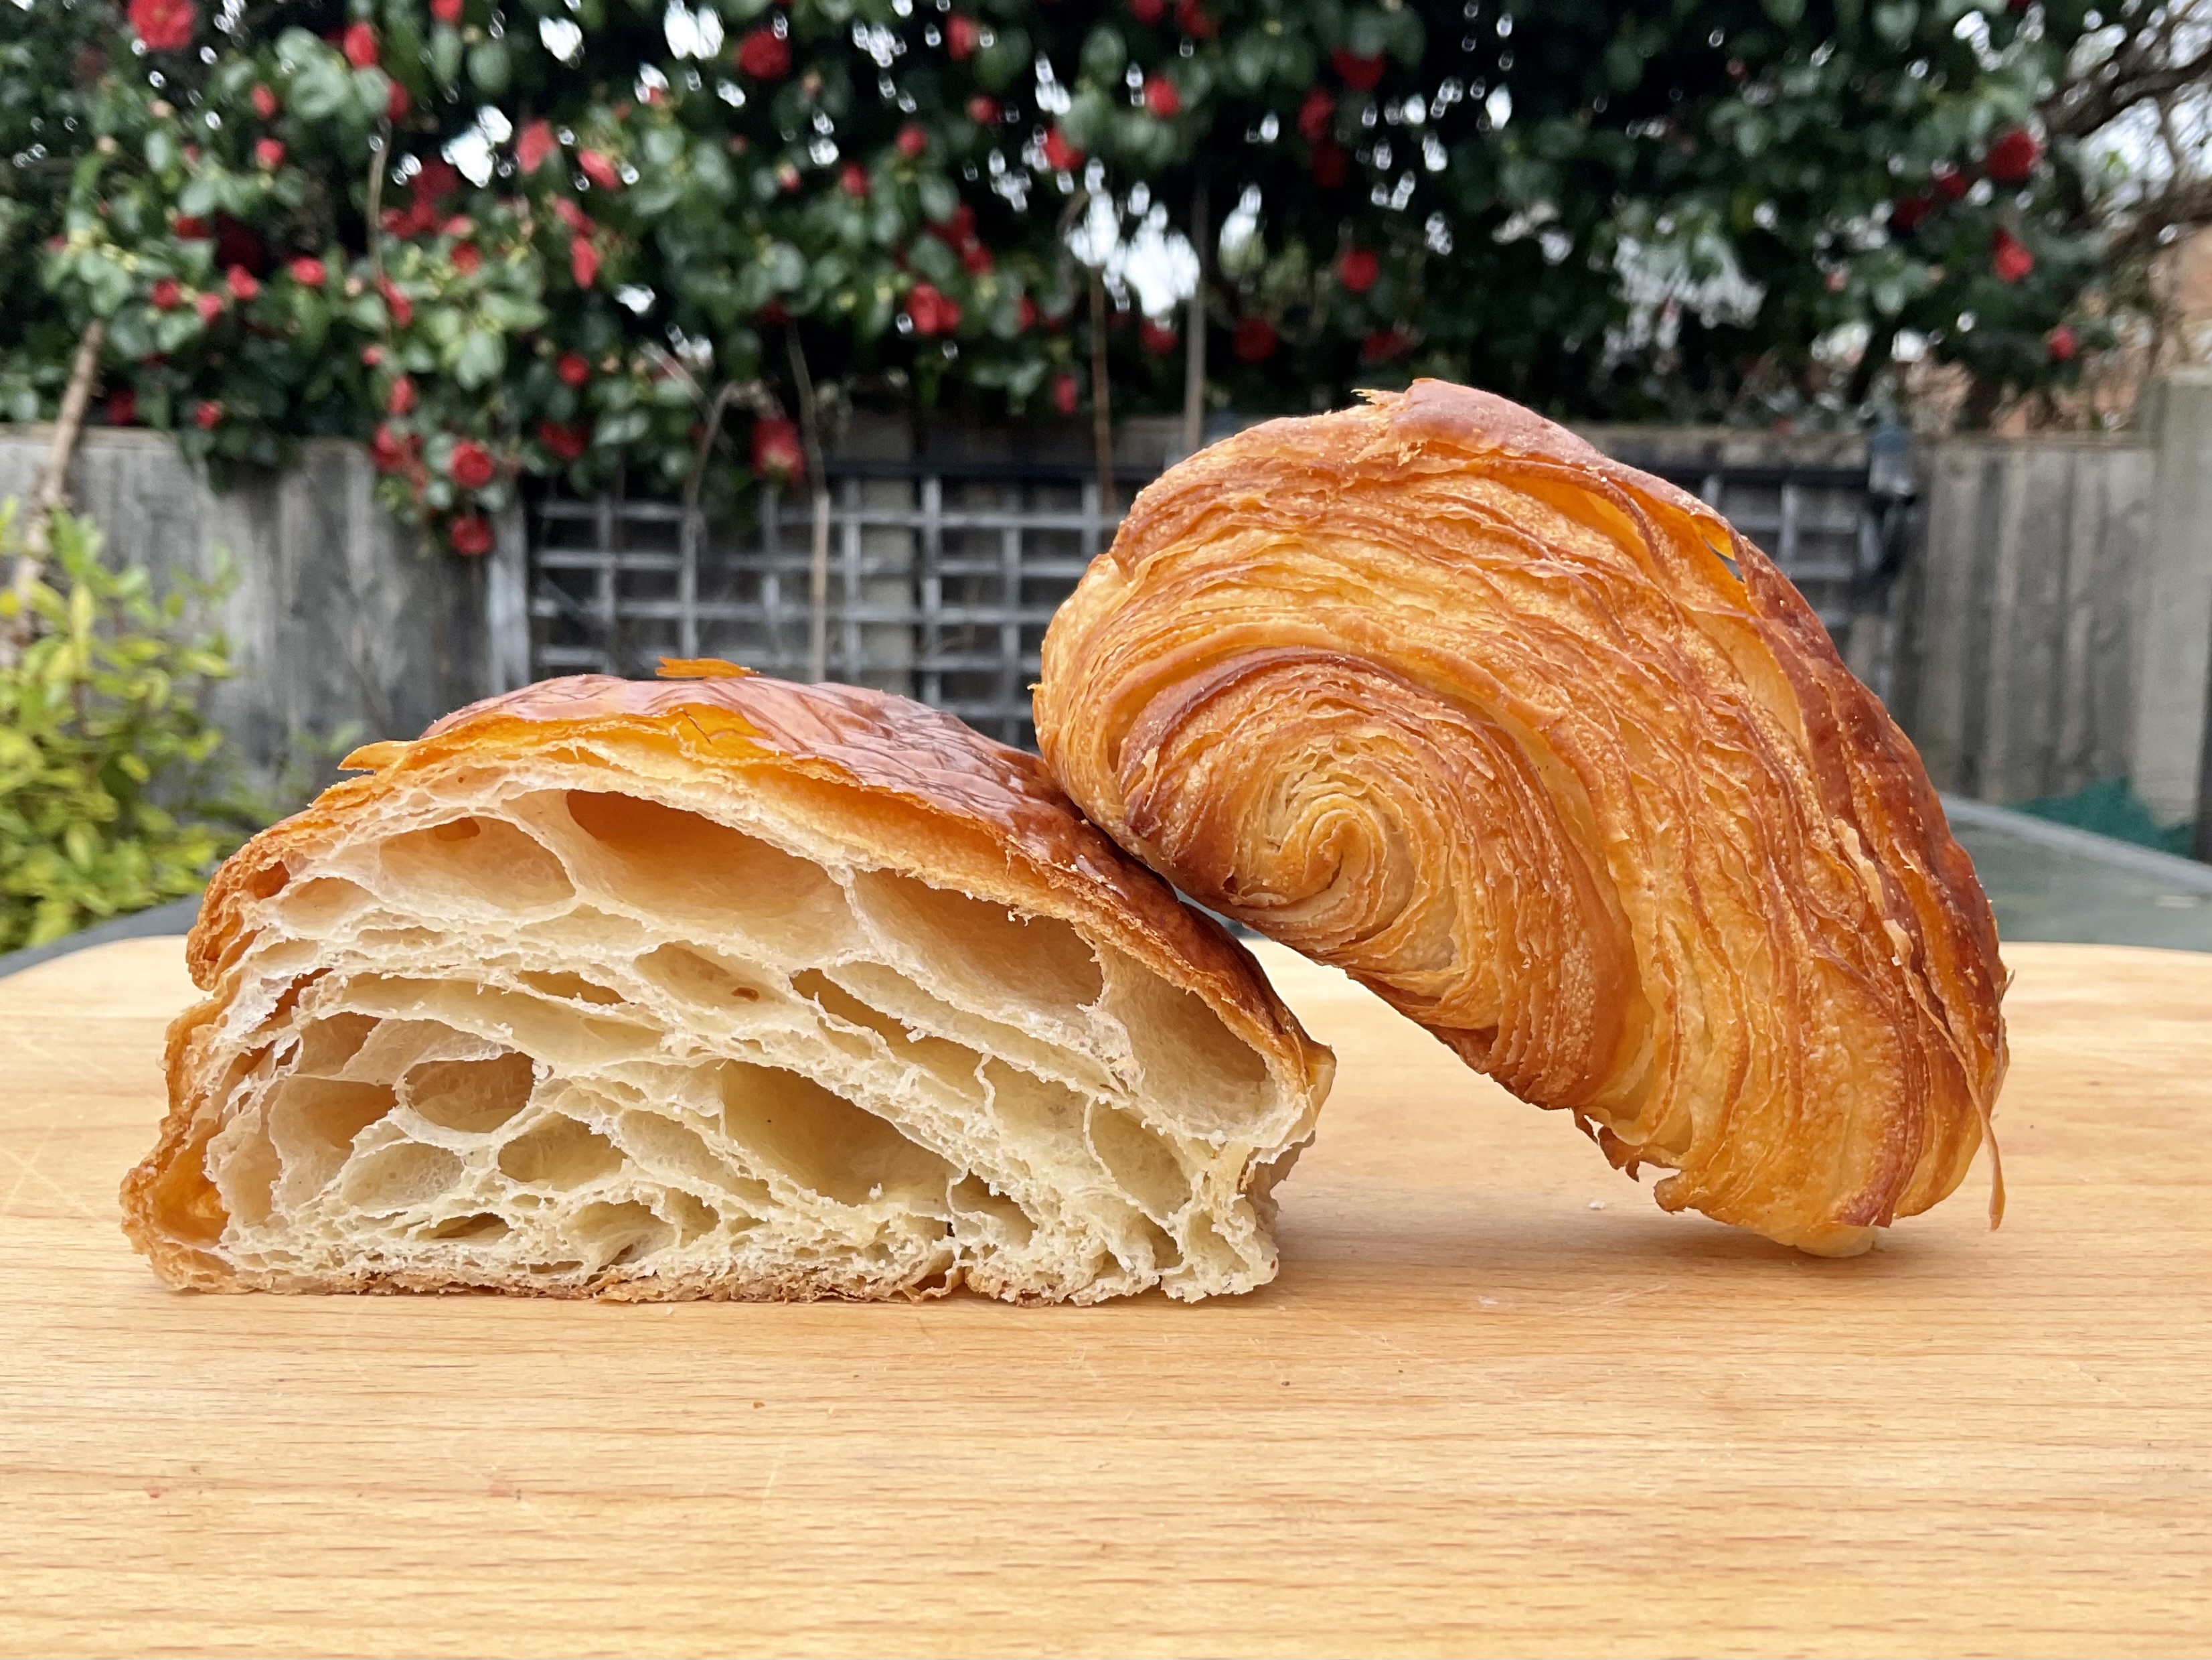
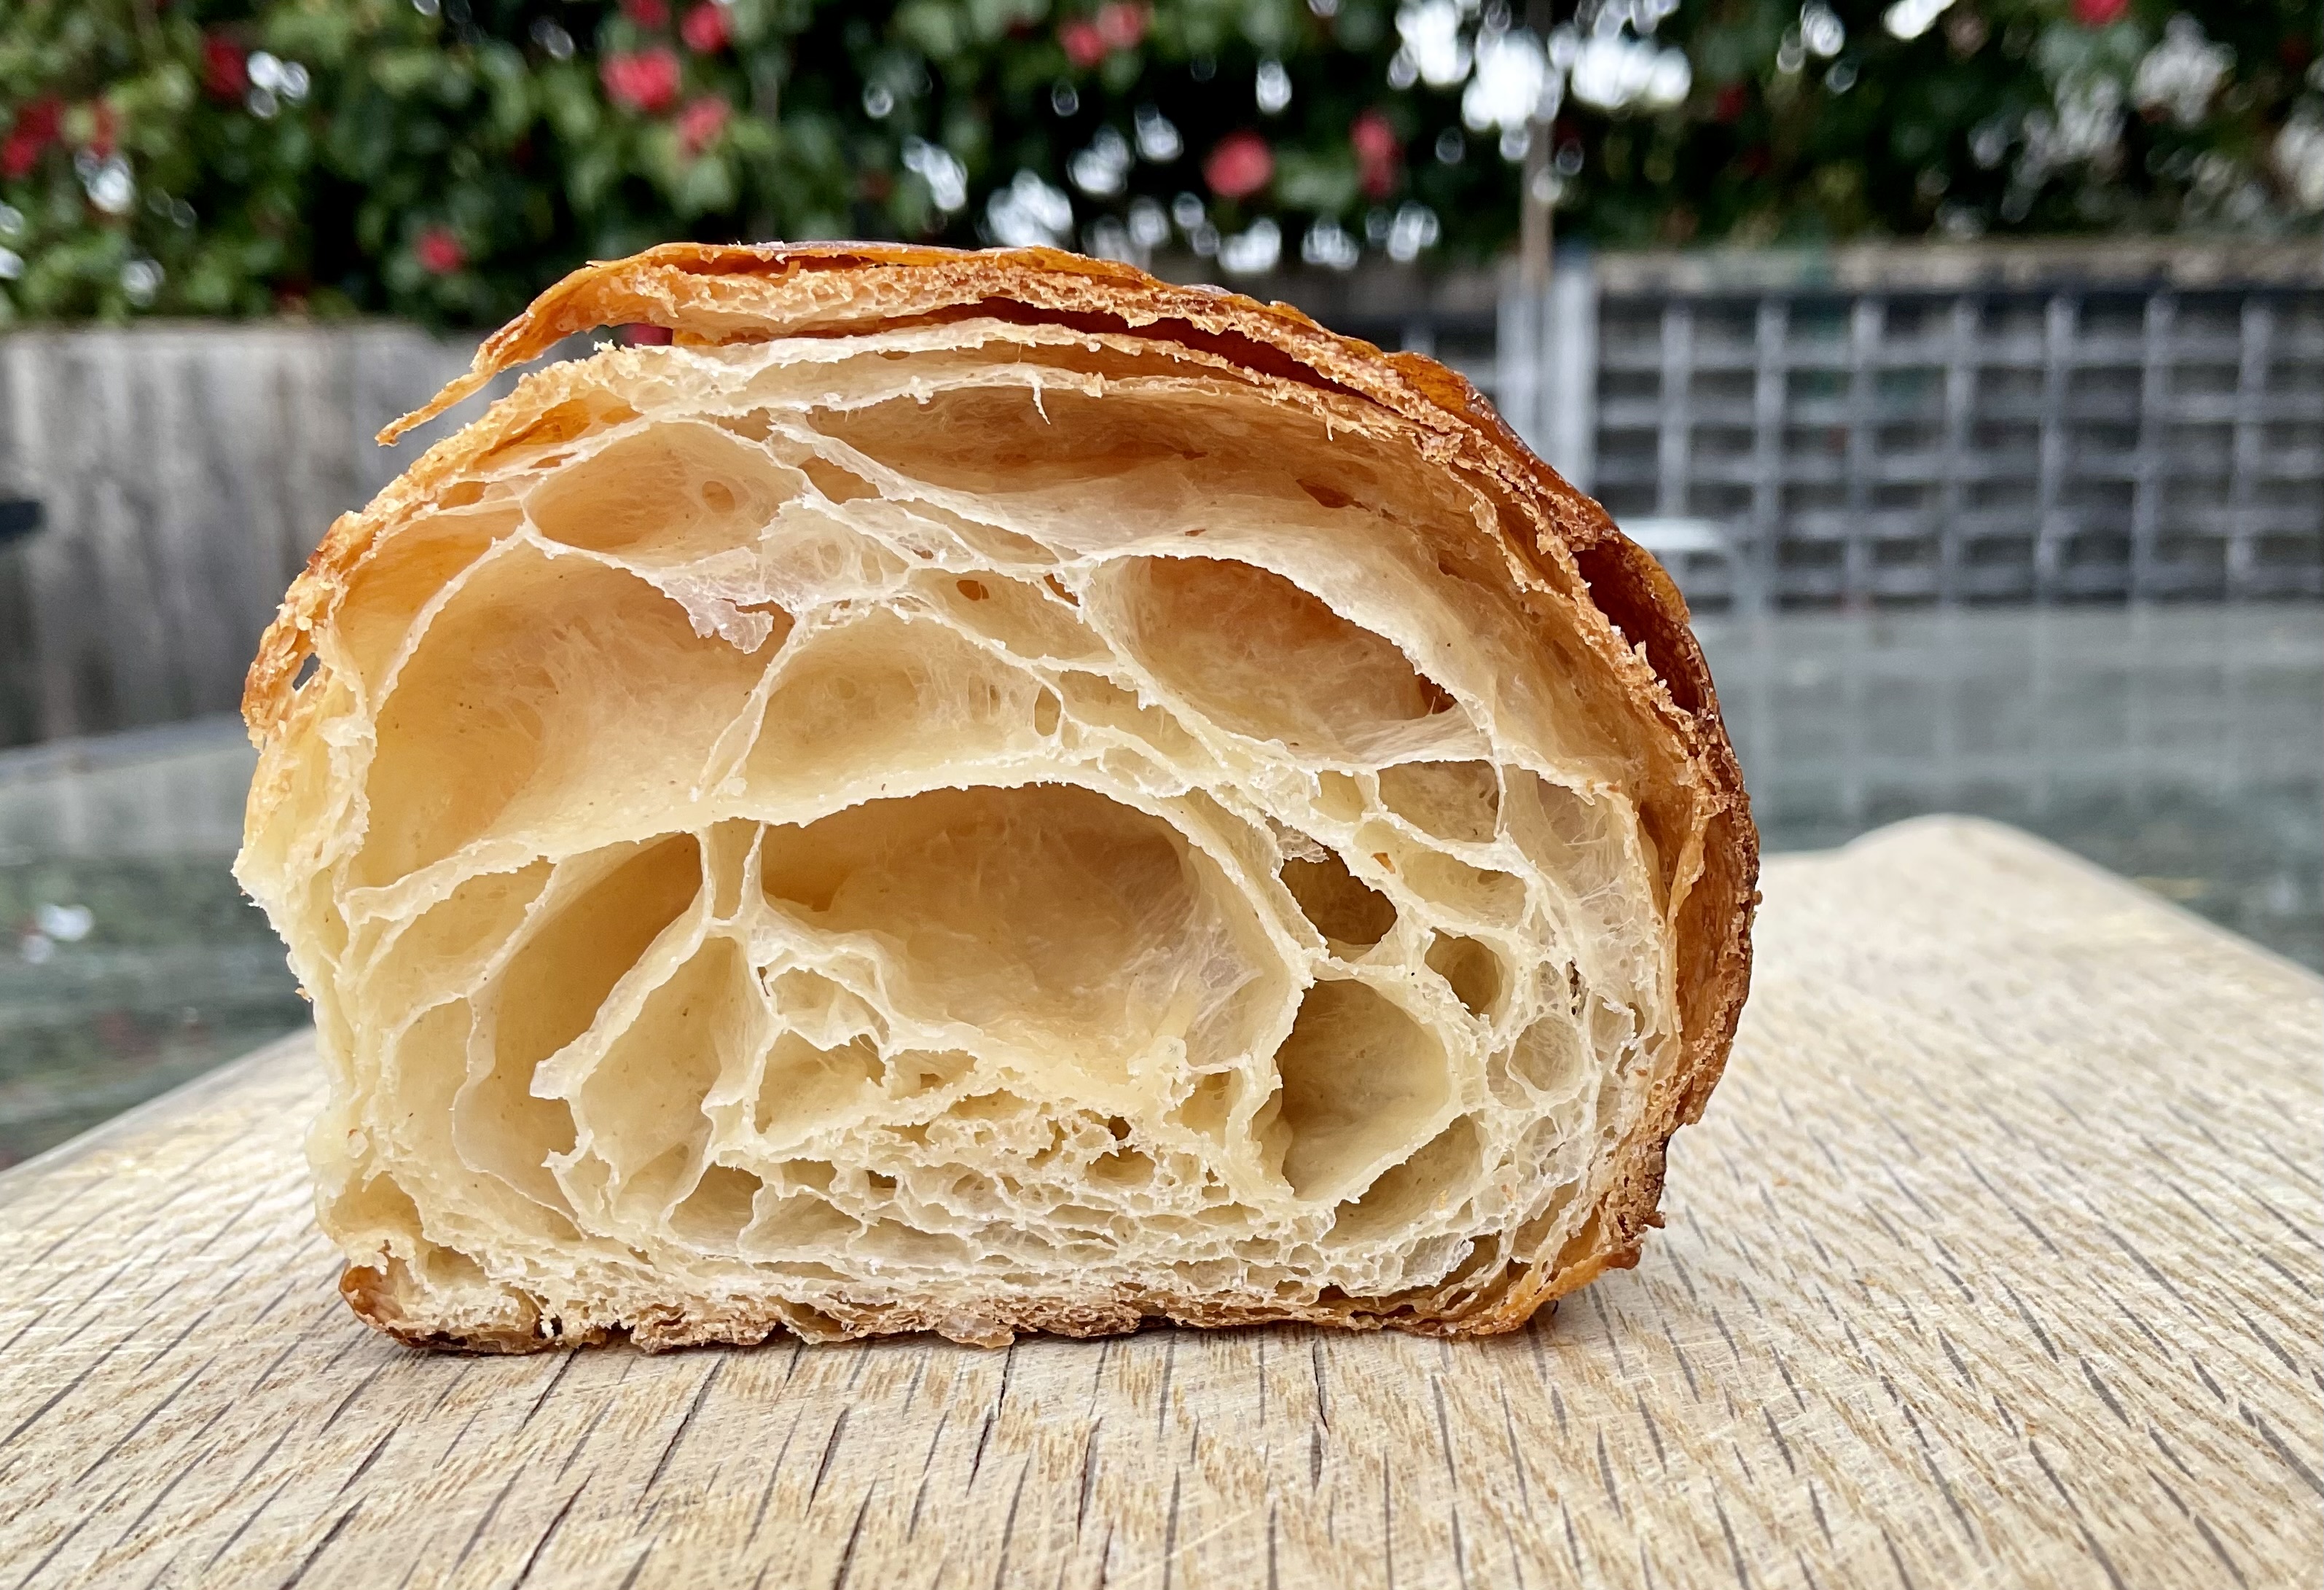
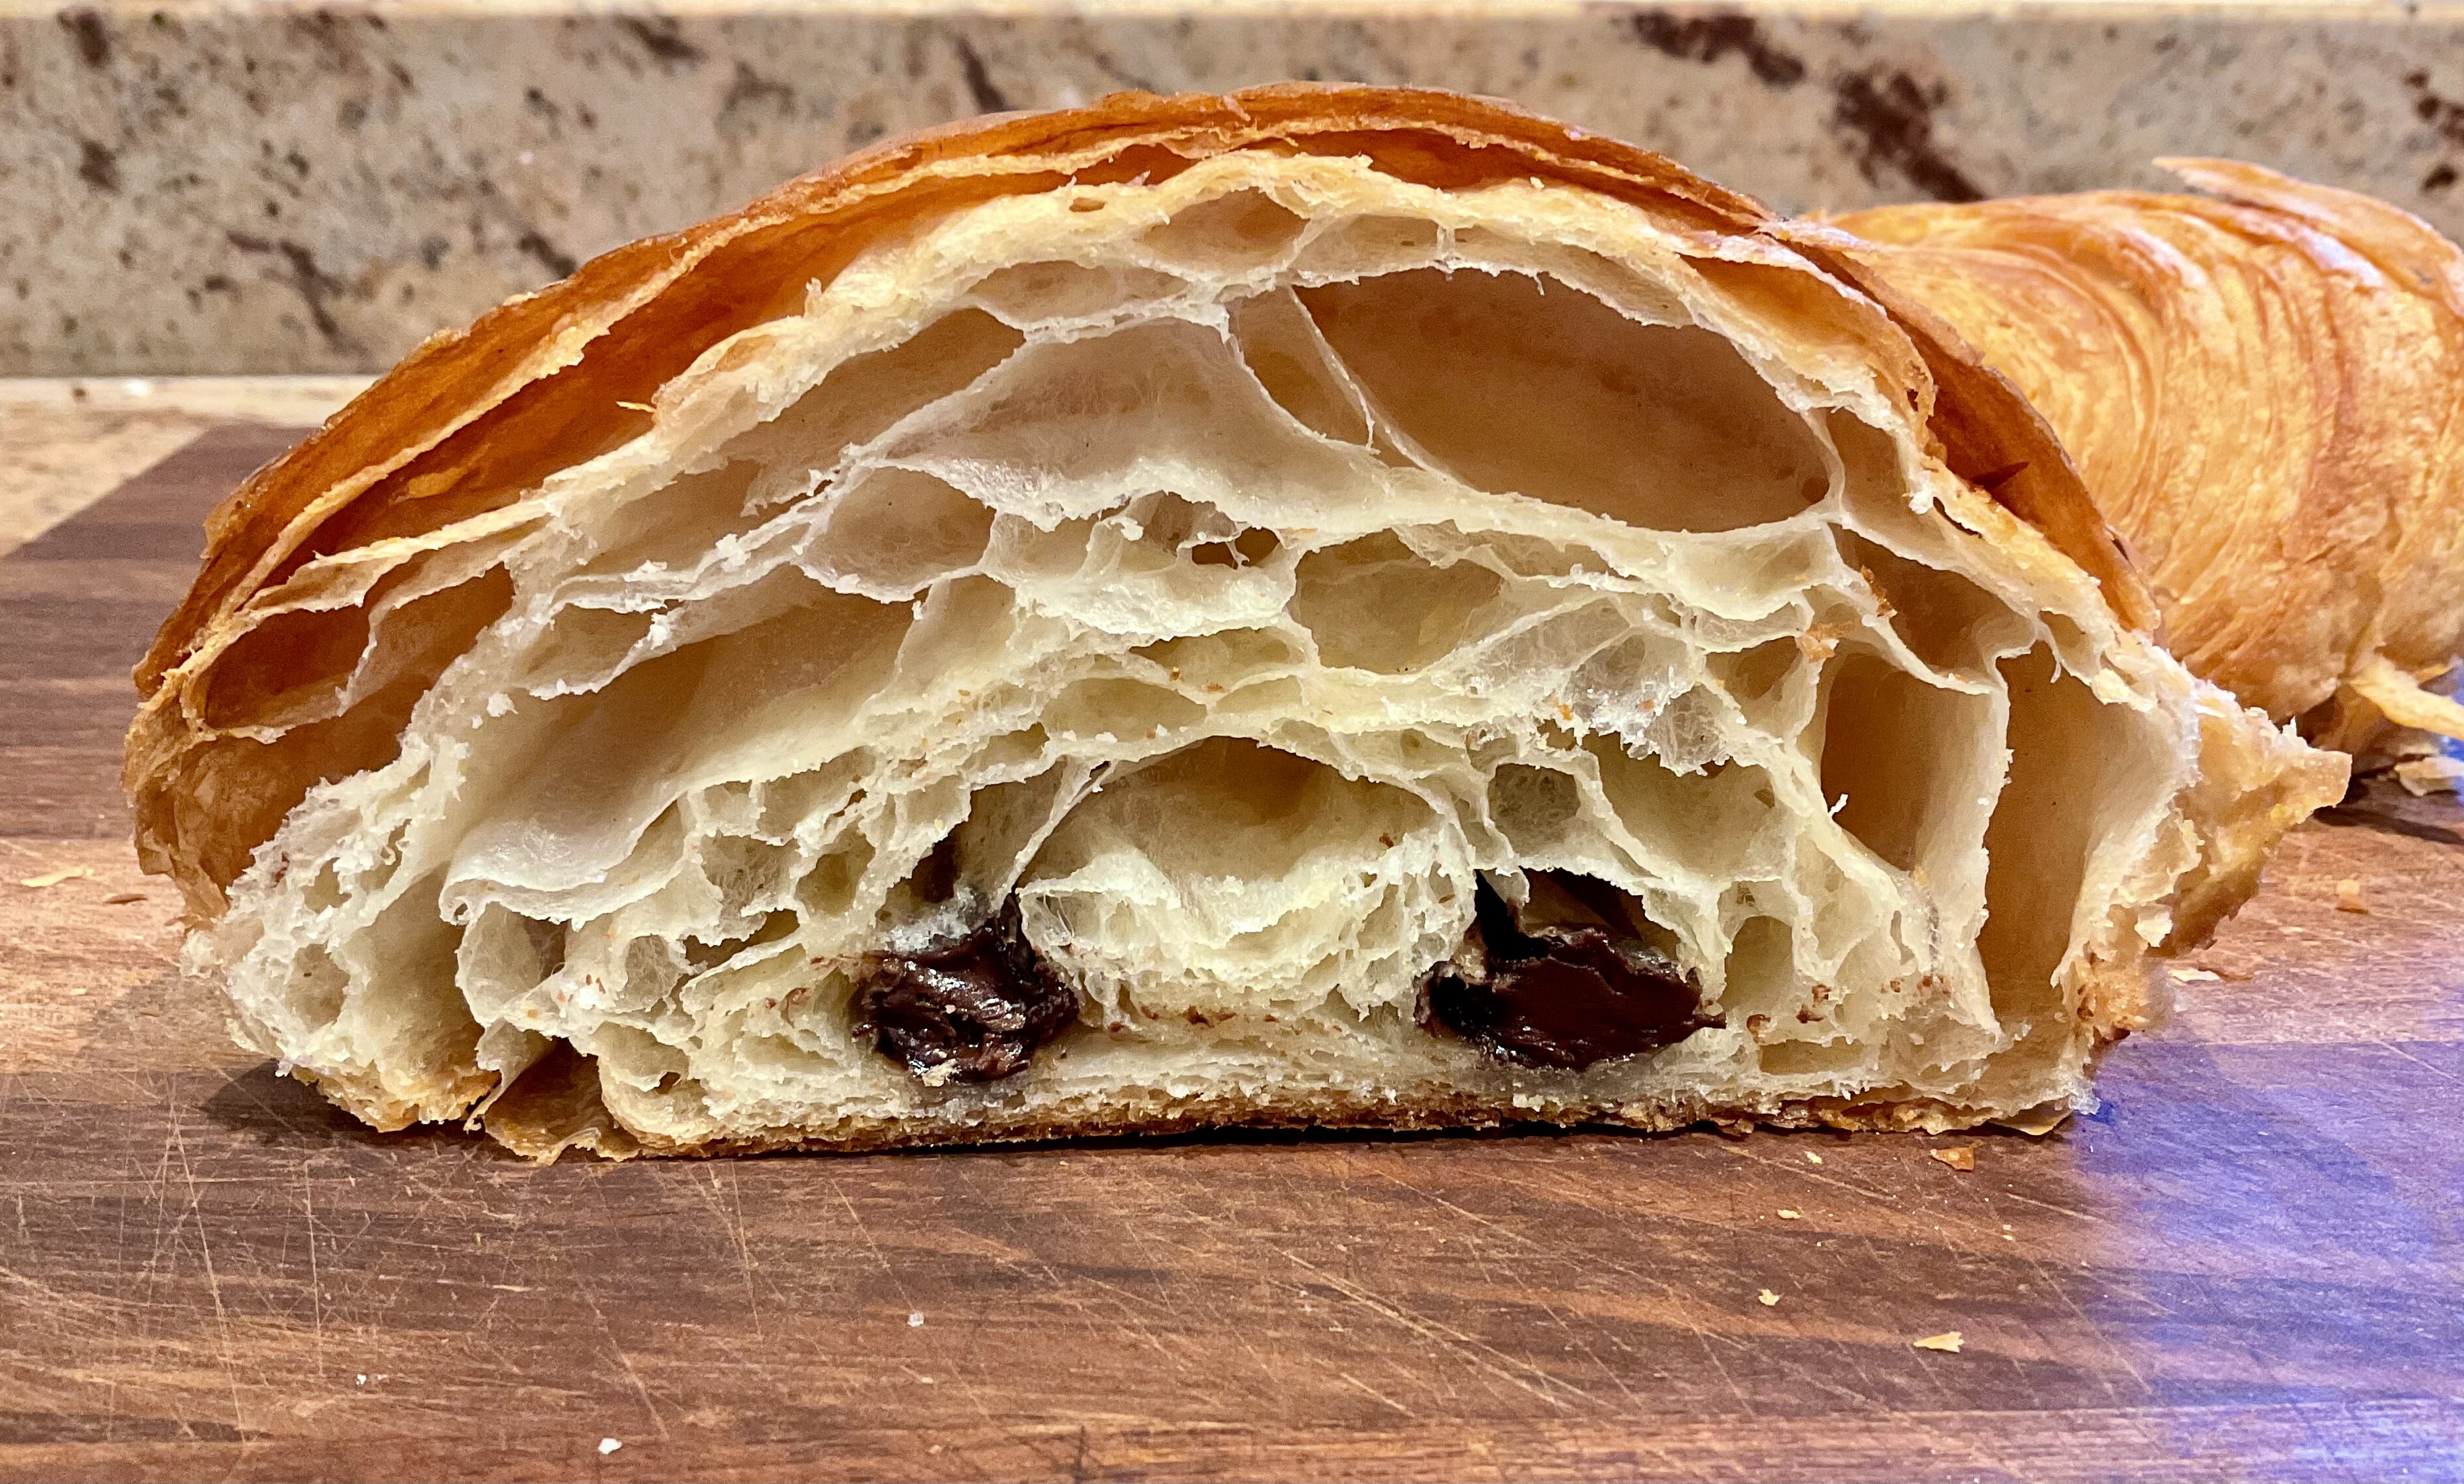
For me a croissant is one of the greatest pastries to eat. I love those wafer-thin flakes that shatter when you bite into it, revealing an open, honeycombed interior. And then there’s the utter joy of that delicious buttery flavour…..
Sections in this post
- Introduction
- About the recipe
- Notes on the ingredients
- The importance of texture and temperature for the dough & butter
- Lamination: the different turns for creating the layers
- Don’t waste the trimmings!
- RECIPE FOR CROISSANT DOUGH
- How to shape the dough for pains au chocolat
- Top tips
- Rough timescales for making croissants
- Variations
- Quicker croissants

Croissants

Introduction
I will start with a warning. Not about the addictive nature of croissants and related pastries, but about the length of this post. However, as croissants are challenging to make and have so many pitfalls, I think it is only fair to cover all key stages of making croissant dough in detail.
I have been fascinated by making croissants and pains au chocolat since I was a boy and making a batch is right up there as one of my top home-baking joys.

I would rate croissants up there with macarons in terms of difficulty, but they are so rewarding to make.
Realistically, it takes a few goes at the recipe to be more comfortable with the process, but I really recommend reading the whole of this post before starting a batch to get a feel for the method.

The photos in this tutorial are of different batches I have made. I do not claim that these are perfect – and I am learning all the time – but I am very happy with these in terms of flavour, flakiness and lightness.
They are not the quickest things to make BUT the time is mostly waiting for the dough to chill or proving, and the results are well worth it!
When I make croissants, I normally do these over a weekend. I typically start them off on Saturday morning and bake them on Sunday afternoon. I have given a loose timescale for towards the bottom of the post.
I love croissants or pains au chocolat served warm for breakfast so I often freeze some of the baked croissants so they are ready to go – in which case, place them onto a baking tray and leave them to defrost overnight, before popping into a warm oven (around 180°C) for 5 mins or so. They will crisp up beautifully.
There is no urgency with the timings and you can get on with other things while the dough rests in the fridge during the various stages.

About the recipe
I have tried scores of croissant recipes over the decades in my quest to make what for me as a home baker gives a consistently good croissant or pain au chocolat. The recipe below takes ideas and points I’ve learned from the many approaches I have worked through and gives me the results I am very happy with.

As I mentioned above, croissant dough is challenging and I really encourage a full read of this post, including the many stages of the recipe, before starting your croissant journey. Try to resist the temptation to tinker too much with the recipe or the method until you have a real feel for the entire process and you are getting croissants that you are happy with.

Notes on the ingredients

The flour
A strong plain flour (as we call it in the UK) or standard bread flour is best as you need the higher level of gluten (protein) in there to give a robust structure to the croissants: 12% protein content is ideal – any higher than that and the dough can be hard to roll out towards the end.
When I started making croissants years ago I used a standard plain flour. Being lower in protein (a little under 10%) it gave a dough that was certainly easier to roll out. BUT this flour gives a weaker structure, so the croissants are prone to collapsing as they bake, resulting in a less open and denser interior.
The butter
A good quality butter with a high fat content (82% or so) is best. Most of the butter gets enclosed in the main dough before being rolled out and folded. This process (the lamination) results in very thin layers of butter and dough which in turn gives you flakiness when baked. I get best results using butter such as President (my favourite!) and Lurpak.

The liquid
You can use all water if you wish but I go for a mixture of water and skimmed milk. Milk adds flavour and colour, as well as giving a dough that is slightly easier to roll out.
Don’t be tempted to add a much higher proportion of milk as it can weaken the dough and result in heavier croissants, but I have never found an issue with this amount of milk. Alternatively, you can replace the milk with 10g milk powder, but increase the water to 170ml.
The yeast
I rarely use fresh yeast, opting instead for instant dried yeast: the type that is simply added to the flour without activating in water first. It works well and I’ve not found any noticeable difference in flavour of the baked croissants using this compared to fresh yeast.

The sugar
I typically use caster sugar but it doesn’t have to be caster. I sometimes like to use a brown sugar (such as muscovado) which gives a different depth of flavour, but occasionally I use a mixture of sugars.
The salt
I use fine sea salt so that it dissolves easily into the dough. As well as adding flavour, the salt is essential for helping to strengthen the gluten – needed for maintaining the structure of the dough. Don’t be tempted to add too much more salt (or indeed sugar) as too much can hinder getting the open structure of the baked croissants.
The importance of texture and temperature for the dough & butter
The texture of both the dough and the butter is crucial: the closer to each other they are in terms of texture, the better the lamination will be: this results in more well-defined layers and a more open interior.
The dough and butter must be at different temperatures, with the dough much colder than the butter. A cold dough also ensure the yeast will not activate while laminating. If you have an infrared temperature gun, aim for the dough to be 2-3°C and the butter between 9-12°C.
The butter shouldn’t be too soft: otherwise it simply starts to melt and you feel it squishing when you roll out the dough. The result is a doughy, dense bread that is more brioche than a light, flaky croissant.
The butter shouldn’t be too hard and cold: otherwise it shatters into tiny hard fragments as you roll, ruining some of the layers.
The ideal butter texture is pliable rather than solid: remove it from the fridge for about 5-10 minutes and check after 5 minutes if it’s at the right texture by bending over a corner of the butter: if it bends easily without breaking or snapping it is pliable enough and ready to use. If it breaks up or snaps, leave it at room temperature a bit longer to soften just enough to be pliable.
In order to get the dough and butter at a very similar texture: have the dough VERY cold initially (a 30-minute or so blast in the freezer is ideal) – and remove the flattened butter from the fridge just before taking the dough out of the freezer until it just becomes pliable.
Thereafter, resting the dough on the work surface for a few minutes or so after chilling or freezing before rolling out will help the butter soften enough to match the texture of the dough.
Lamination: the different turns for creating the layers
The turns or folds are where the real magic happens: rolling out and folding the dough a few times to create those beautiful layers.
The chilled dough gets trimmed, rolled out and is then ready to have a couple of turns: a book turn followed by an envelope turn.
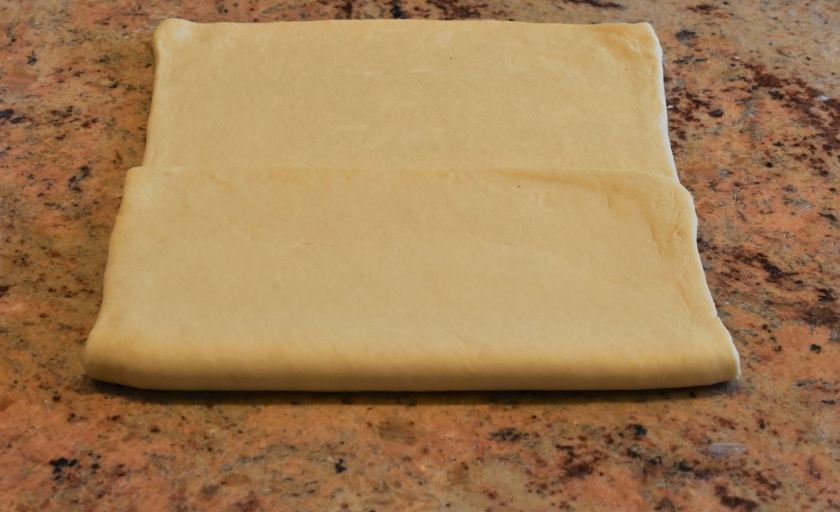
Book turn: folded in 4
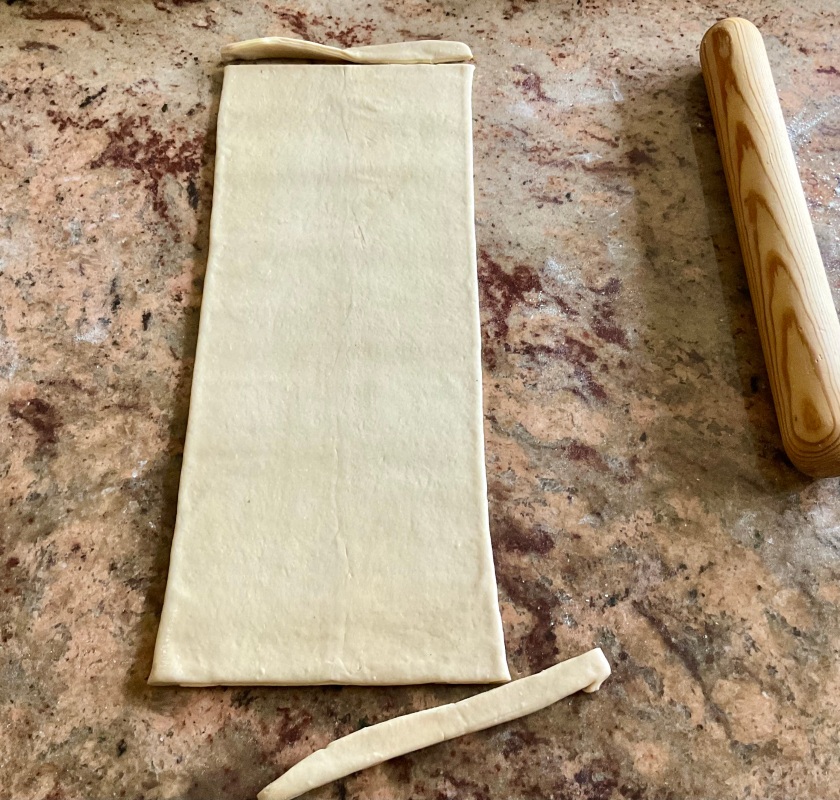
- Roll out the dough to a long, thin rectangle (about 5mm thickness).
- Trim the two shorts edges to expose the butter inside
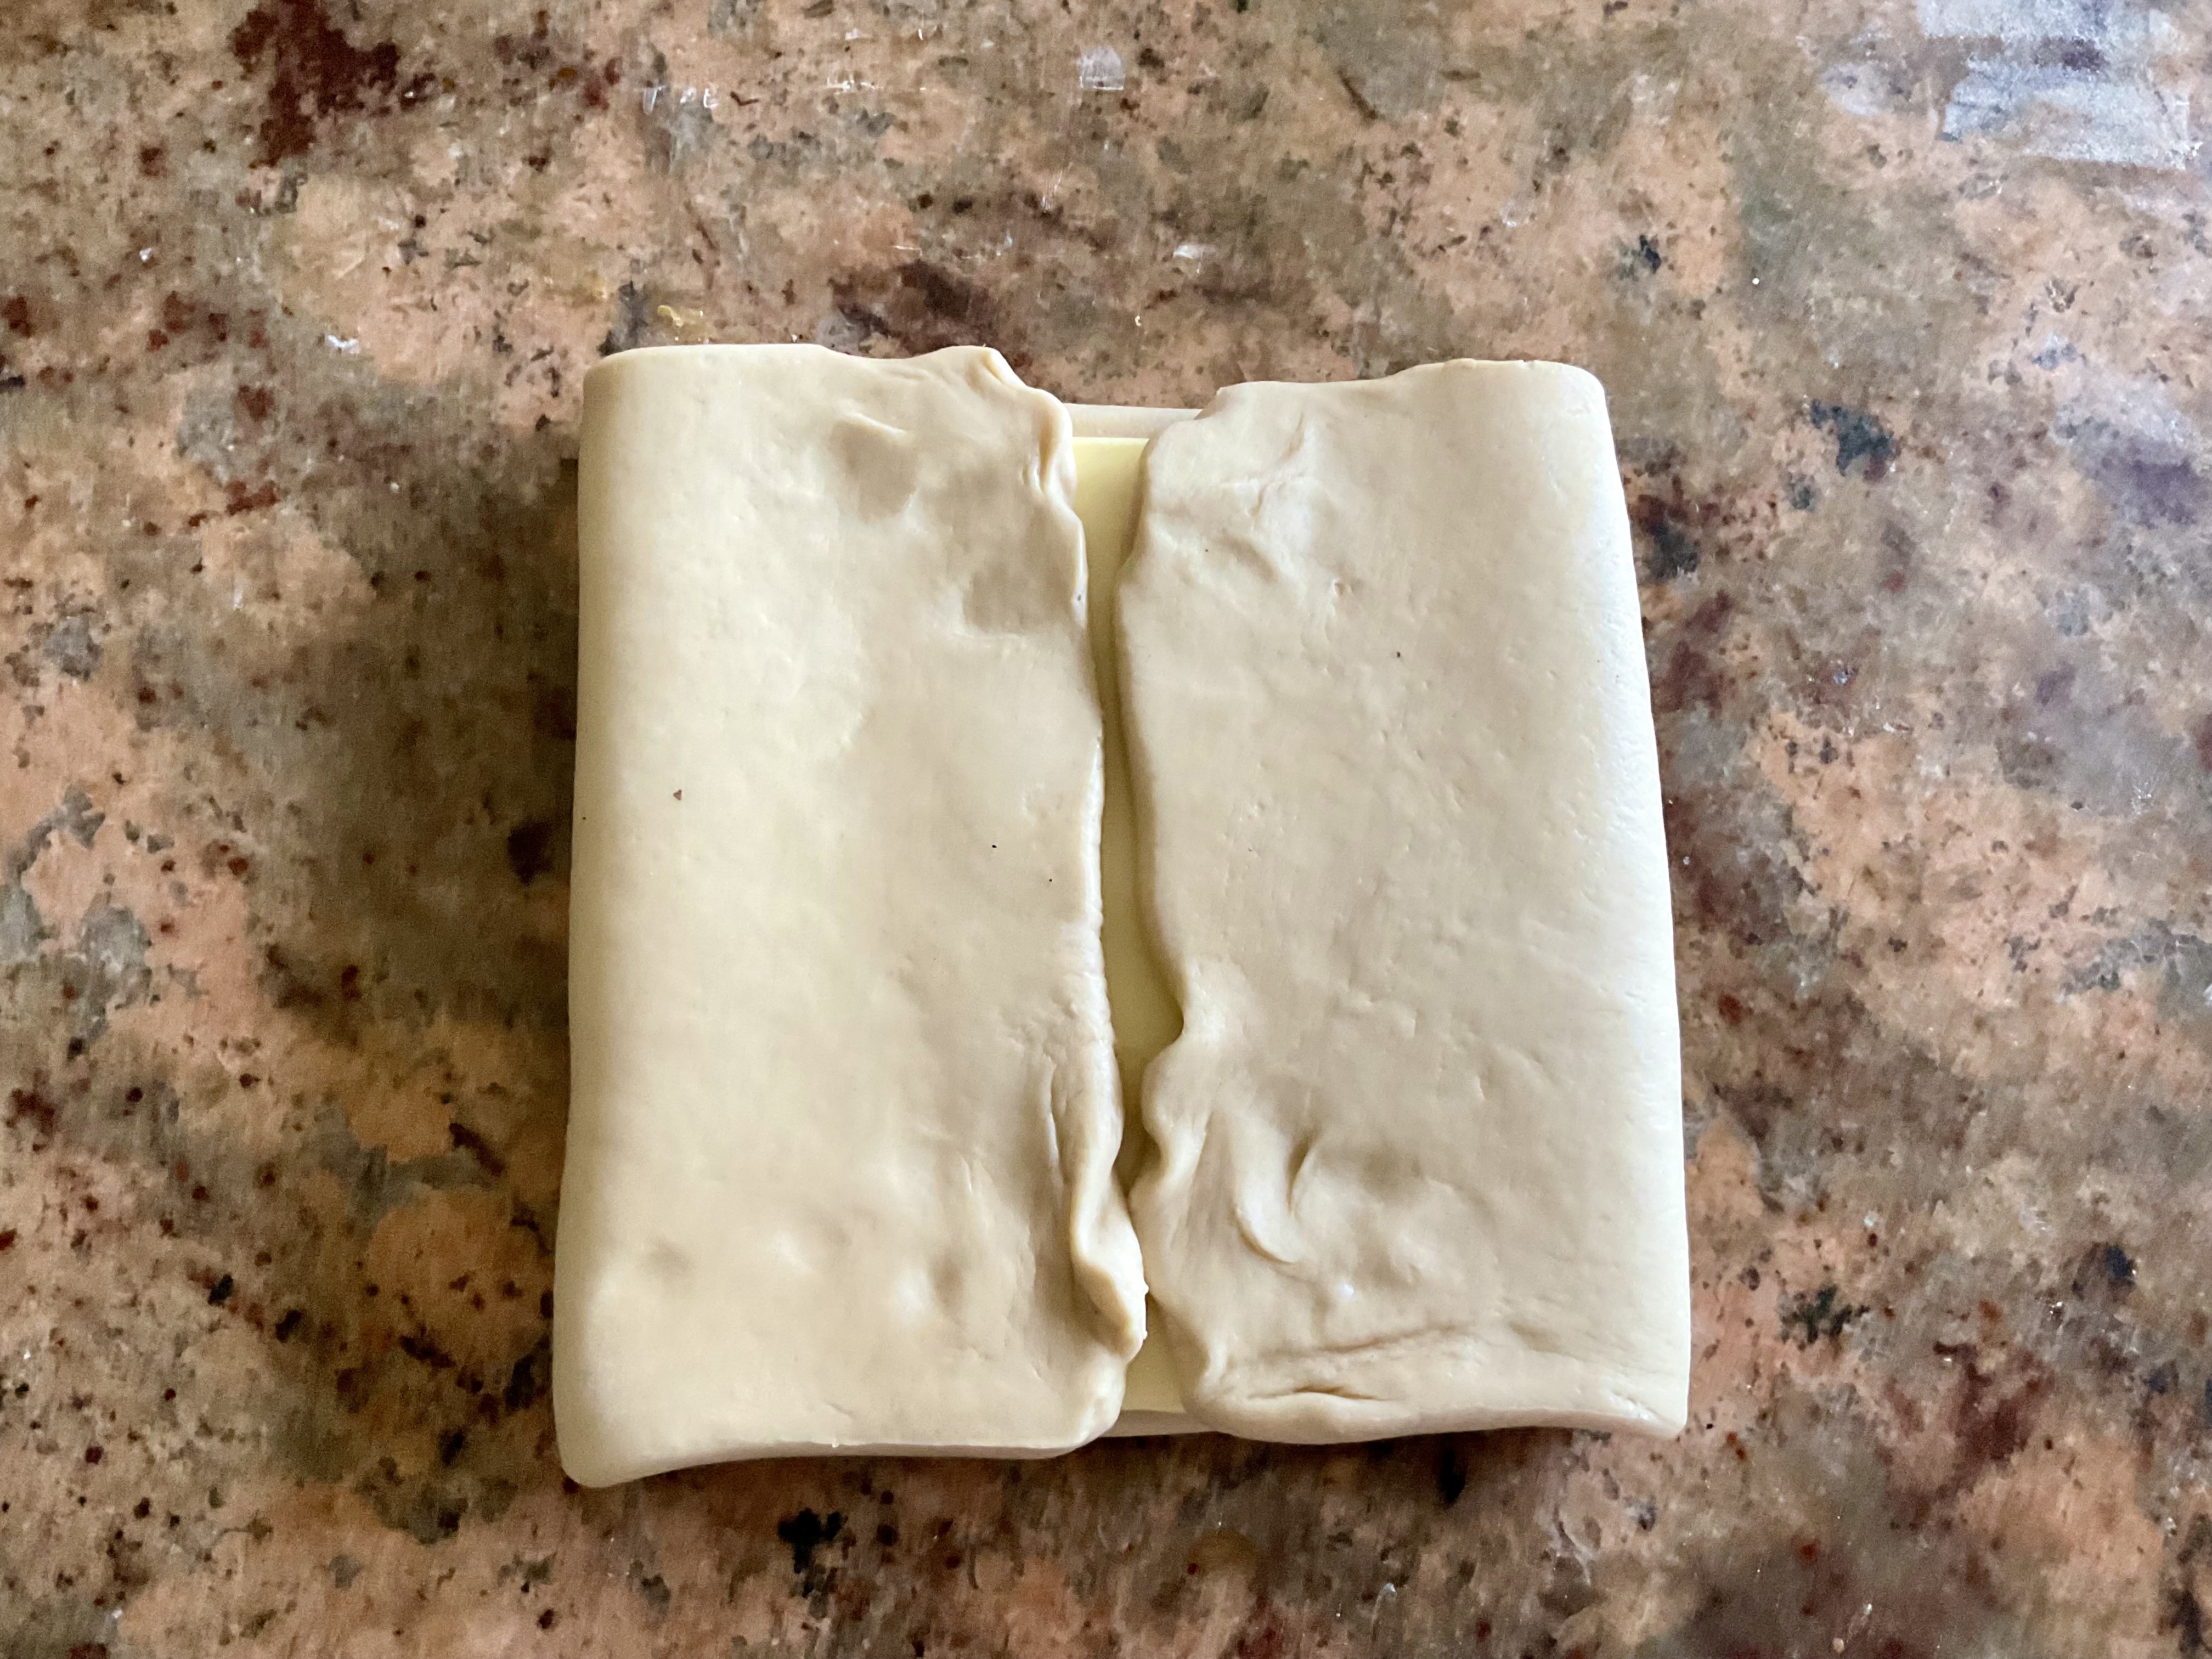
- Fold the bottom edge of the dough over part way, keeping the edges as straight as possible
- Fold the top edge of the dough over to meet the other edge
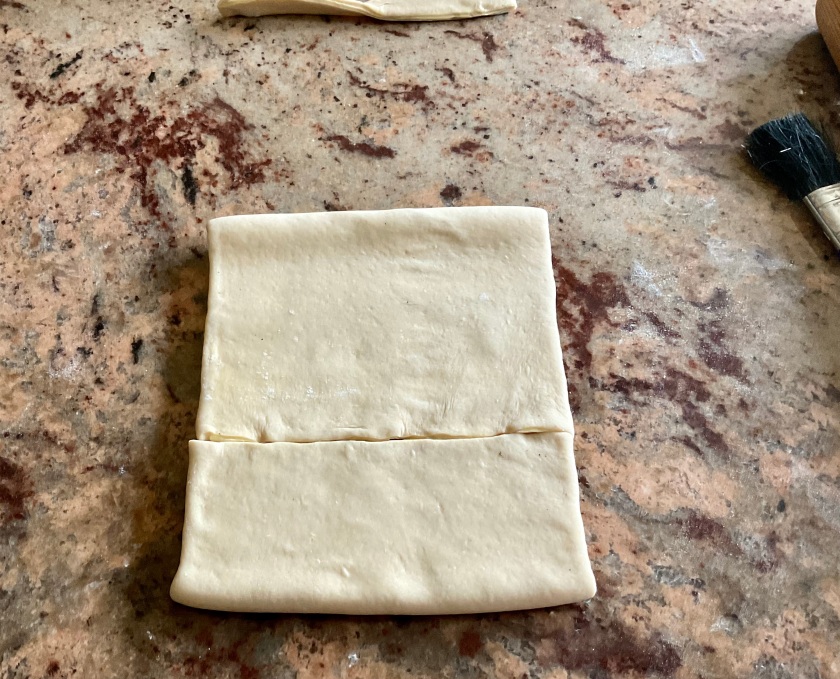
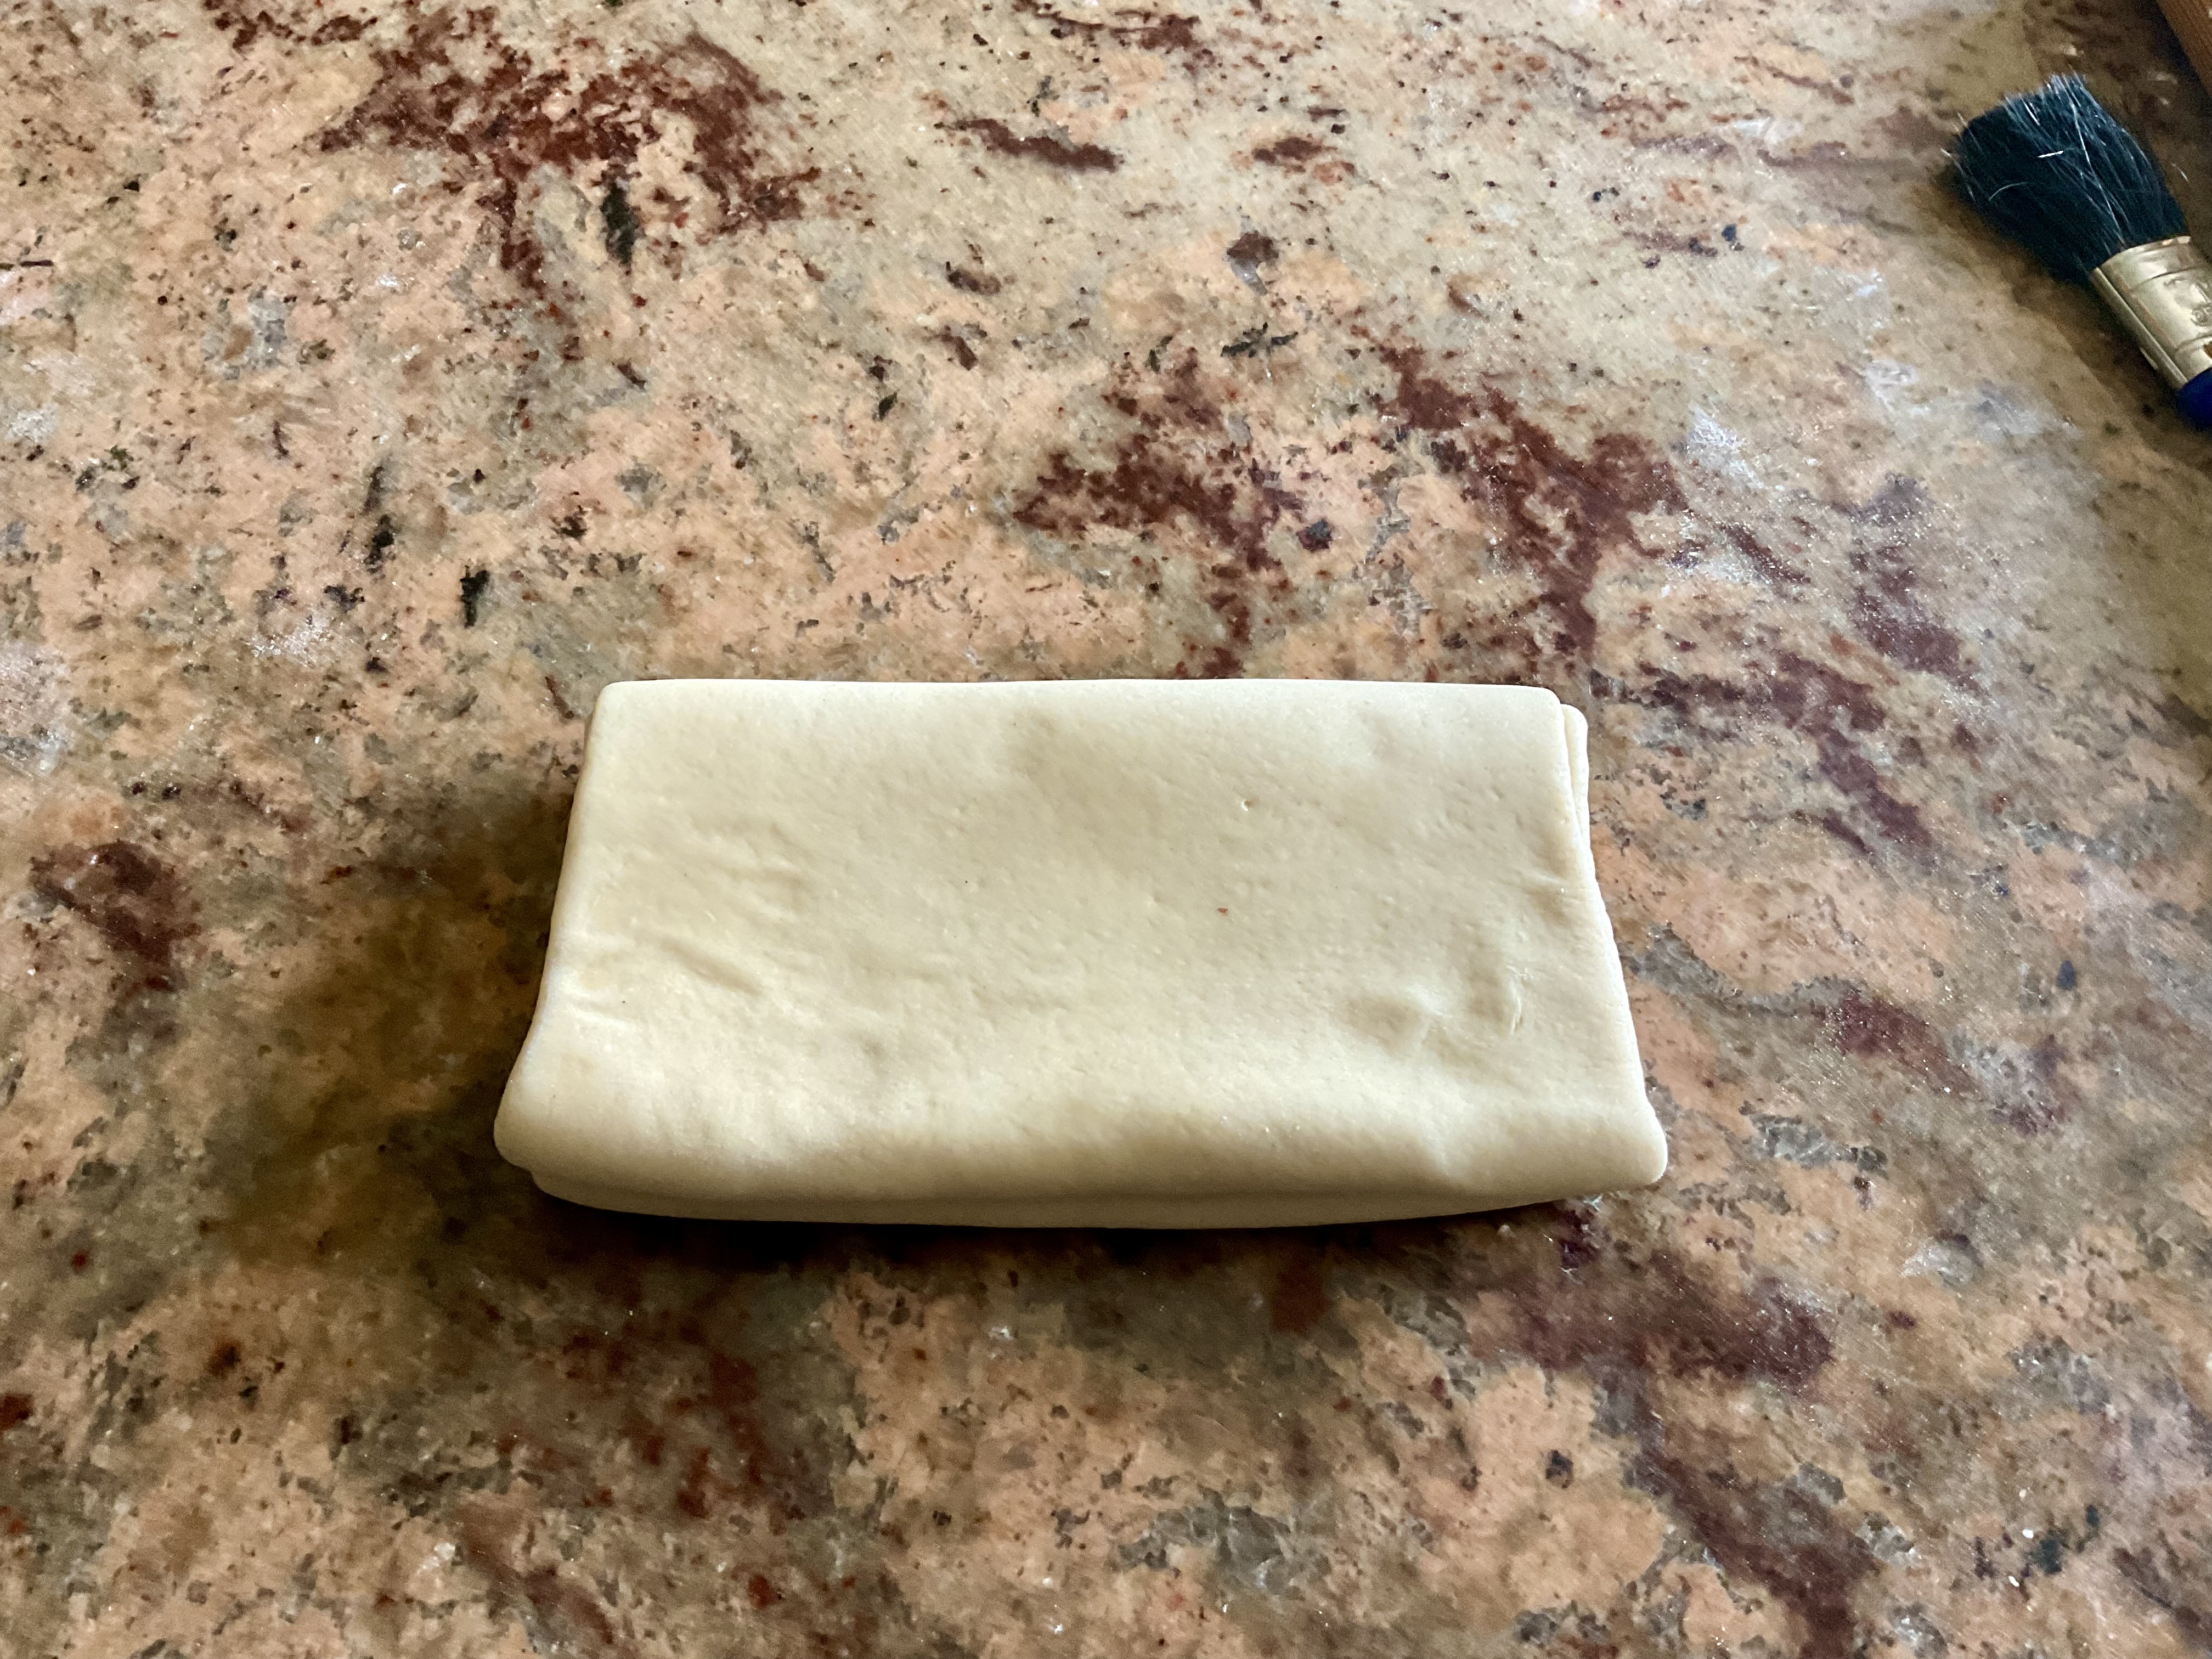
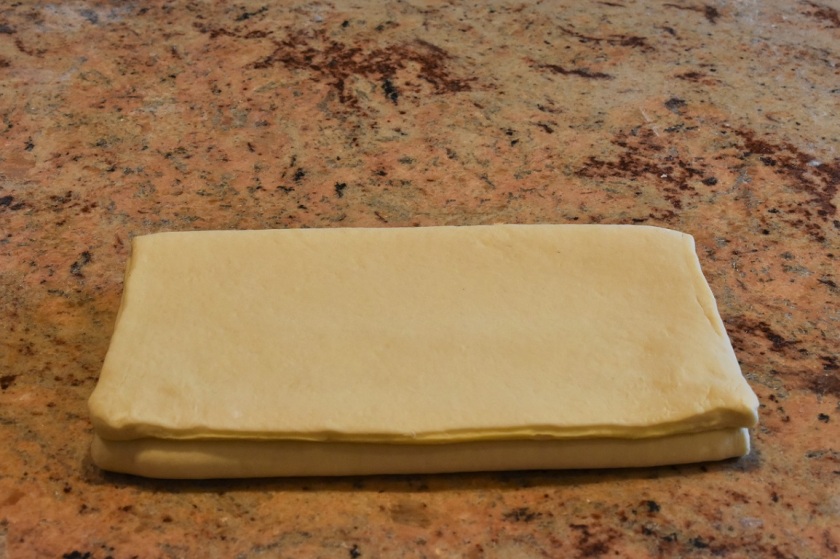
- Fold the dough in half and flatten out to about 1cm thickness
- Wrap up the dough, freeze for 15 minutes
- Transfer to the fridge for 45 minutes or so to relax the gluten
- Rotate the dough 90° before rolling out again

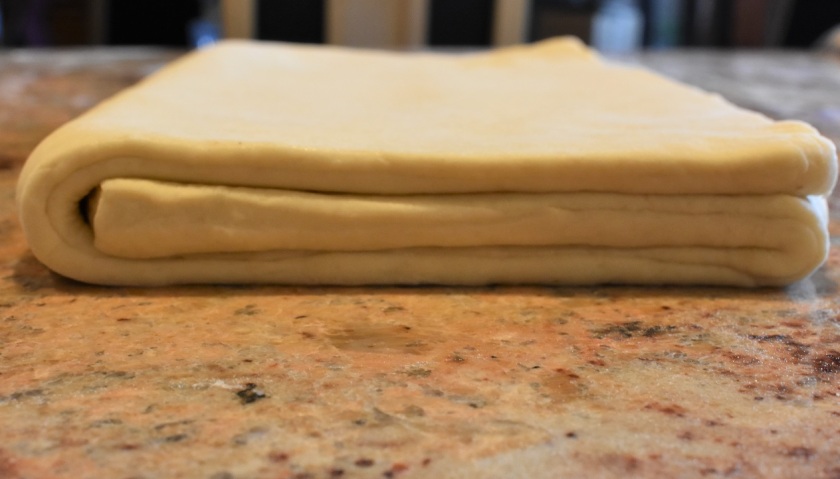
Envelope turn: folded in 3
- Roll out the dough to a rectangle, aiming for about 5mm thick.
- Trim just the edge closest to you to expose the butter inside
- Fold the bottom third of the dough up, keeping the edges as straight as possible.
- Now bring the top third of the dough over this, keeping the edges as straight as possible.
- Use the rolling pin to gently flatten the dough to about 1cm thickness
- Wrap the dough and freeze for an hour, before putting in the fridge until using.


Trimming the edges ensures there are no closed dough bits inside. This helps achieve a more open interior in the baked croissants.
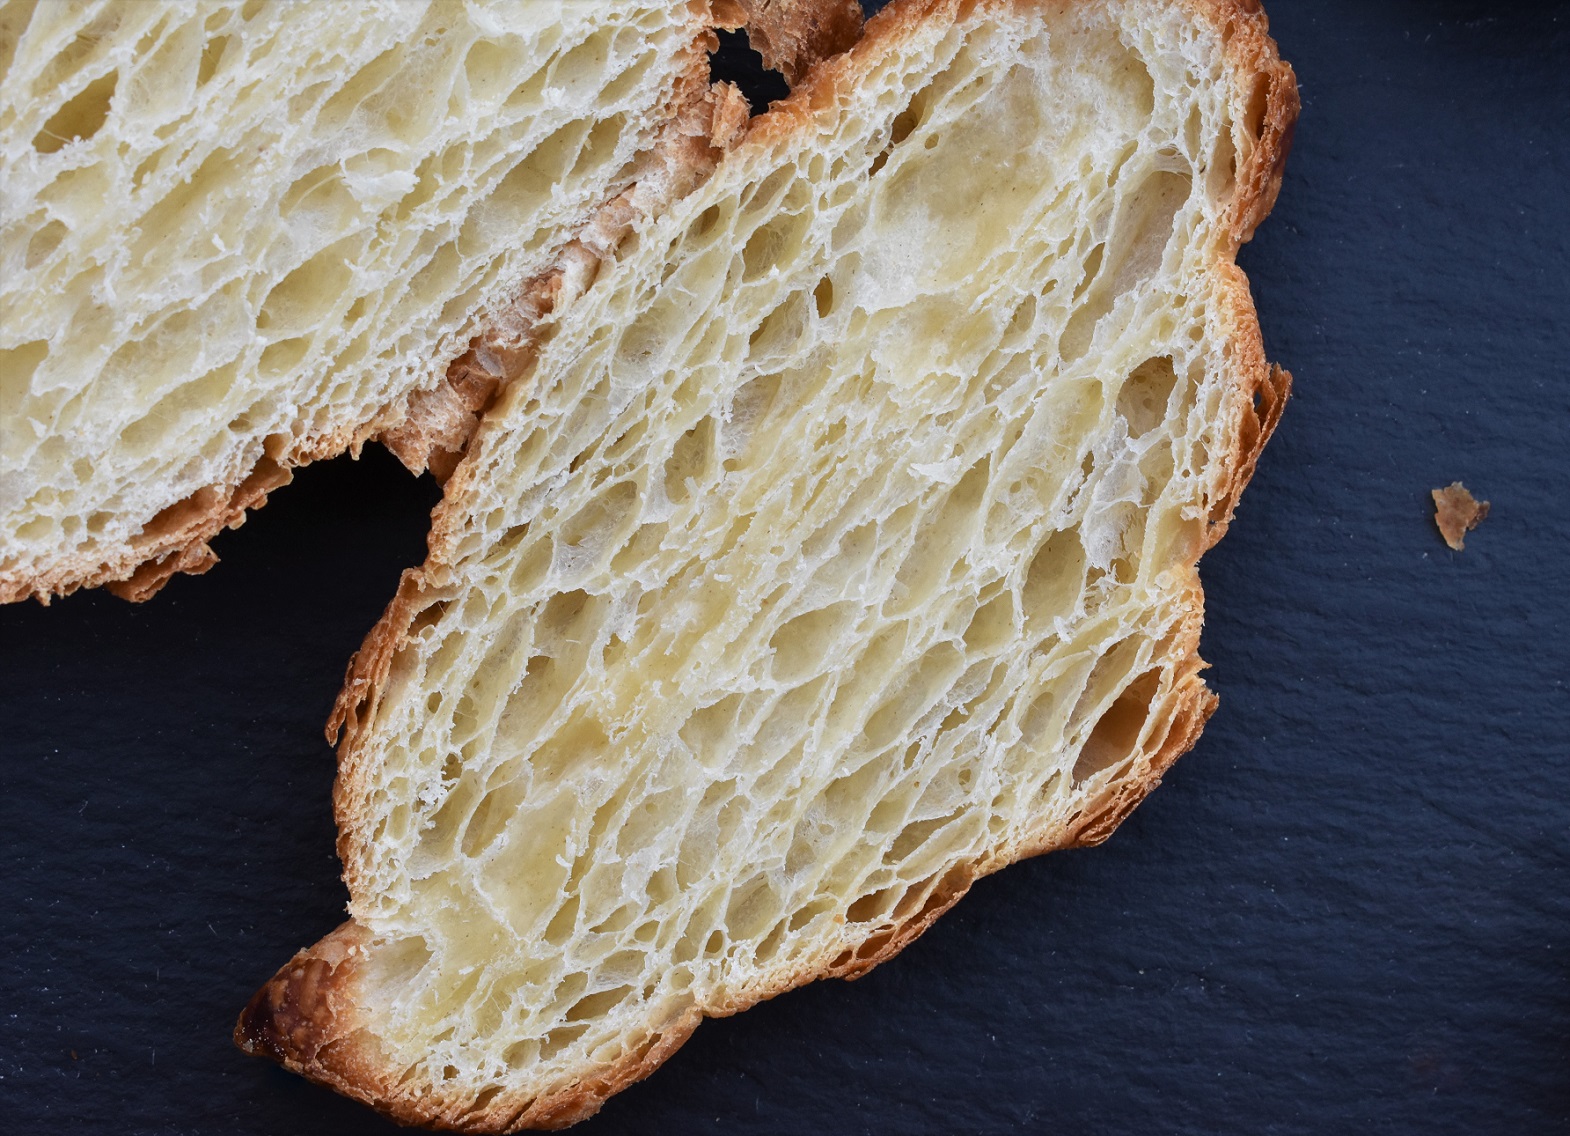
You can give different numbers and combinations of these turns depending on what your croissant preference is. I tend to go for 1 book turn followed by 1 envelope turn – giving larger holes or alveoli – or 3 envelope turns, which gives a more uniform honeycomb structure.
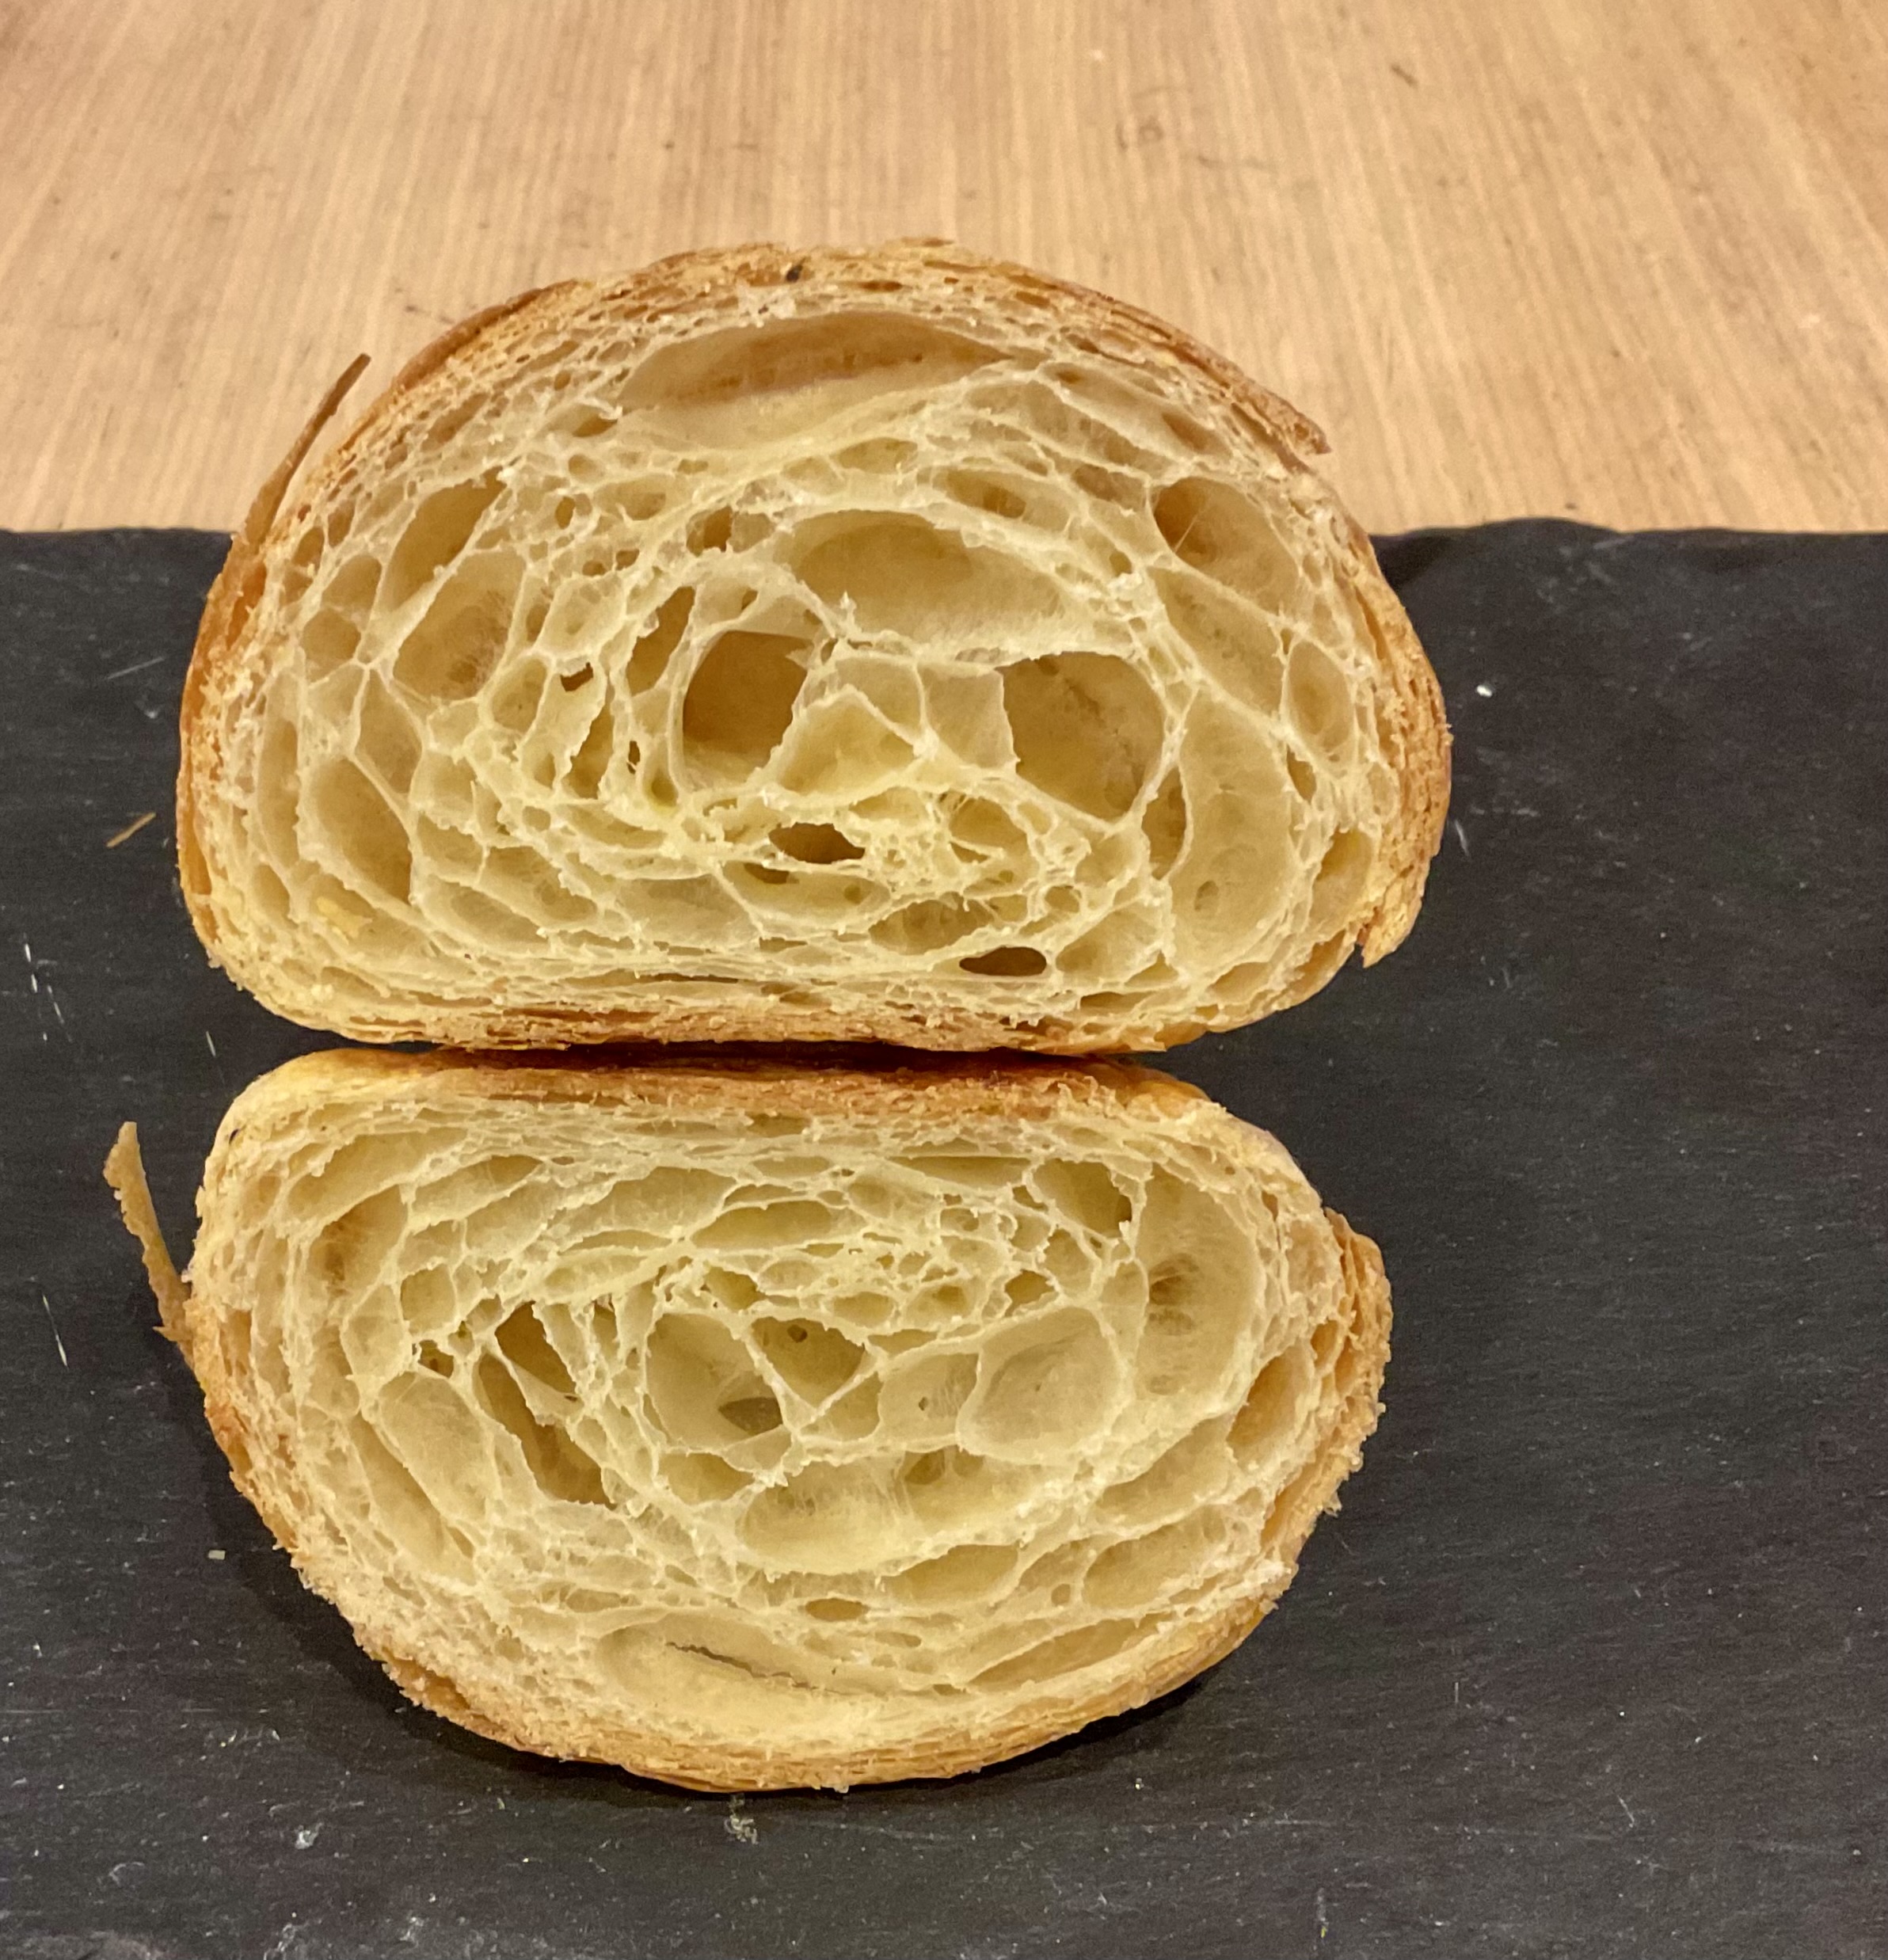
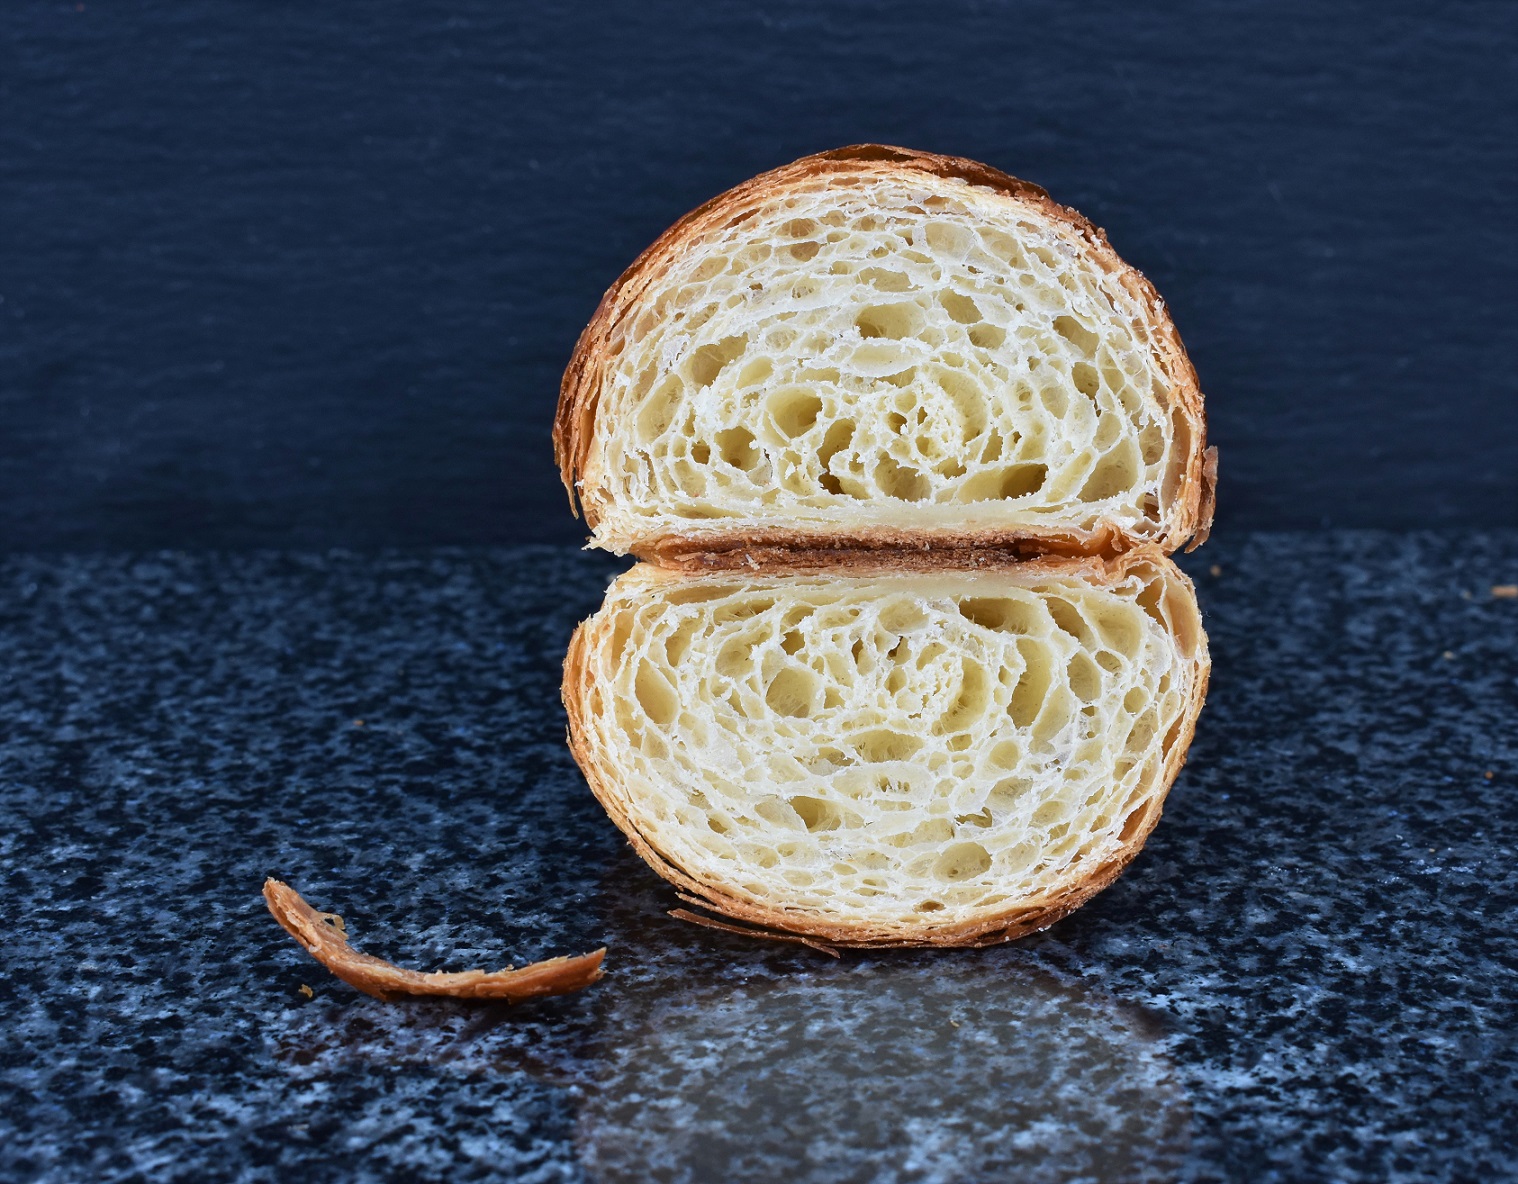
Three envelope turns: gives a suitably flaky exterior with a nice open structure. As in the photo below:
One book turn and one envelope turn: I now mostly go for this combination, which gives a more open interior ie) larger holes – as in the photos below:
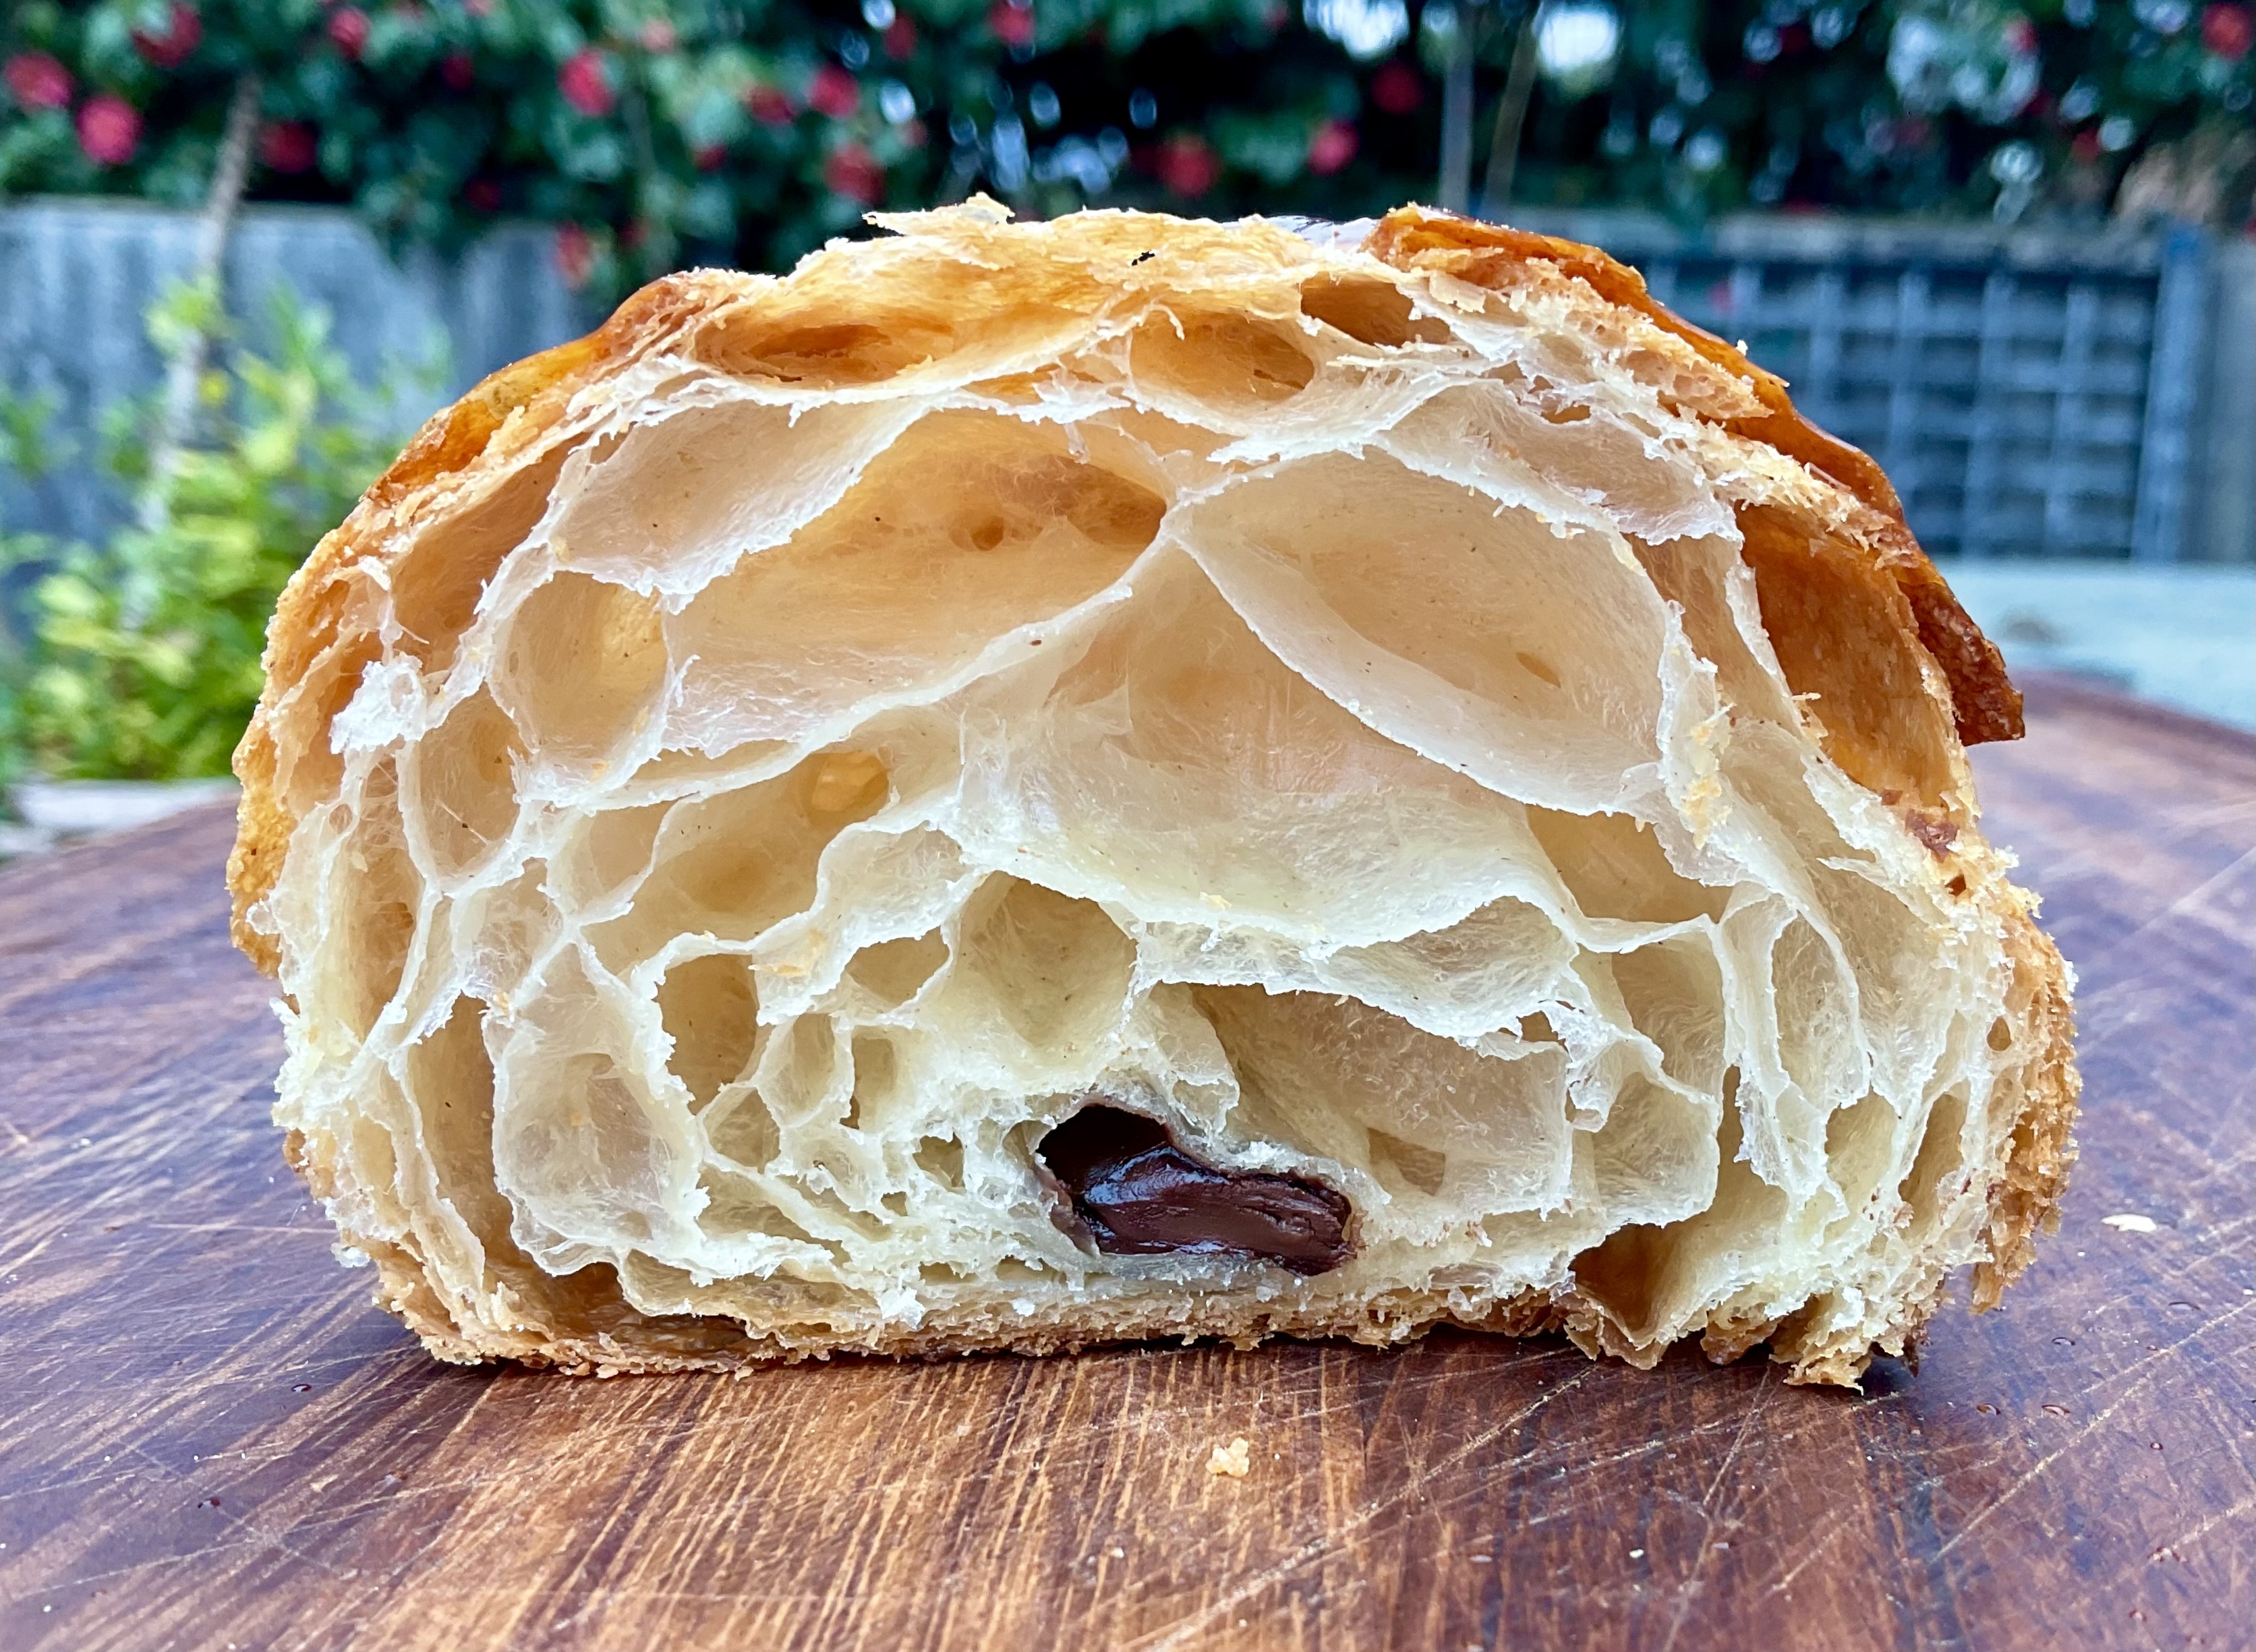
Don’t do too many turns, though: if you try to fit in more, there’s a greater risk of compressing the layers which will result in a denser, more brioche-like interior, as in the photo below which was for a batch with 4 envelope turns:

Regardless of whatever turn I do, I cut through the rounded edges that are formed when the dough is folded: this releases the dough tension and helps with effective rolling out at the next stage. The two photos below show this cutting after doing a book turn.


Don’t waste the trimmings!
Whenever you trim the dough when doing the turns, don’t throw the trimmings away. They are useful for any of the following:
- wrap them up in cling film and freeze them as you go, giving several sets of trimmings per batch of croissant dough: great to add a small amount (about 40g) to a later batch of bread or croissant dough to boost the flavour. Once defrosted, this dough simply gets added at the very start with the flour and other ingredients
- mix all the trimmings from a batch and shape into mini brioche-style burgers, proof until well risen and then bake
- sprinkle with sugar and cinnamon, roll up loosely or tie like a knot, proof them and bake to get crispy, flaky cinnamon bites
Recipe for croissant dough: makes 7-8 large croissants or about 12 smaller ones

Initial dough:
- 350g strong white plain flour
- 8g instant dried yeast
- 5g fine salt
- 40g caster sugar
- 40ml skimmed or semi-skimmed milk
- 130ml cold water
- 20g soft, unsalted butter
To laminate the dough:
- 170g unsalted butter
To glaze:
- 1 egg, beaten – or use cold milk (milk gives a matt finish rather than a shiny glaze)
You also need baking trays lined with a double layer of parchment
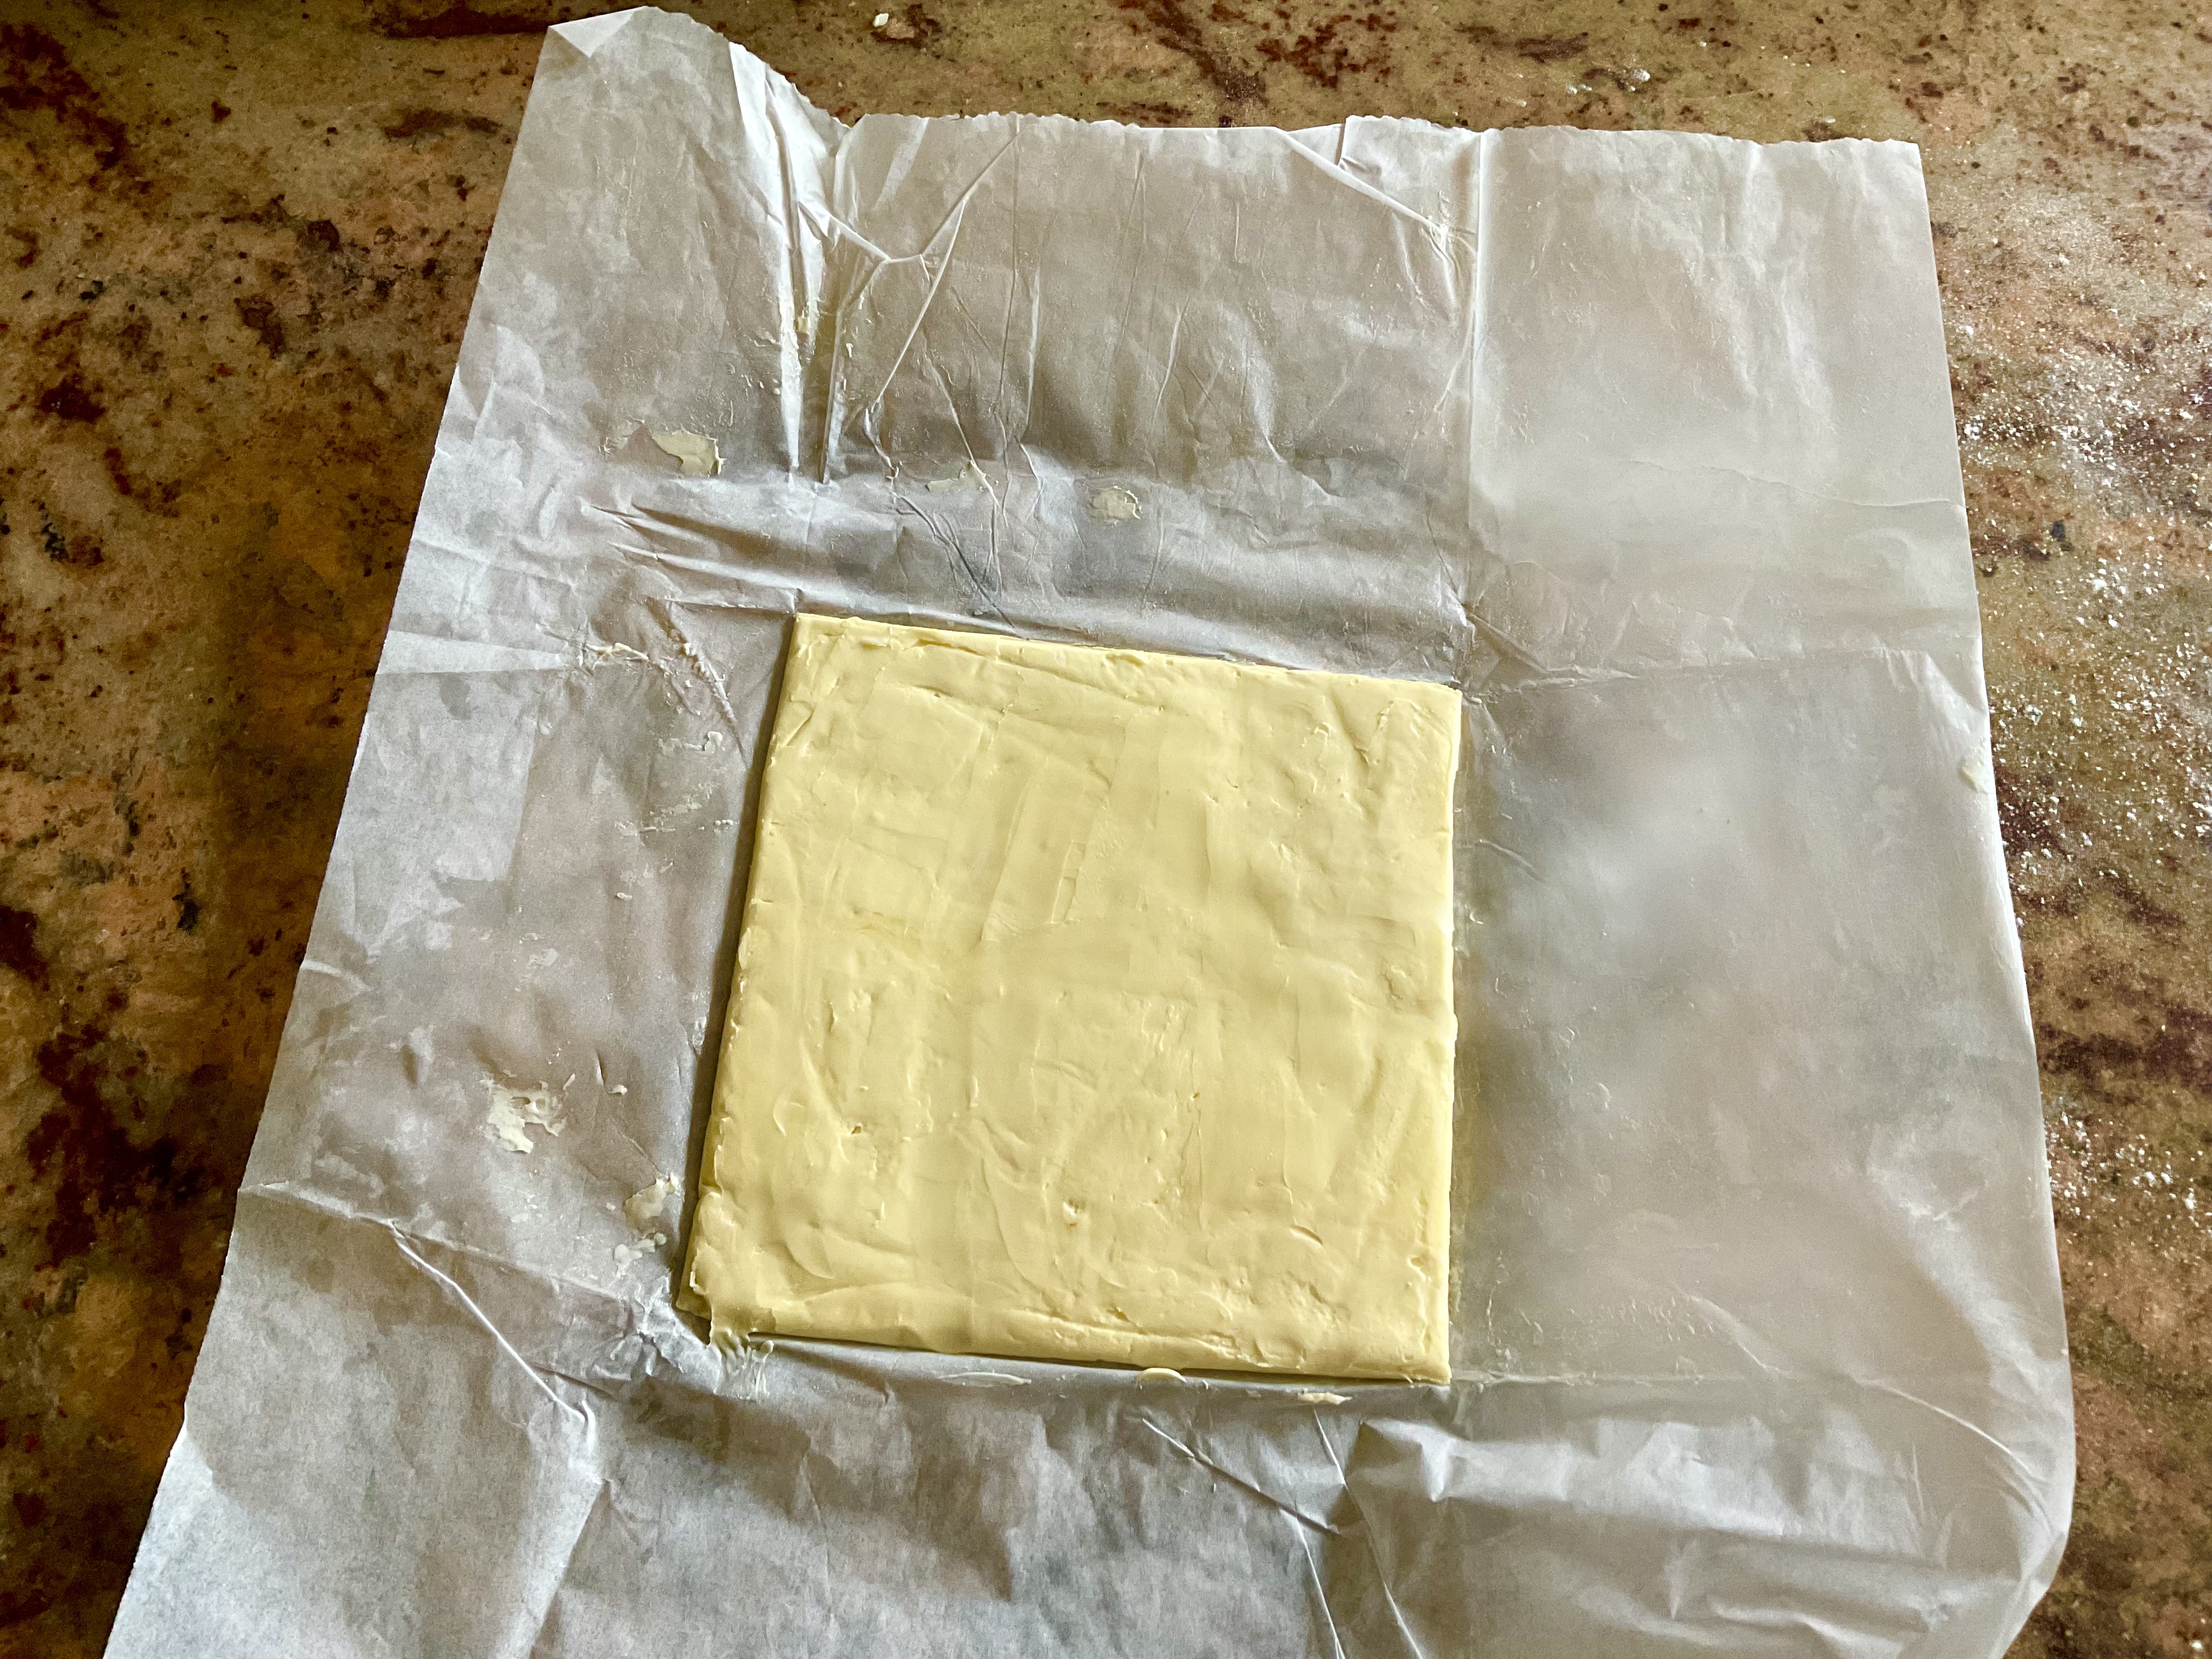
Make the butter slab:
(1) Shape the butter into a thin square that is about 16cm by 16cm by bashing it lightly with a rolling pin between two sheets of baking parchment. Chill it until you are ready to encase it in the dough.
Make the initial dough:
(2) Mix the initial dough ingredients together in the bowl of a food mixer fixed with a dough hook to give a firm dough. Knead on a fairly low setting for about 15 minutes: this will give a fairly smooth dough with good gluten development and noticeable elasticity.
NB 1: it will seem quite dry and crumbly initially and feels as though you’ll never form a dough. However, the dough really needs to be firm rather than too soft. I find squeezing the dough firmly will help it come together initially: it will actually soften up and become pliable when it rests.
NB2: The kneading is important to develop the gluten here so that the shaped dough holds its shape during proofing and baking.
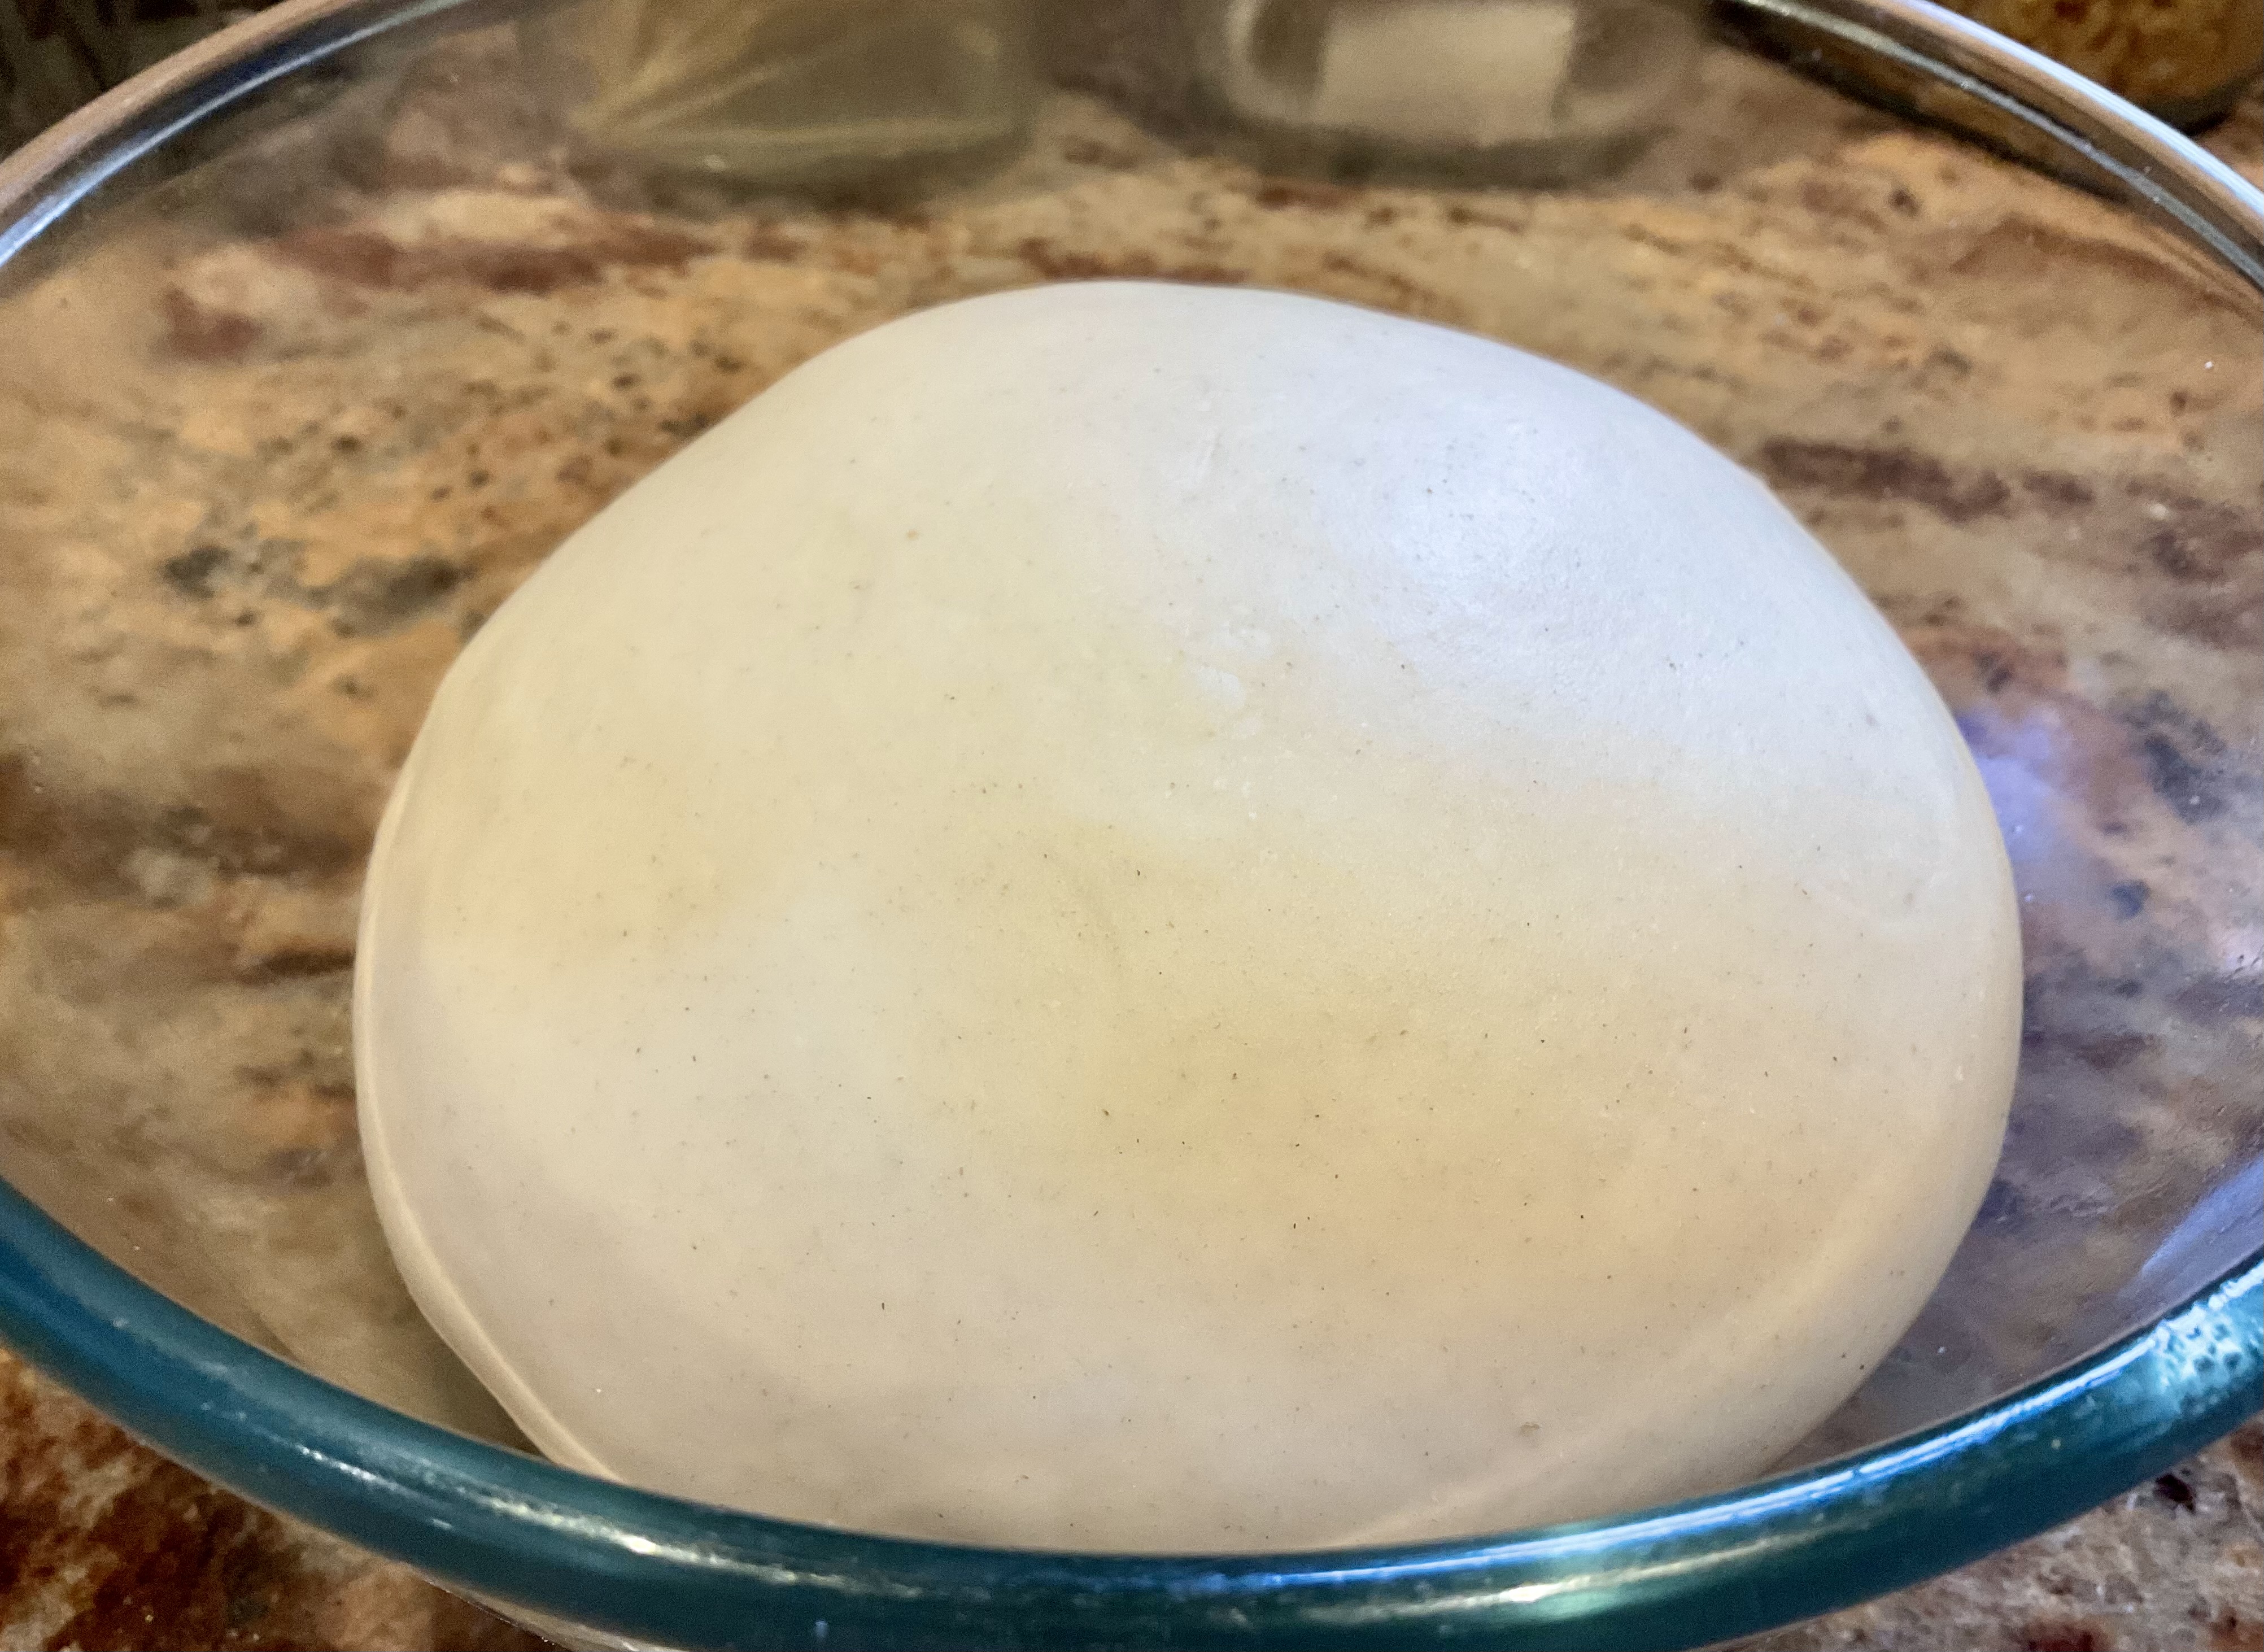
(3) Place in a bowl and cover. Leave it at room temperature for about a hour to allow the yeast to start to activate and for the dough to expand a little: aim for an increase of about half the original volume – it doesn’t need to get to twice the volume as you would with a standard bread dough.
NB: this slight fermentation is important for flavour development.
(4) Deflate the dough and then roll out to a rough rectangle just larger than 32cm by 16cm: I find it is easier to get the butter square as a guide – you want the dough width to be about the same size of the square and the length to be as close to twice the butter size as possible. Wrap in clingfilm and put onto a baking tray, folding the dough over if needed in order for it to fit on the tray. Freeze for a hour and then place in the fridge for at least 7 hours or overnight.
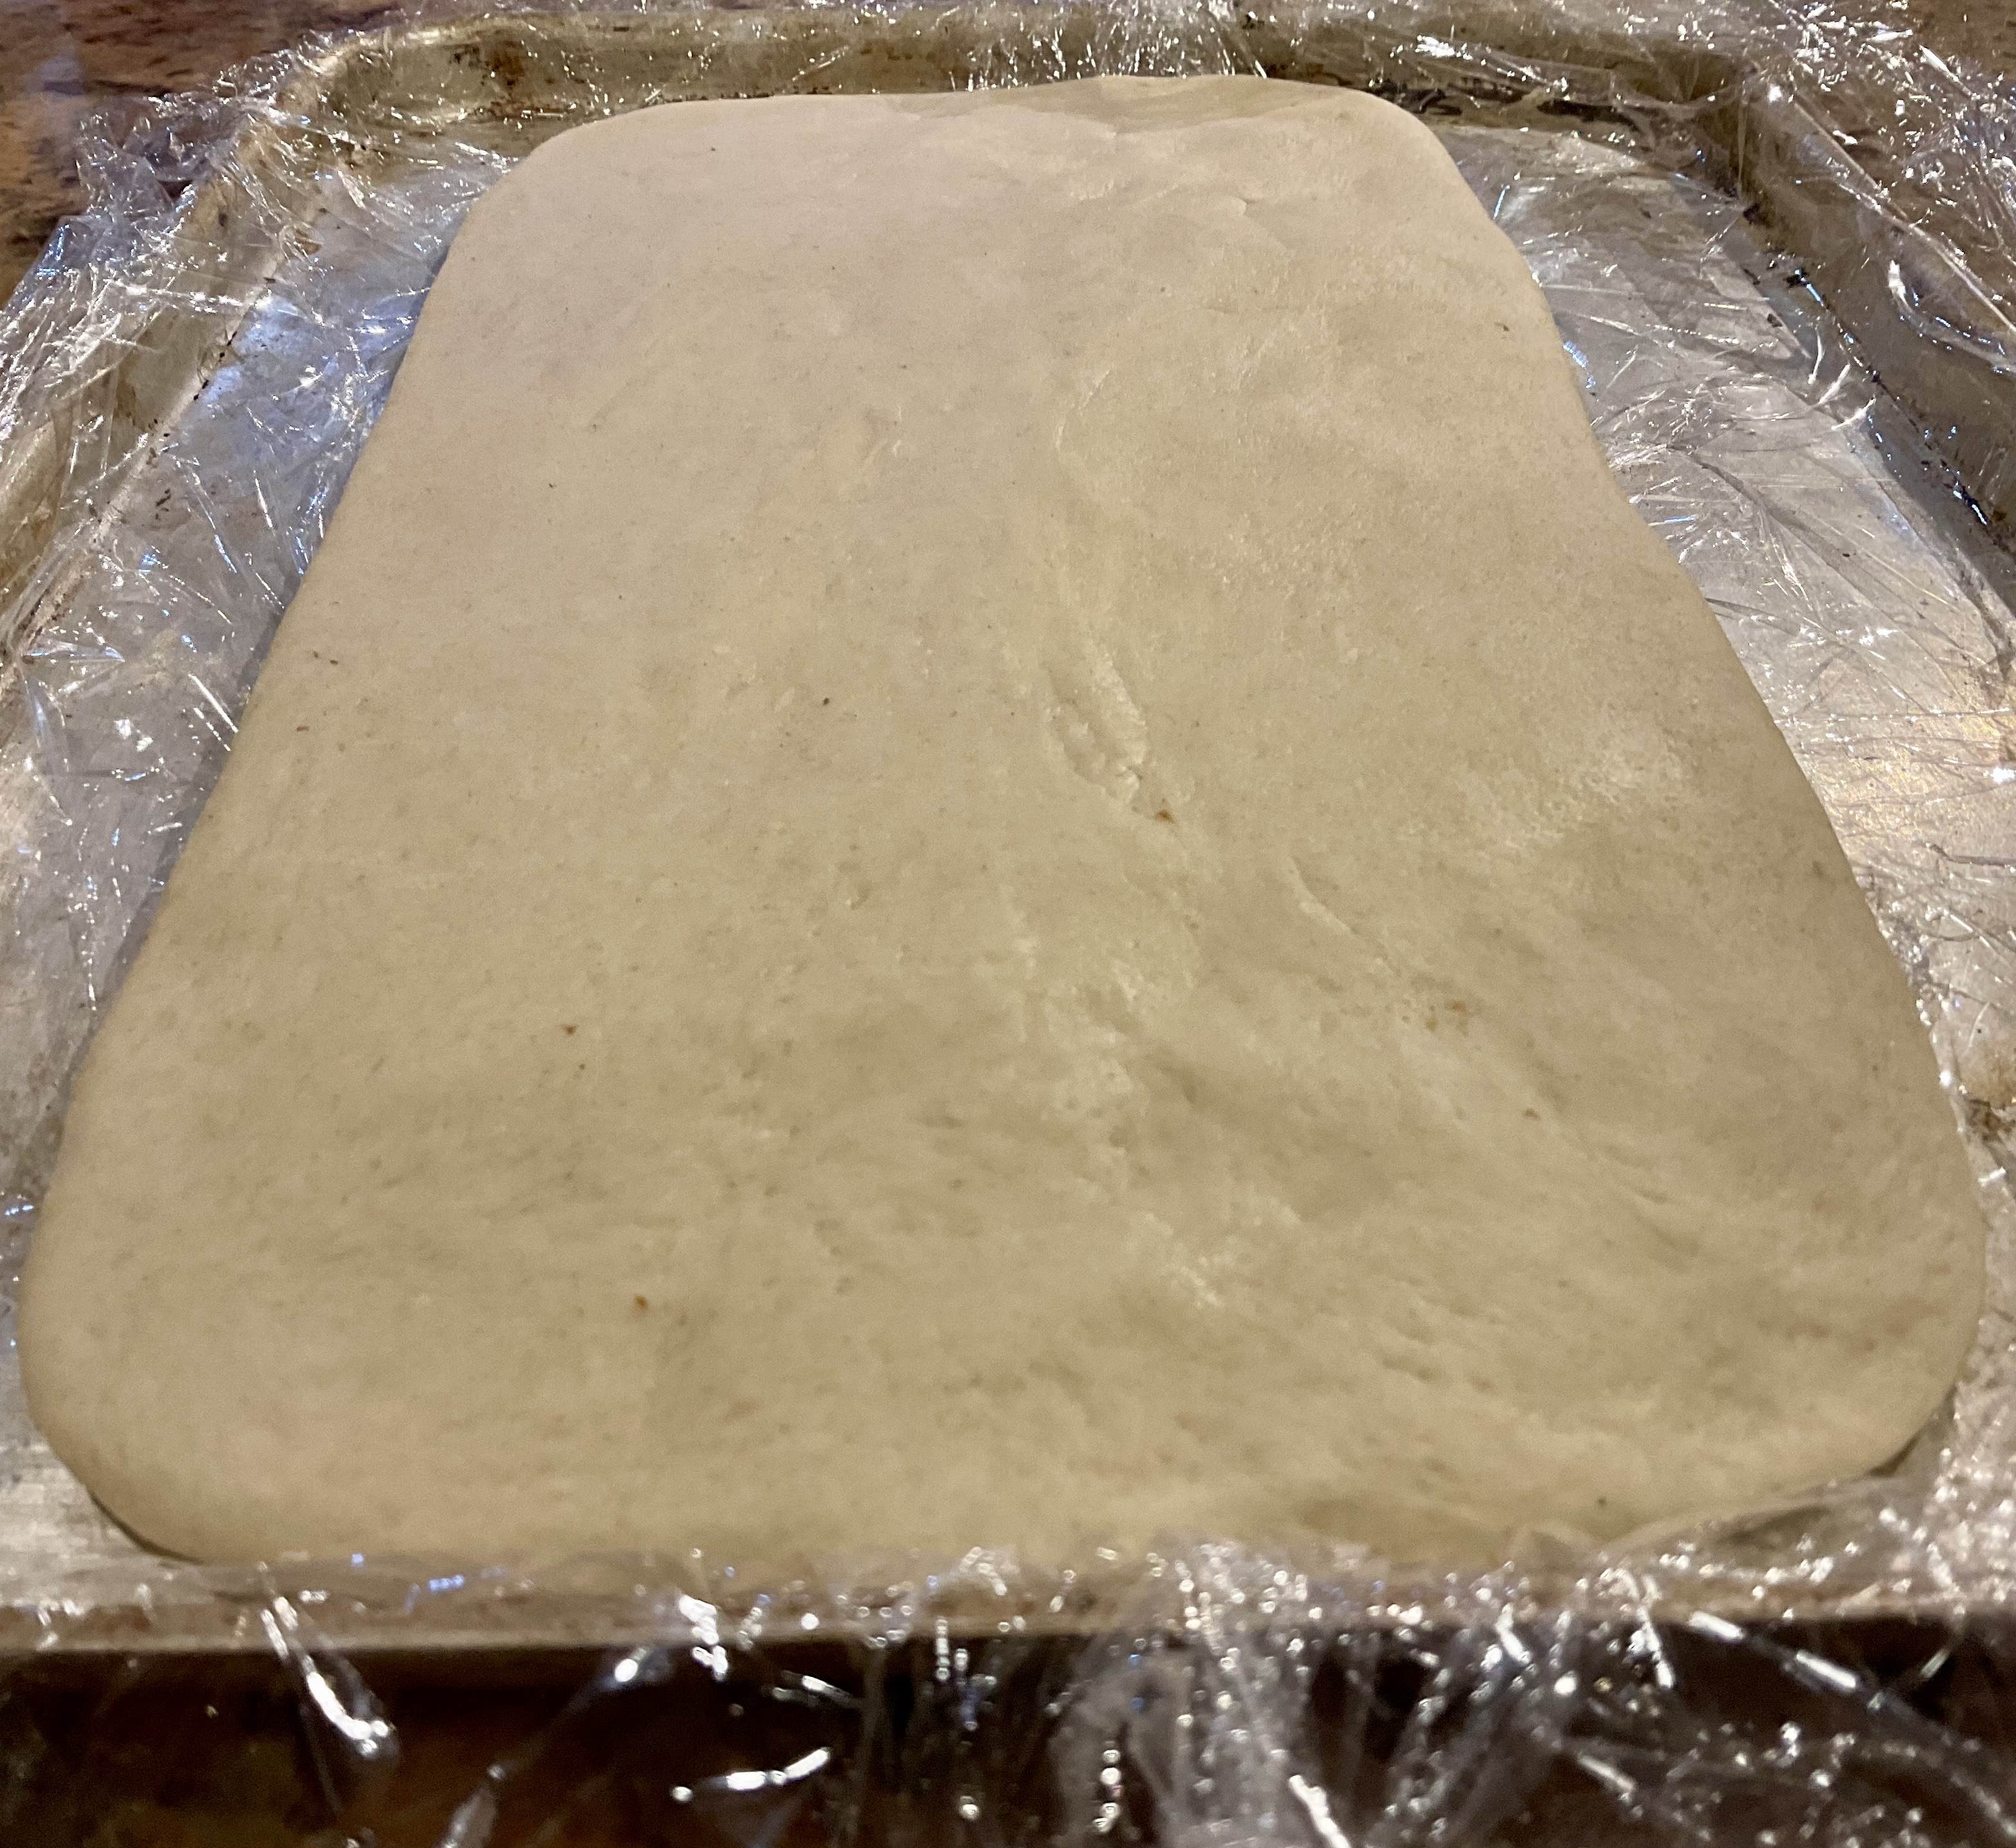
NB 1: this short burst of freezing won’t kill the yeast: it just makes it dormant so that when it is chilled overnight the dough won’t over-ferment (which would hinder a good rise later with the shaped dough).
NB 2: by shaping it to a rough rectangle now, there is little rolling out to do when it comes to encasing the butter slab. That way, the gluten will be relaxed enough so that the dough rolls out easily later on.
(5) Put the well rested dough into the freezer for 15 minutes and remove the butter from the fridge: just long enough for it to be flexible and not at all brittle. To test the butter is at the right texture, bend a corner over: if it snaps, it is too firm, in which case leave it at room temperature a bit longer until it can just bend easily without snapping.
NB: the dough and the butter should be as similar in texture as possible so freezing the dough helps. As does removing the butter from the fridge to slightly soften it up. If the butter is too hard compared to the dough then it will break apart and cut into the layers you form. If the butter is too soft, it will simply squish around in the dough and not give effective layers – resulting in what is essentially a brioche!
Encase the butter in the dough:
(6) Turn the chilled dough onto a lightly floured work surface and roll out a little if needed, so it is just over 32cm by 16cm.
(7) Rotate the dough so long edge is closest to you and place the butter in the centre. Bring the rest of the dough over the butter, sealing gently and trying not to trap air bubbles.
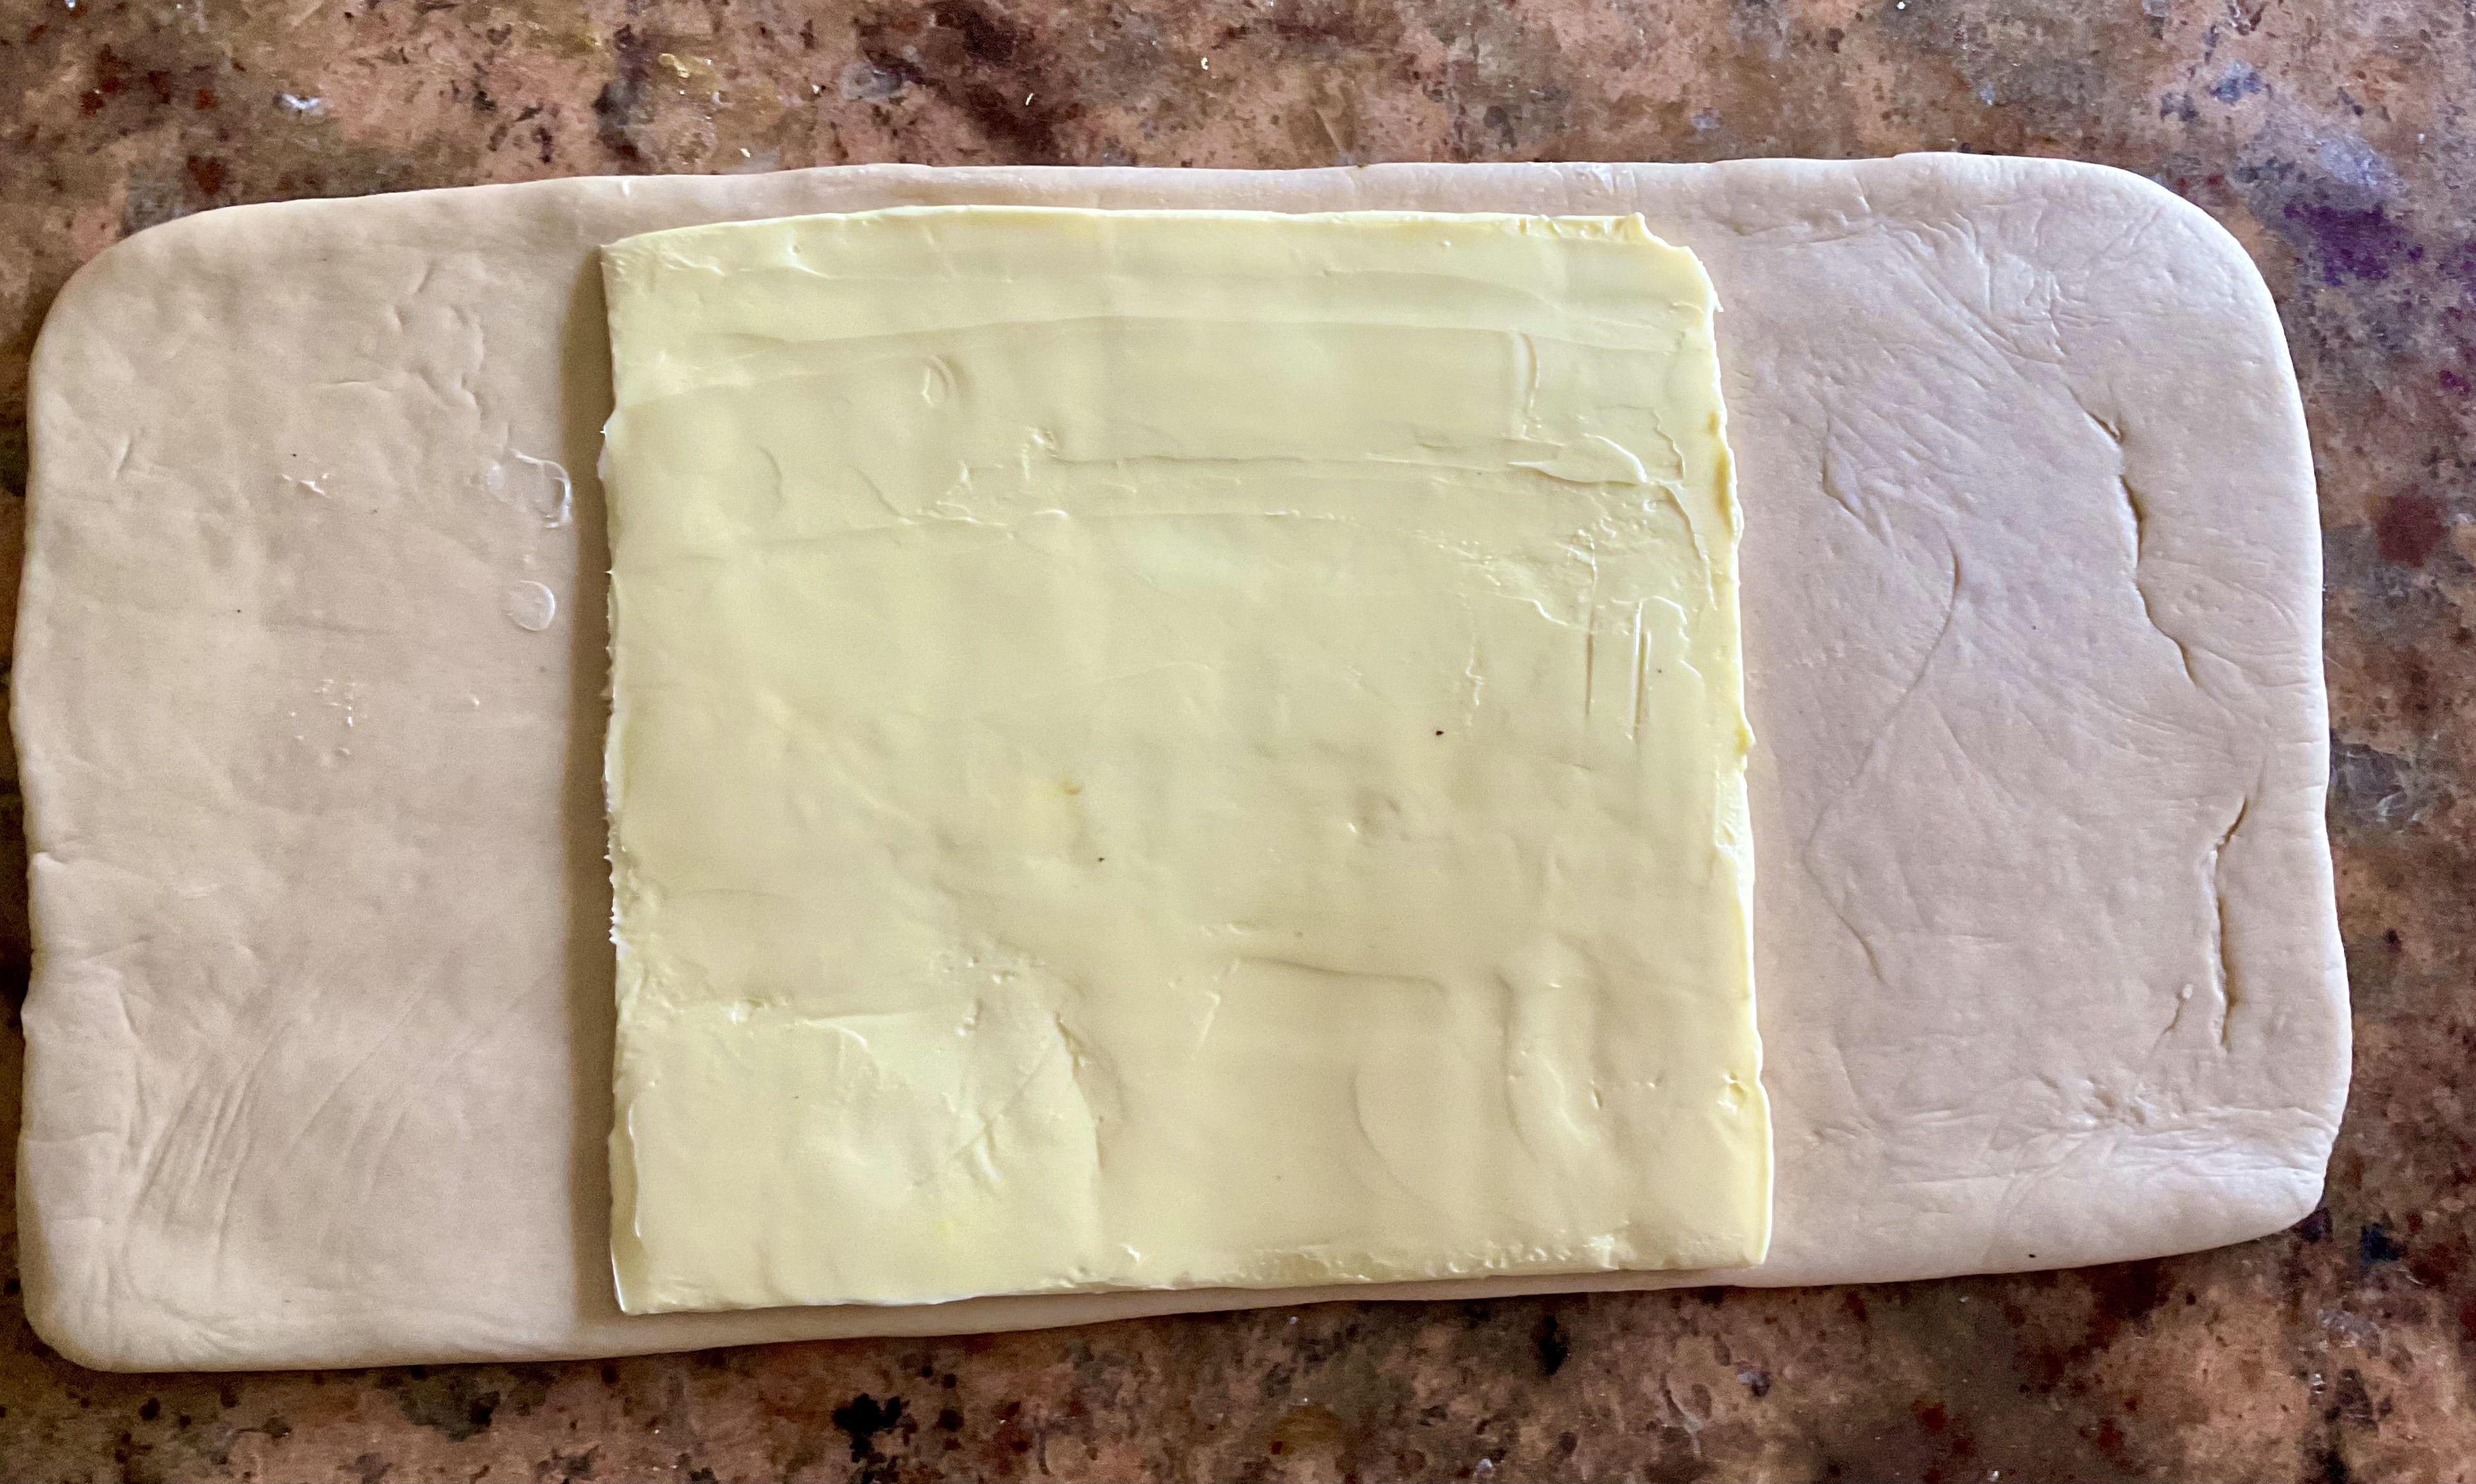

The run a sharp knife along the two folded edges (on the left and right of the last two photos above) to expose the butter: this cutting helps minimise surface tension of the dough.
Roll out dough ready to start the turns:
(8) Use the rolling pin to lightly press down on the dough along the length a few times, giving small ridges to begin with. This helps elongate the dough without using much pressure, and helps the butter spread just enough to roll out easily within the dough.
(9) Lightly roll out to give a rectangle just over 16cm wide and 50cm long – don’t worry about precise dimensions, but the key thing is the dough should be about 5mm thick. Trim the short edges (going about 1cm in) and brush off any excess flour from the rolled out dough: you don’t want flour trapped inside the dough as this hinders the open structure later.
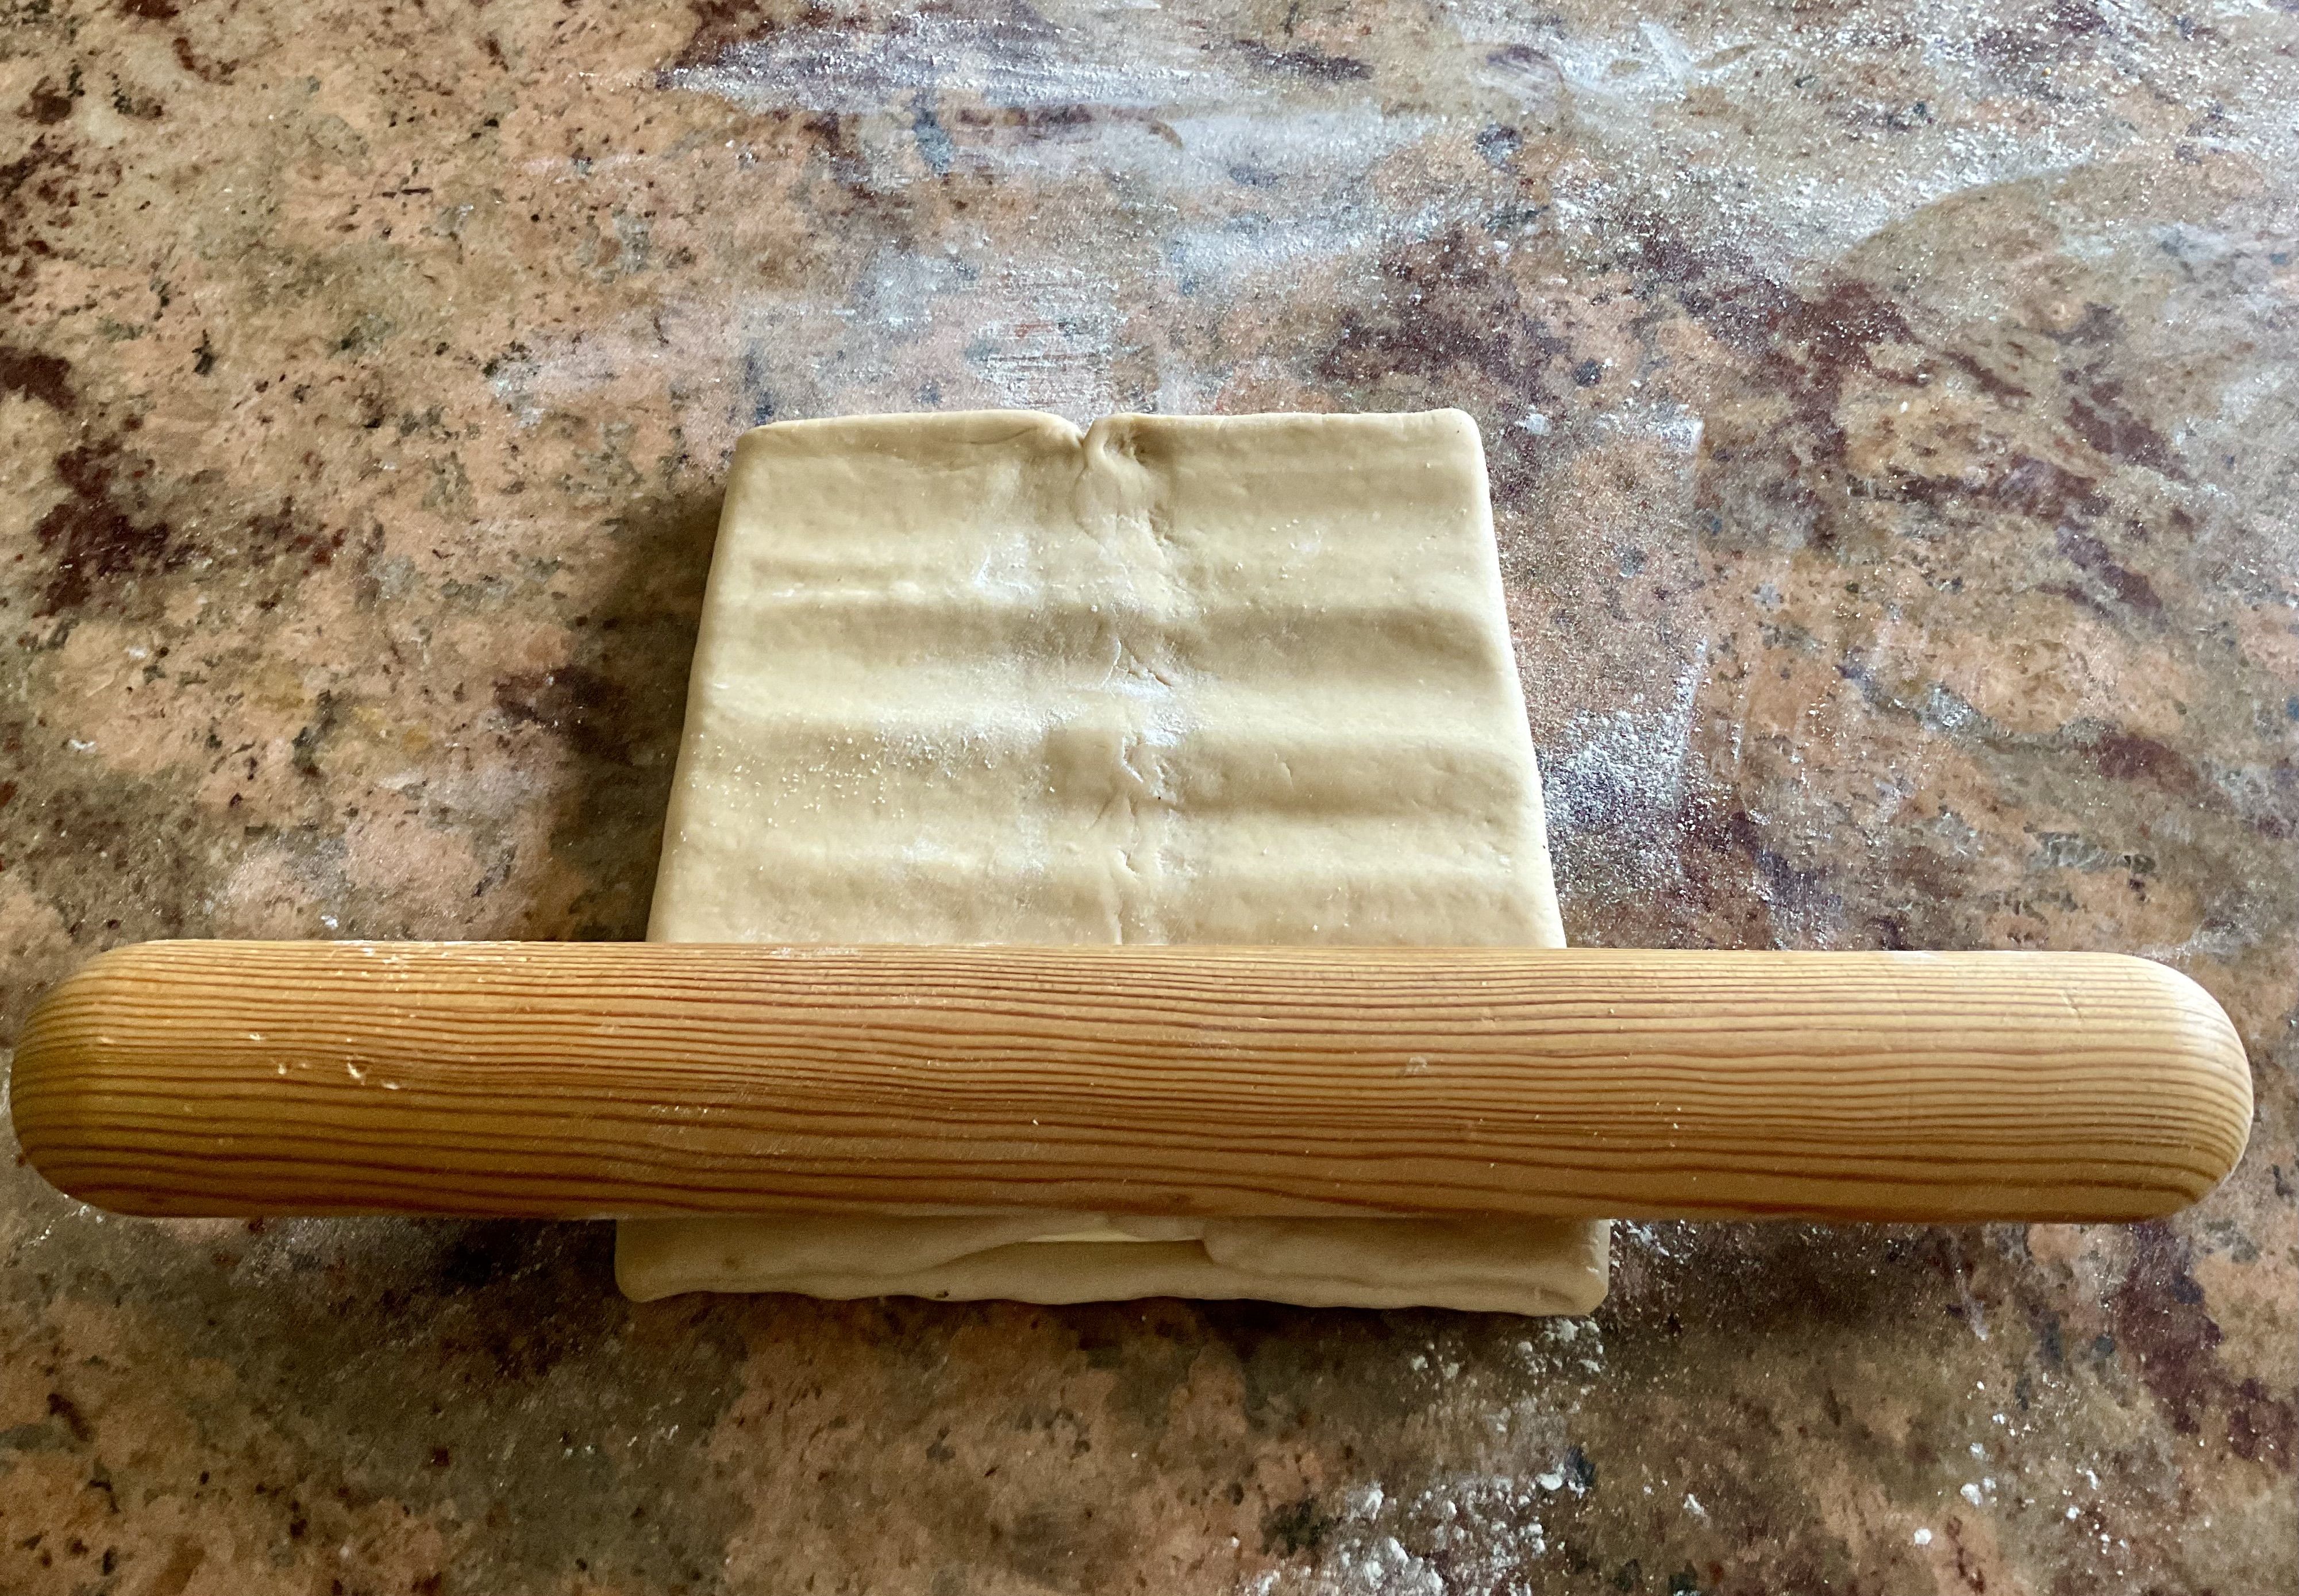

NB: the trick is to gently press the rolling pin onto the dough a few times along its length to start to flatten it and then gently roll it out.
Perform the turns (creating the layers)
(10) Do a book turn (folding in 4 like a book):

(11) Lightly flatten the dough with the rolling pin to about 1cm thickness, wrap the dough in clingfilm and freeze it for 15 minutes. Transfer to the fridge for about 1 hour in order to let the gluten relax a little. Make a cut all along the three curved edges where the dough was folded to release the dough tension (see next photos).
NB 1: It really makes a difference to your croissants if you rest the dough properly. Without resting, the gluten will not be relaxed enough so the dough is too elastic and you end up putting more force into the rolling out, which ruins some of the layers.
NB2: the use of both freezer and fridge remains important for controlling the dough temperature and preventing fermentation. Rolling the dough to about 1cm thickness before freezing means the cold in the freezer can really get to the centre of the dough rapidly without the yeast becoming active.
(12) Unwrap the dough and leave on the counter for 5-10 minutes so the butter softens up just enough to allow you to bend the dough gently without the butter breaking. Give the dough a 90° turn and roll it out to about 16cm by 50cm again, trim the shortest edges again and this time give it an envelope turn (folding in three, as in the photos below).
(13) Wrap up the dough and freeze for 1 hour*. Then transfer to the fridge for at least 7 hours or ideally overnight. That is now the dough ready to be used.
NB 1: as previously, this initial freezing controls the fermentation so that overnight the yeast will activate very slowly. The dough won’t rise much at this stage, but the flavour will still be develop
NB 2: *you can keep this dough frozen for use at a later time. In which case, simply defrost it in the fridge the night before you want to shape it.
The final rolling out
(14) Remove the dough from the fridge and cut into the two curved edges to release the dough tension. Leave the dough on the lightly floured work surface for about 5-10 minutes.
(15) Roll out the dough to a rectangle that is just over 32cm long by 24cm wide and around 4-5mm thick – ideally just a little thinner than was r0lled out for the turns.
Shaping
(16) Brush any excess flour off the surface and trim the edges with a sharp knife.
(17) Cut into isosceles triangles with bases about 8cm and height about 24cm: as is my diagram below. You will get 7 main triangles and two smaller ones: you can lightly press the two end triangles together to give a larger one or shape these two smaller ones into two mini croissants.

NB 1: alternatively, cut the trimmed dough into four rectangles around 8cm by 24cm and then cut each diagonally to give 8 triangles. You can lightly stretch them to make them isosceles before rolling up.
(18) Lightly place the triangles onto a baking tray and chill for around 30 minutes to rest. This helps relax the dough and prevent too much tension when shaping.
(19) Take a triangle and stretch apart the base by tugging gently at the corners to widen it by about 2cm centimetres. Use your fingertips to gently stretch out the triangle’s tip to elongate it just a few more centimetres: this will give the croissant more ridges. Roll it up from the base, starting fairly tightly initially and then going gently.
NB: if you stretch too much, you risk the dough tearing.
(20) Place on the greaseproof-lined baking tray, ensuring the tip is underneath, and pat down lightly to hold it in place. Repeat with the other triangles, placing them apart so when they rise they won’t touch each other.

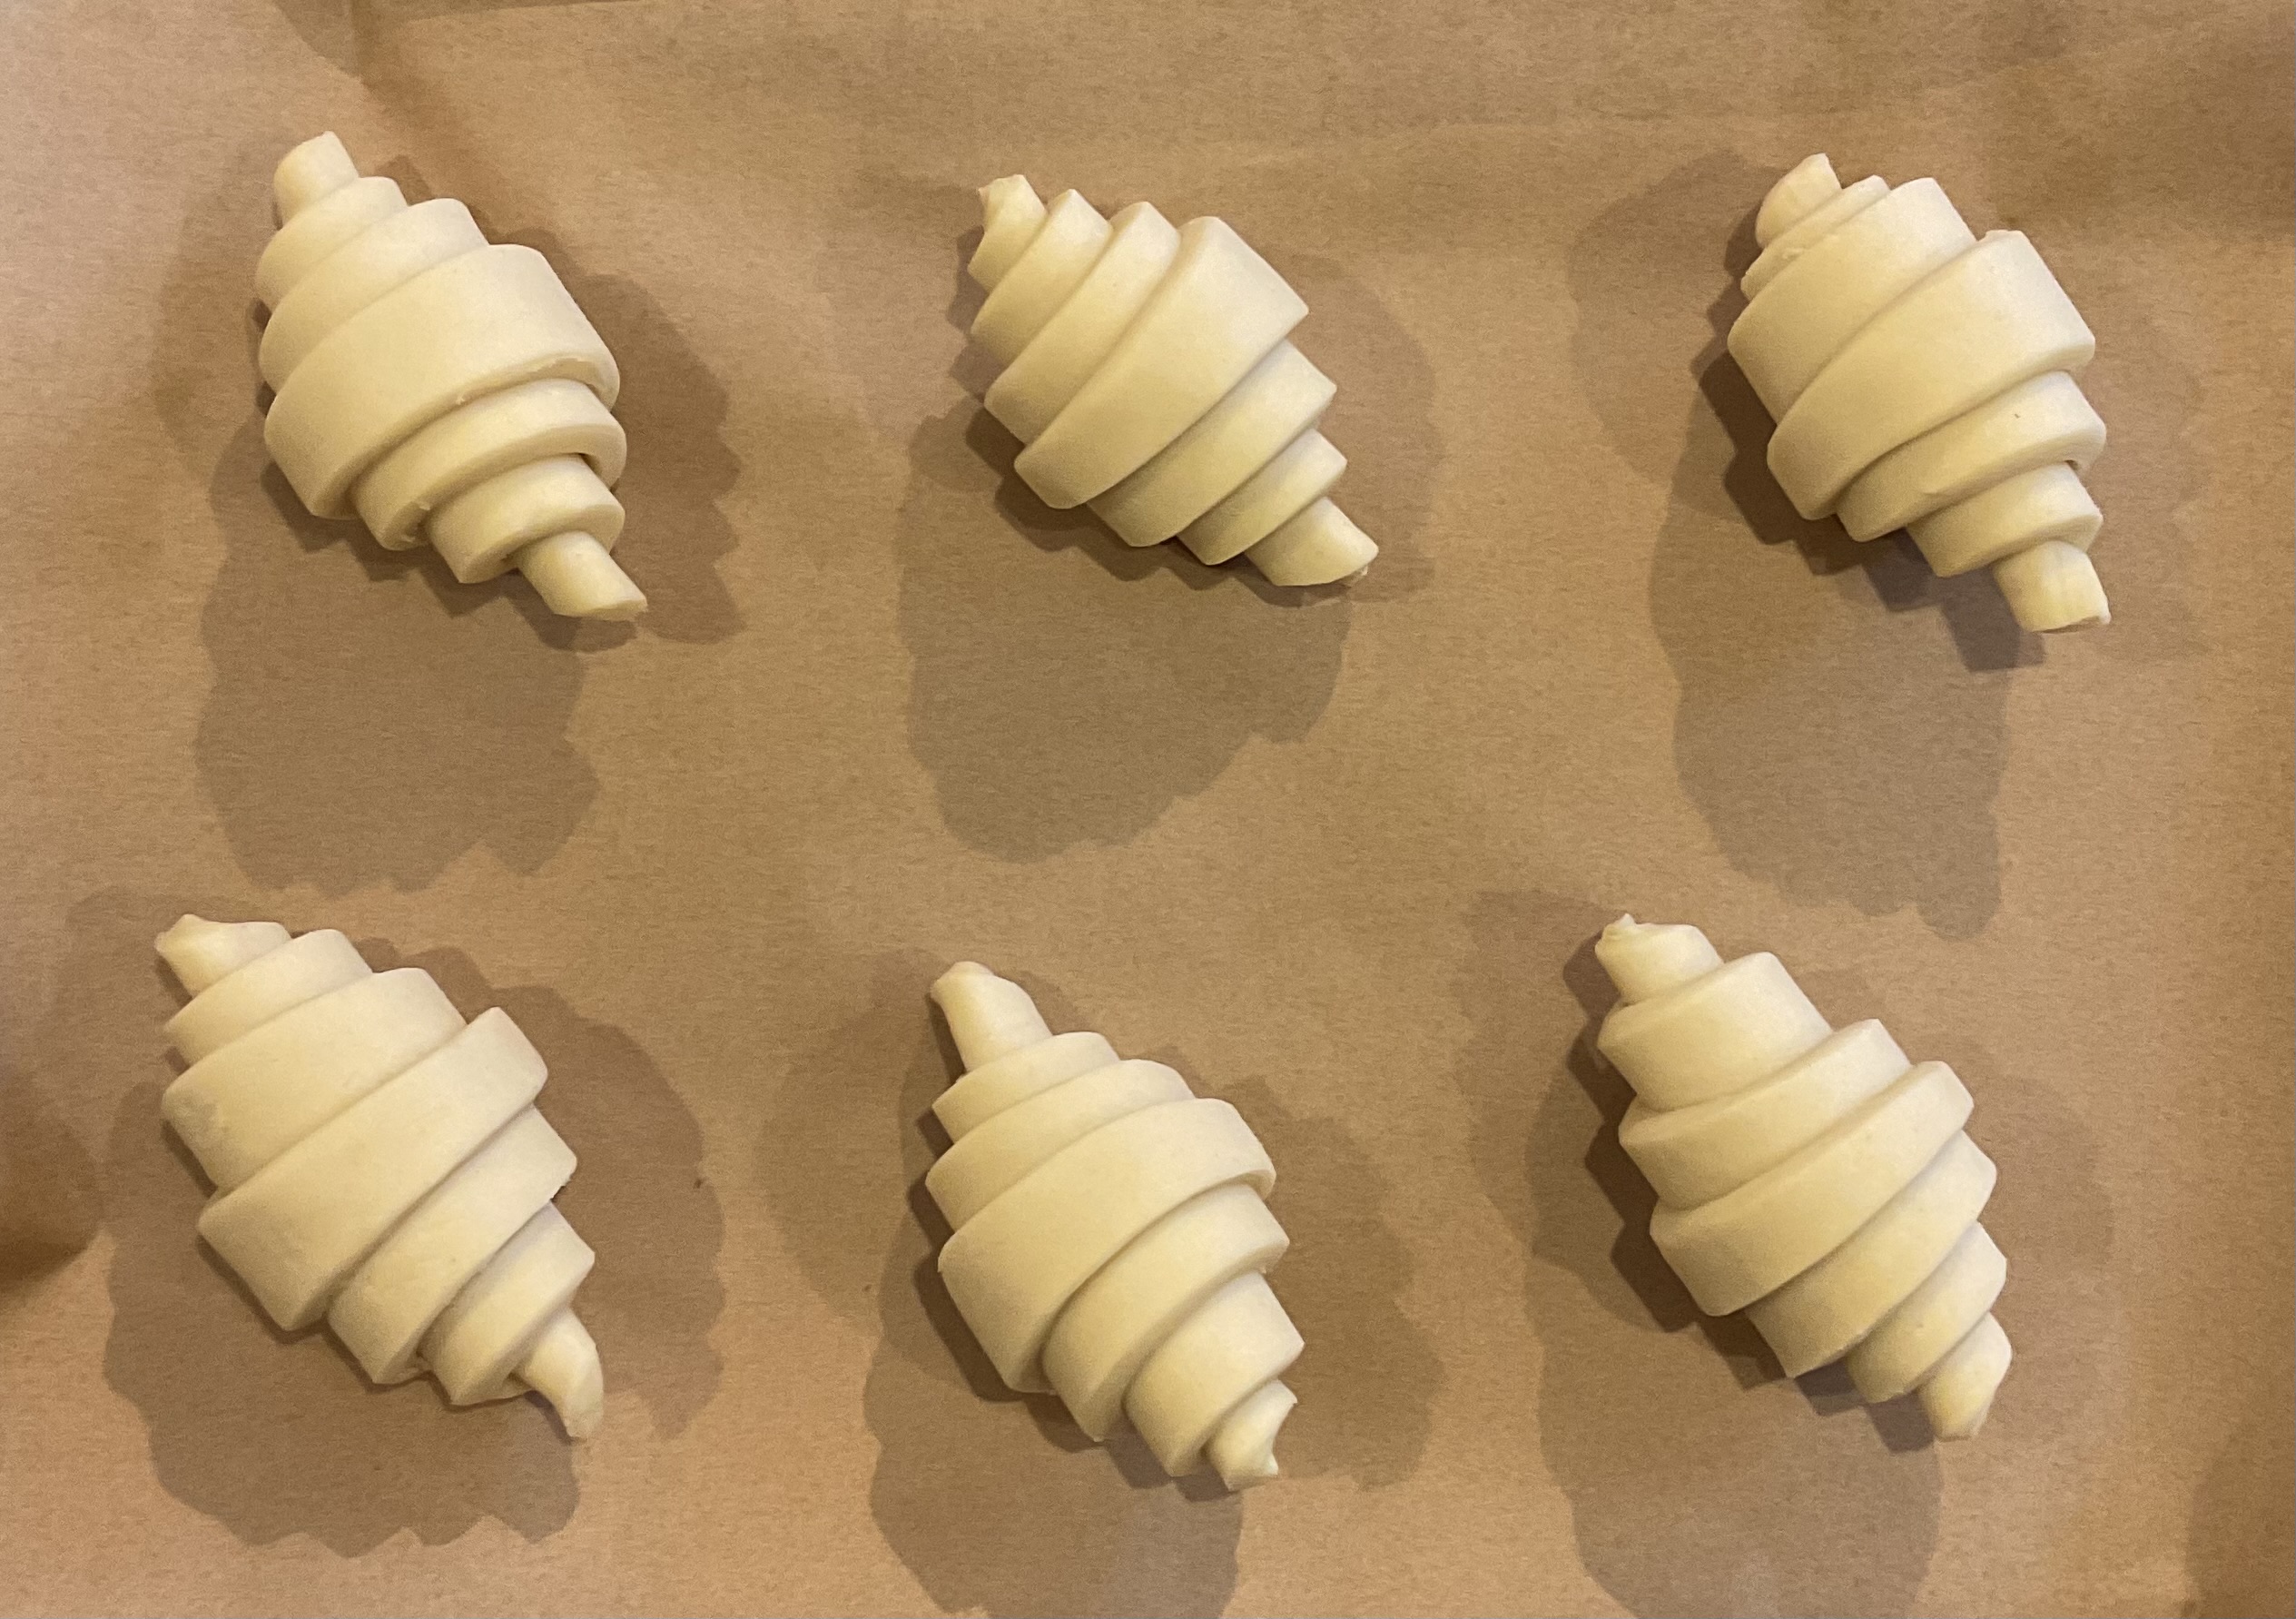
(21) Brush them lightly using the beaten egg or milk. Don’t worry about getting egg over the cut parts of the dough, as it doesn’t significantly affect the expansion when they bake later.
NB: I tend to brush them with the egg or milk glaze before proving to keep the surfaces moist and to give an even appearance once baked. However, you can brush them again just before baking if you wish.
Proving and baking
(22) Pop the trays in large bin liners with a tall jar or tin to keep the plastic from touching the dough. Either leave at room temperature until puffy and well risen or pop in a dough proofer set to between 25°C and 27°C. If you give the tray a gentle shake, the croissants should wobble like jellies. Visually, you will see layers starting to separate and open up – as in the second photo below. Be patient as this proving can take upwards of 6 hours if the room is cool. I find in the dough proofer it takes between around 3-4 hours.
Important: don’t overproof. If the dough overproofs you will see signs of the dough tearing on top and the croissants will be prone to collapsing, so after a couple of hours periodically check what’s happening.


NB: if the room is too warm (higher than 28°C) the butter can start to melt and you end up with greasy, dense croissants. However, if the room is on the colder side, the shaped dough will still rise but it will take longer.
(23) When the dough has proofed enough, preheat the oven to 175°C (fan).
(24) Bake for about 15-20 minutes, rotating the pan after about 10 minutes: when they are ready they should be a golden-brown colour and feel very light when you lift one up.
NB: you can cook them longer to get a darker brown colour – it’s purely a personal taste.

Shaping the dough for pains au chocolat
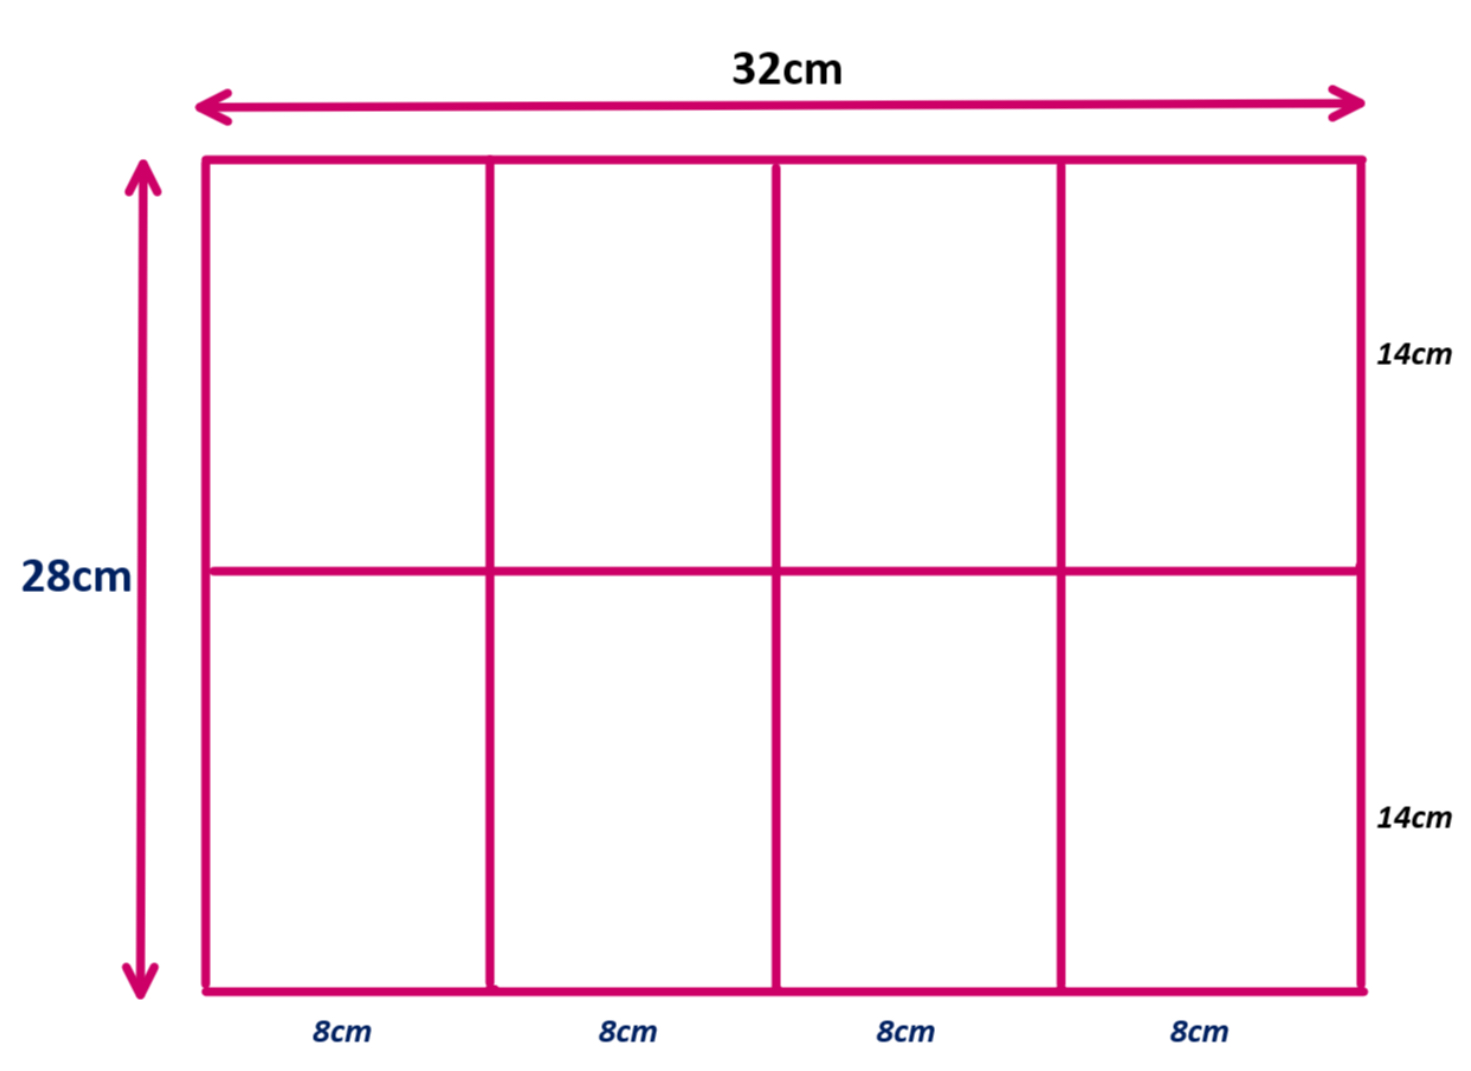
Roll out the rested dough as in Step 14 of the recipe above but just over 32cm by 28cm – a little larger and slightly thinner than for croissants. Trim the edges.
Shaping pains au chocolat (makes 8)
Cut the rolled out and trimmed dough into rectangles about 8cm by 14cm, as in the photos below:
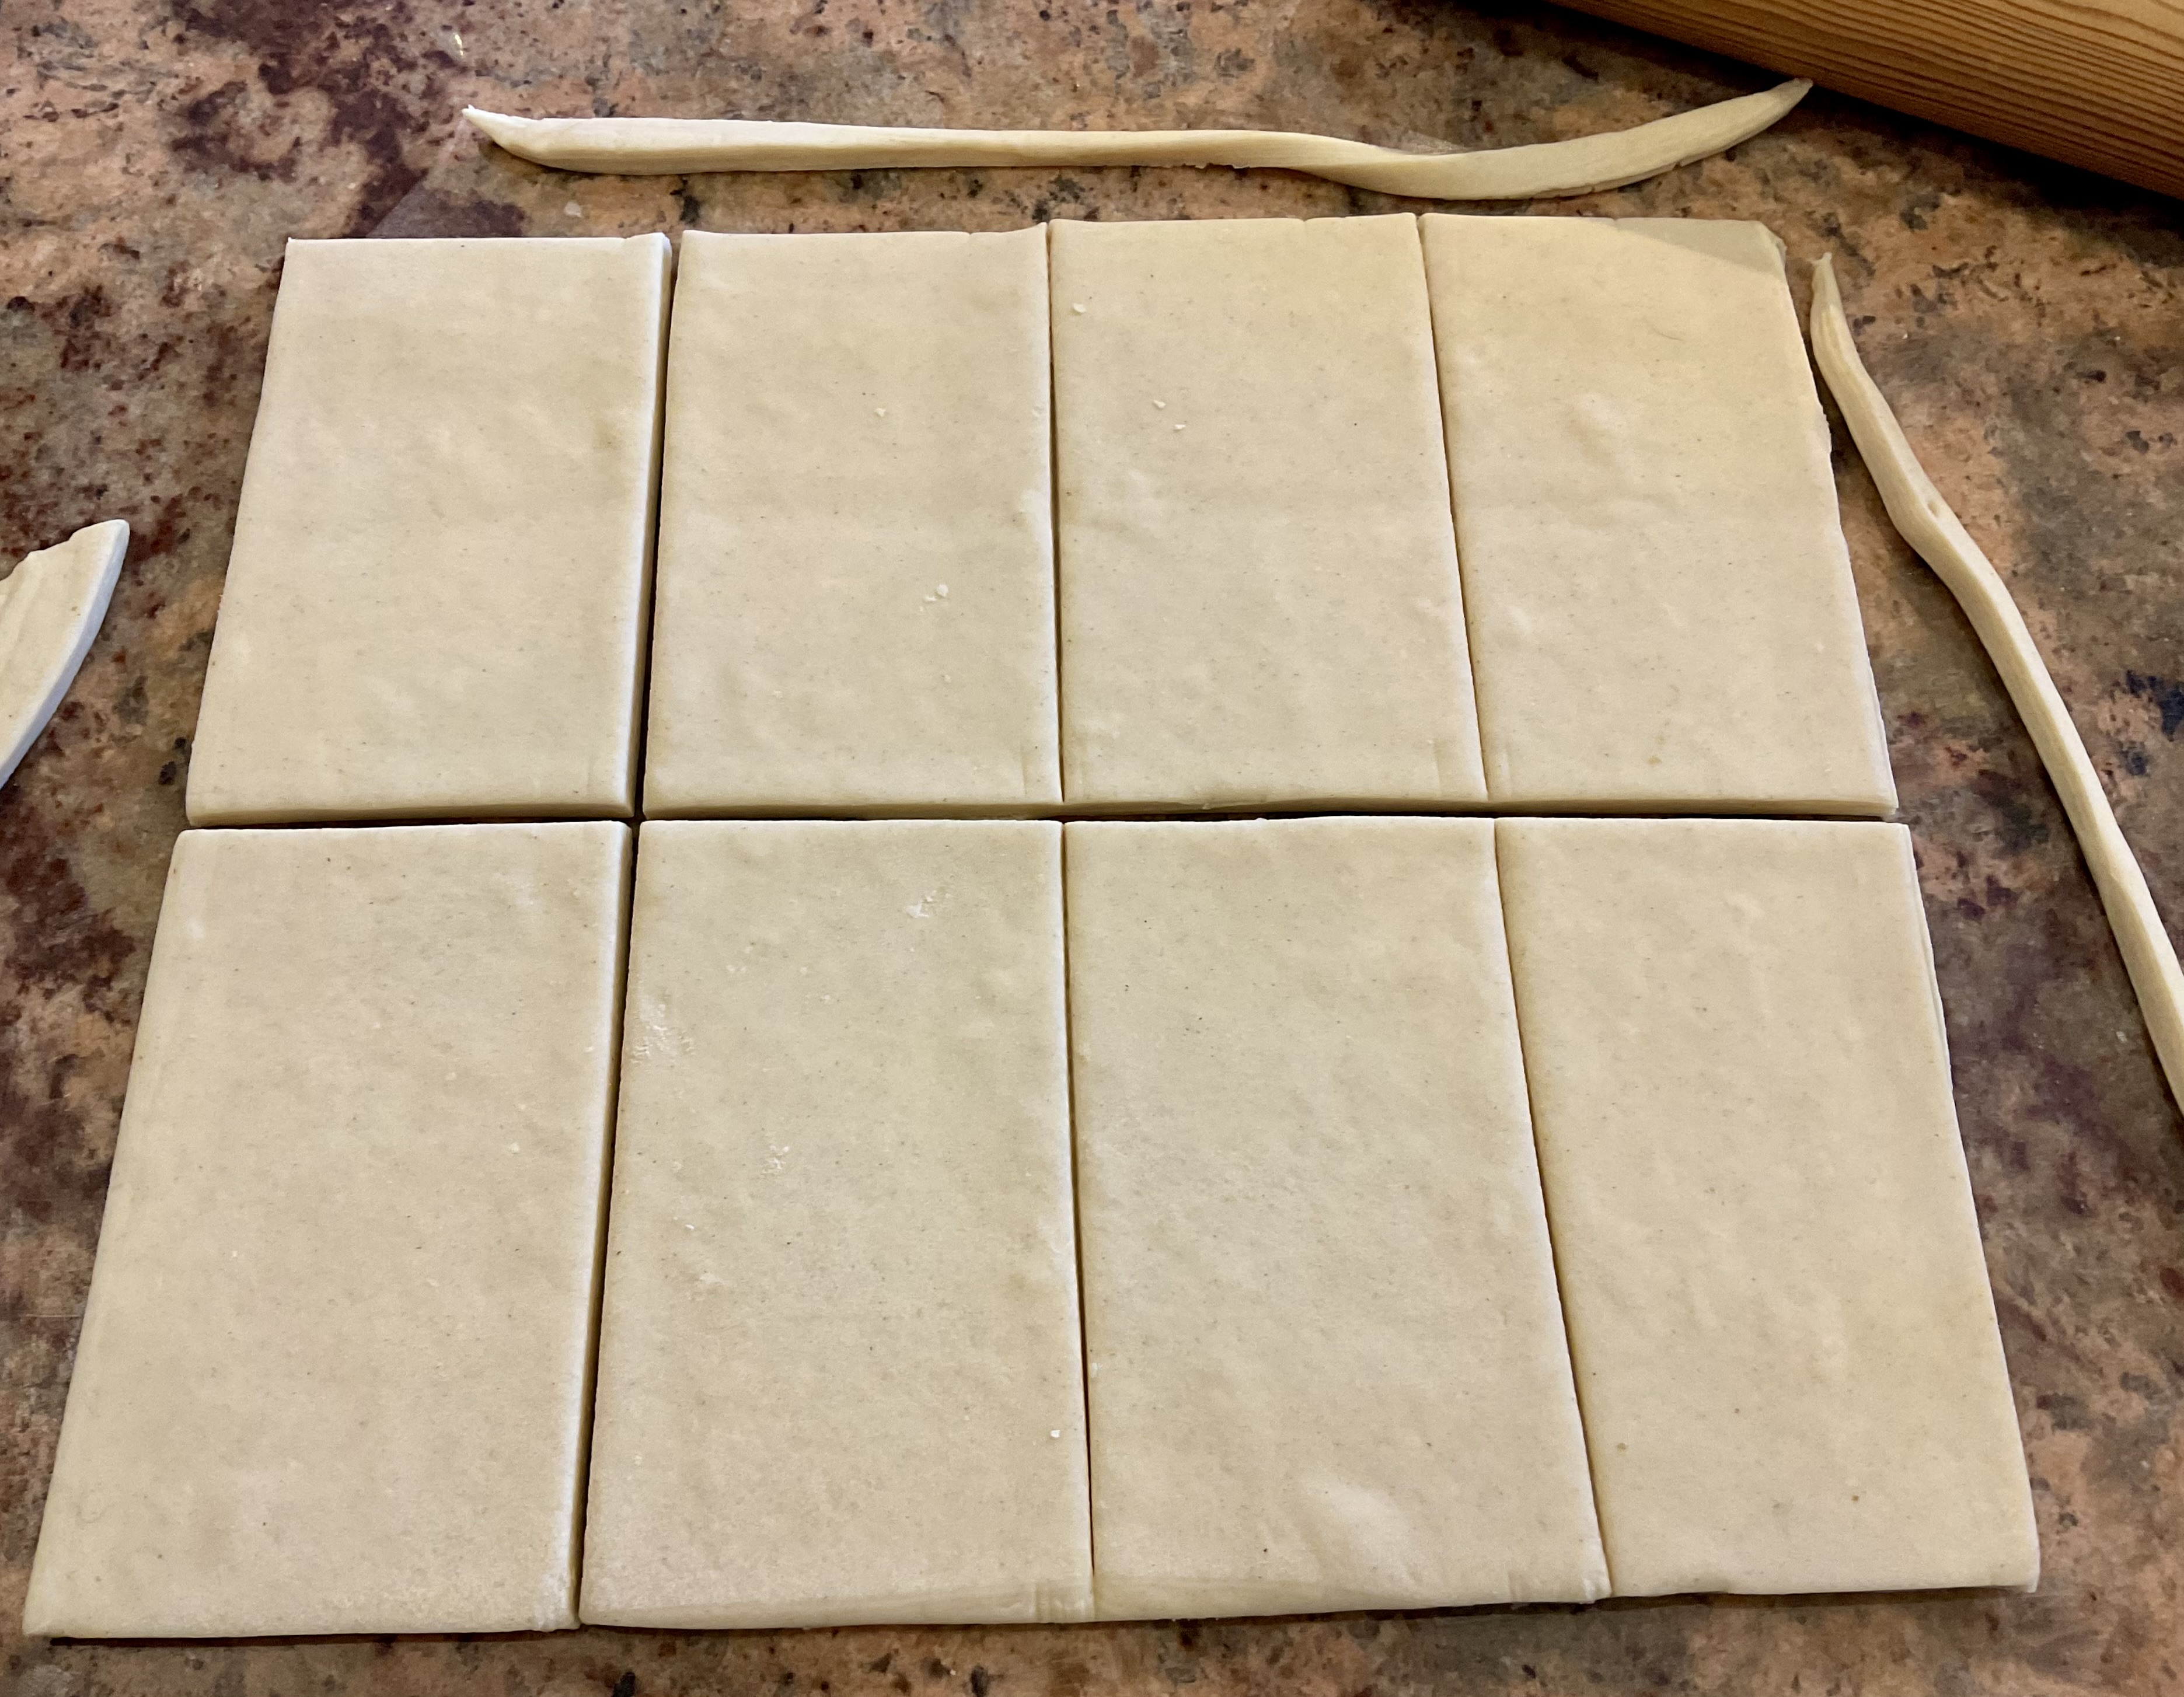
- Place onto a baking tray to chill for about 30 minutes and then shape in any of the two ways given in the photos below. I now tend to favour the second method as it gives a better structure:
Shaping method 1:
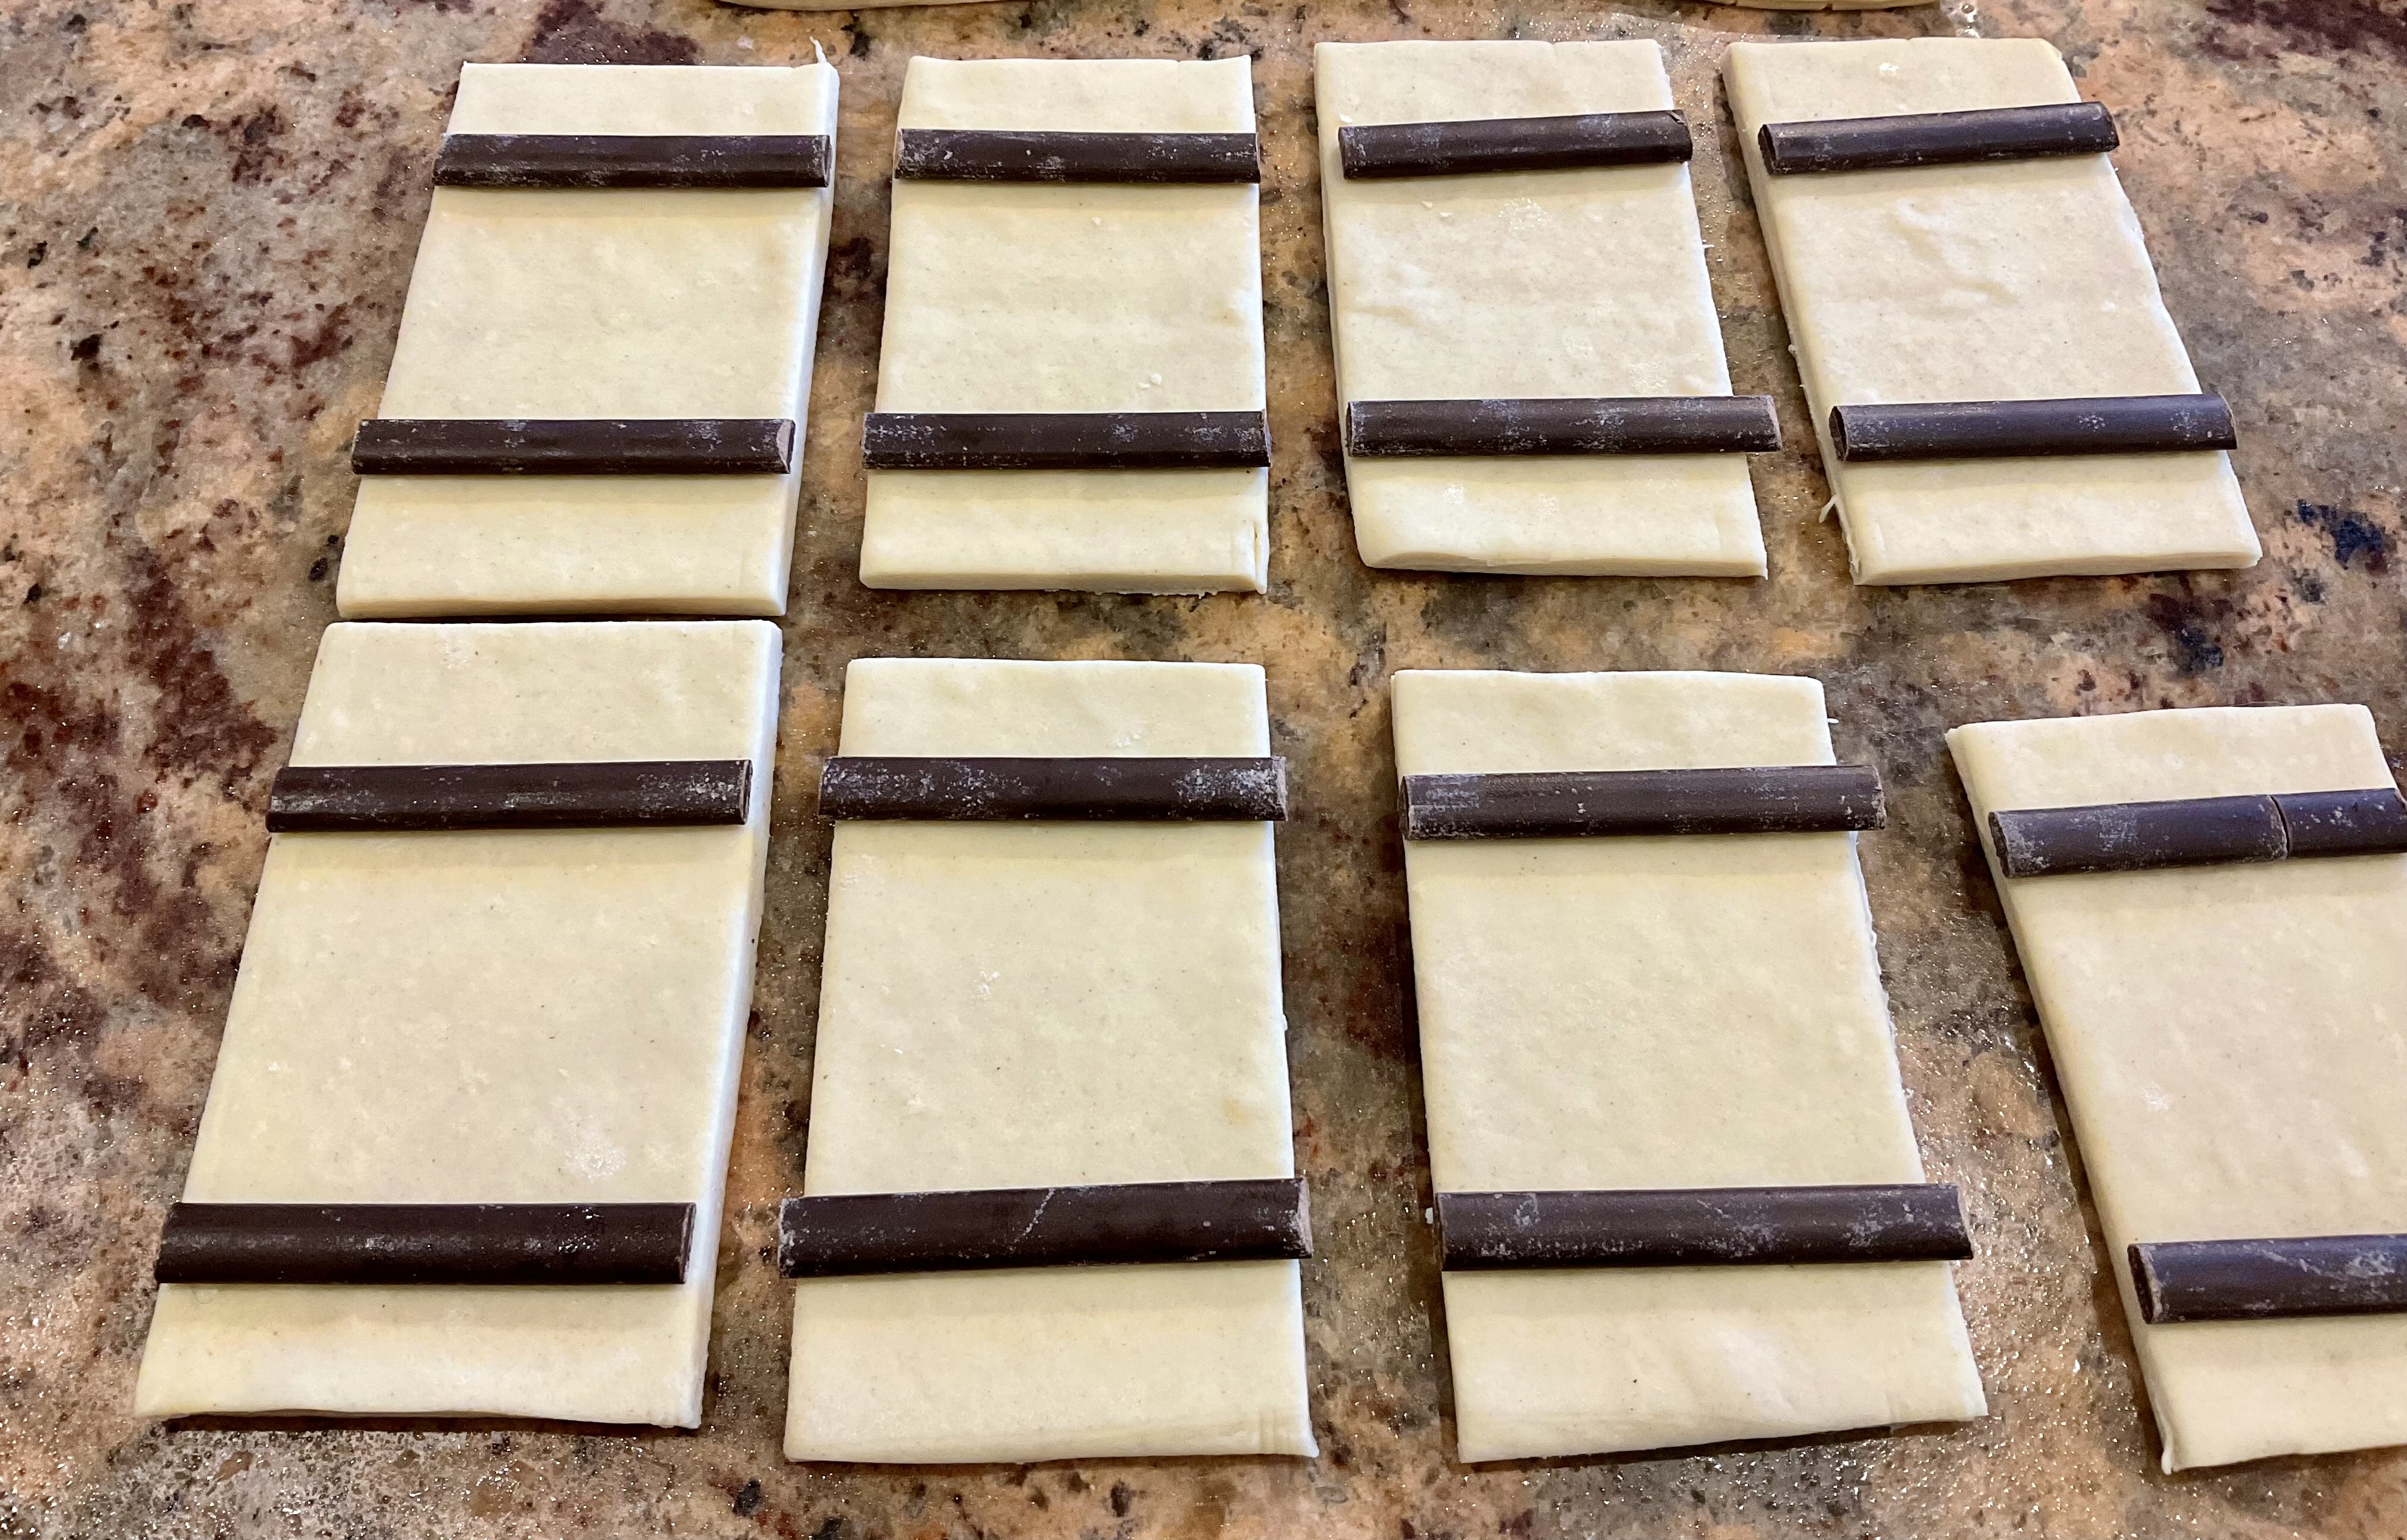
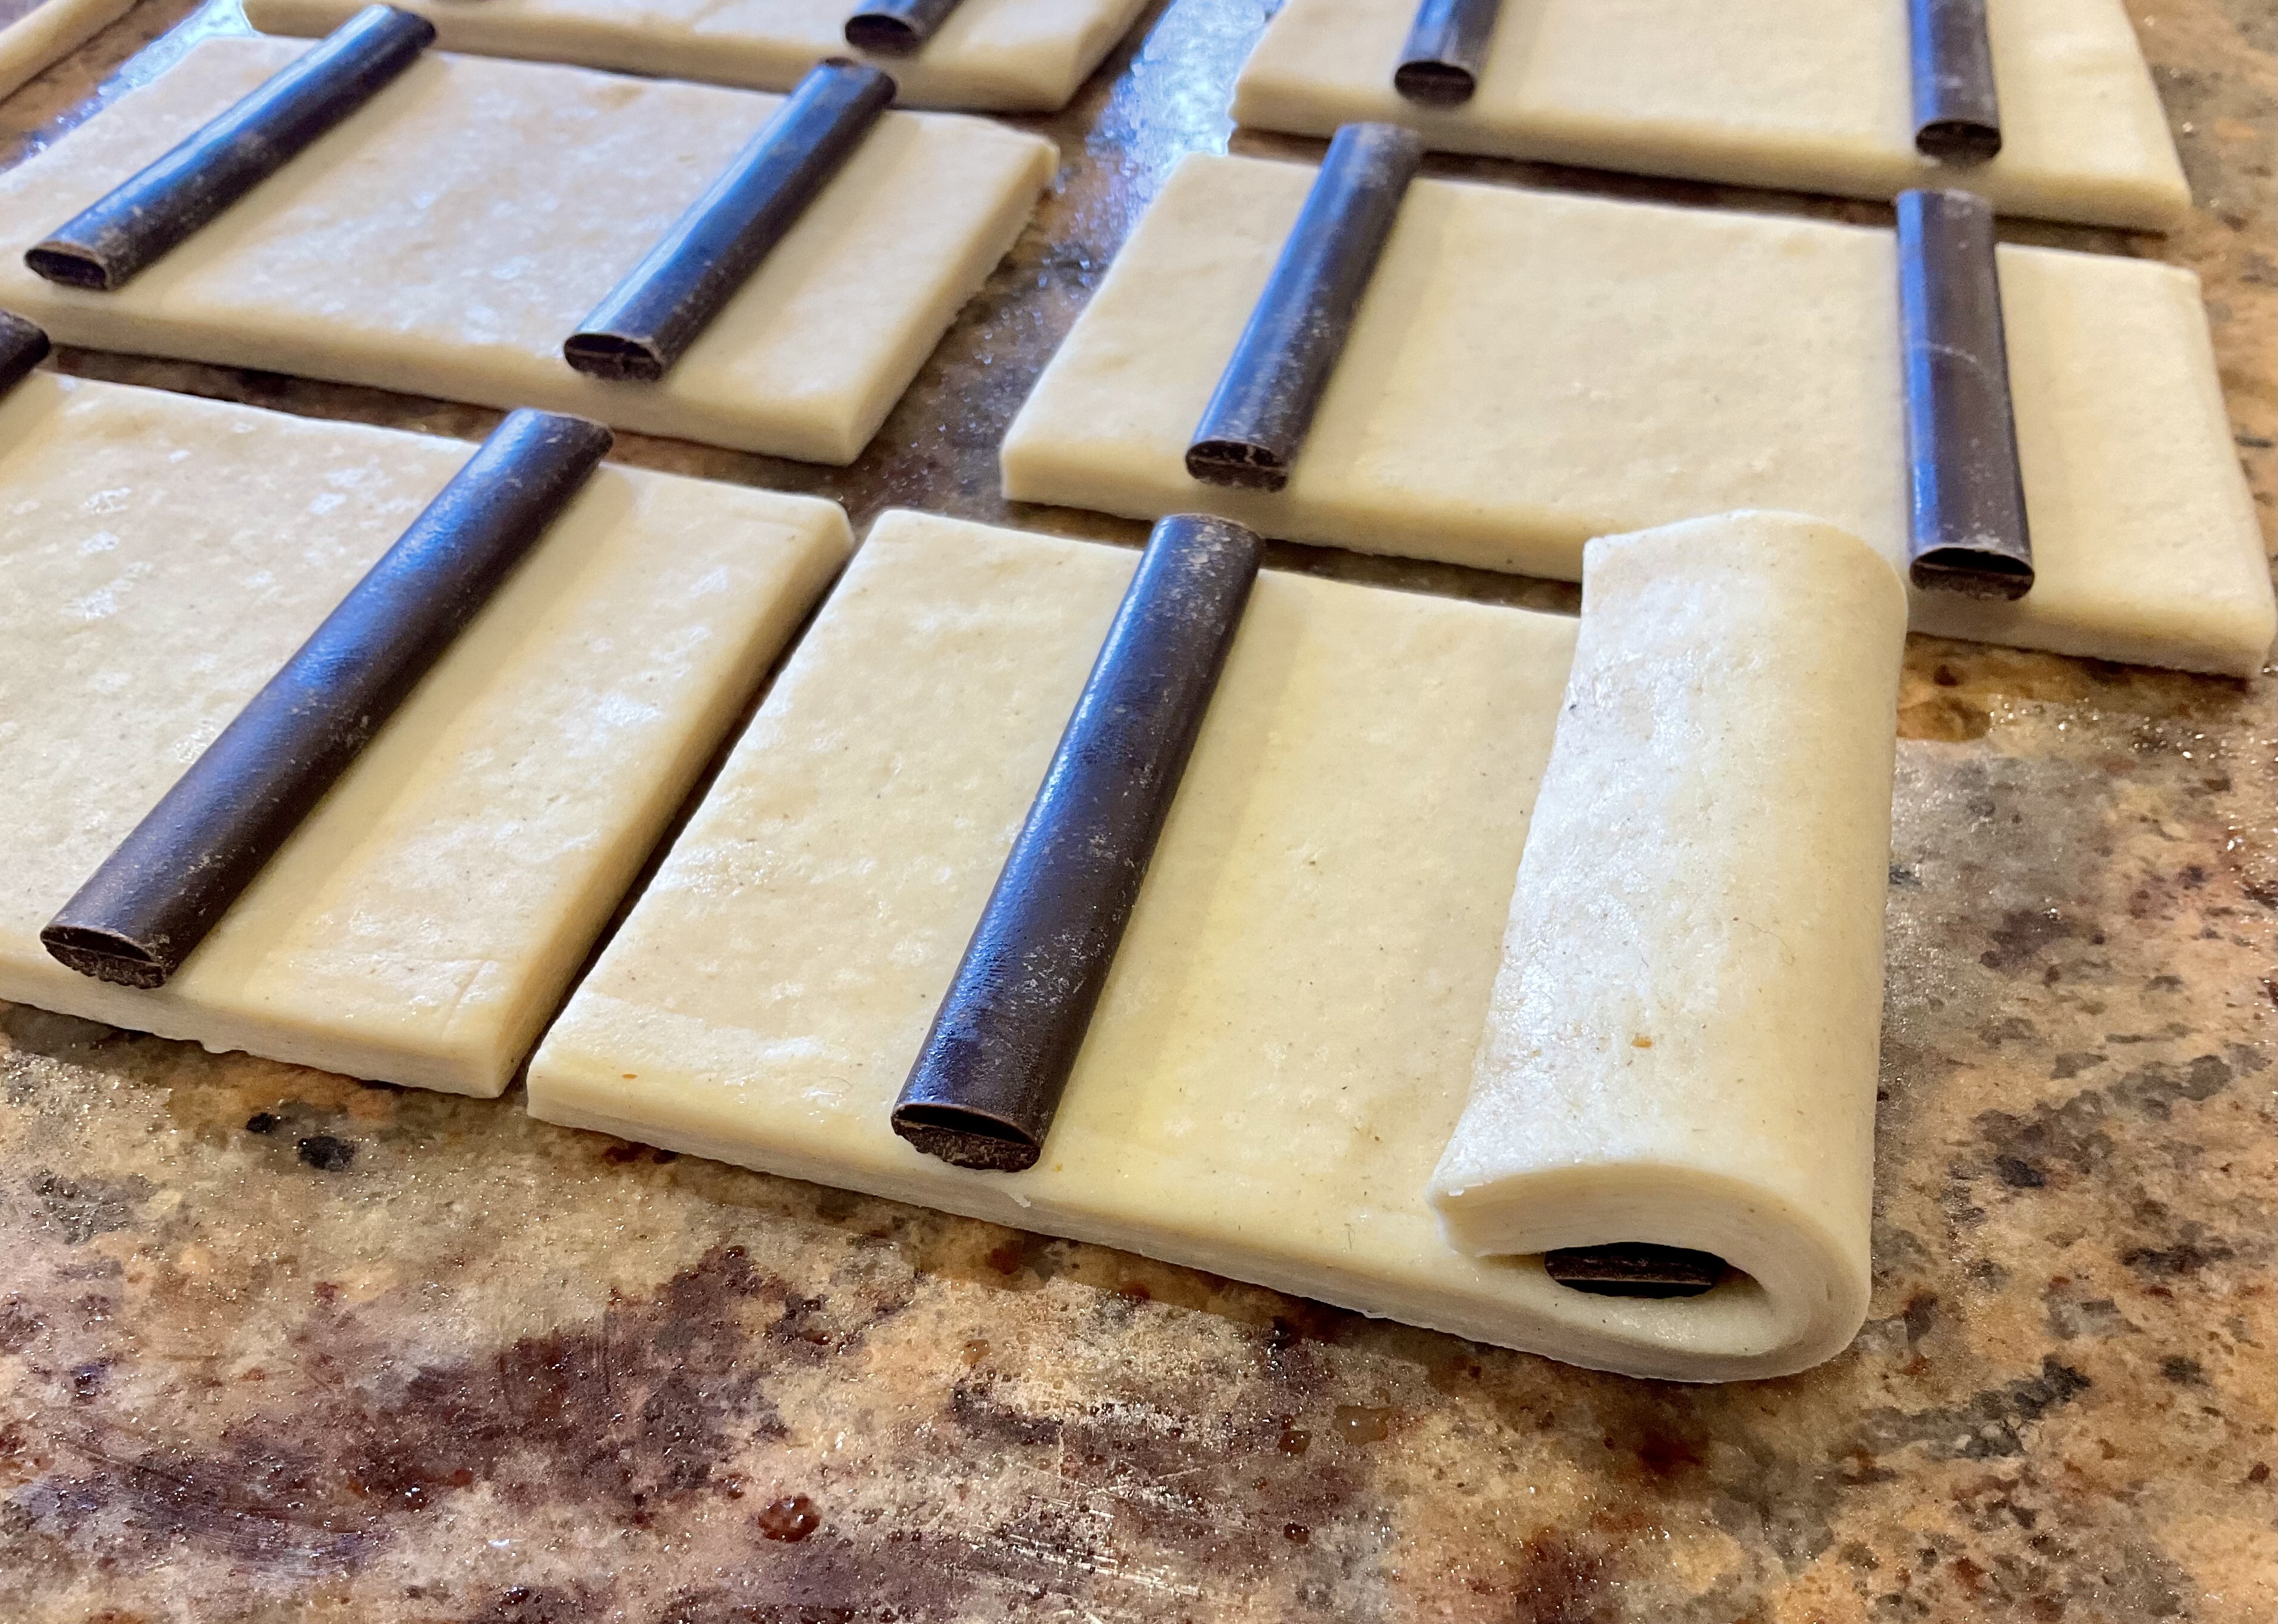
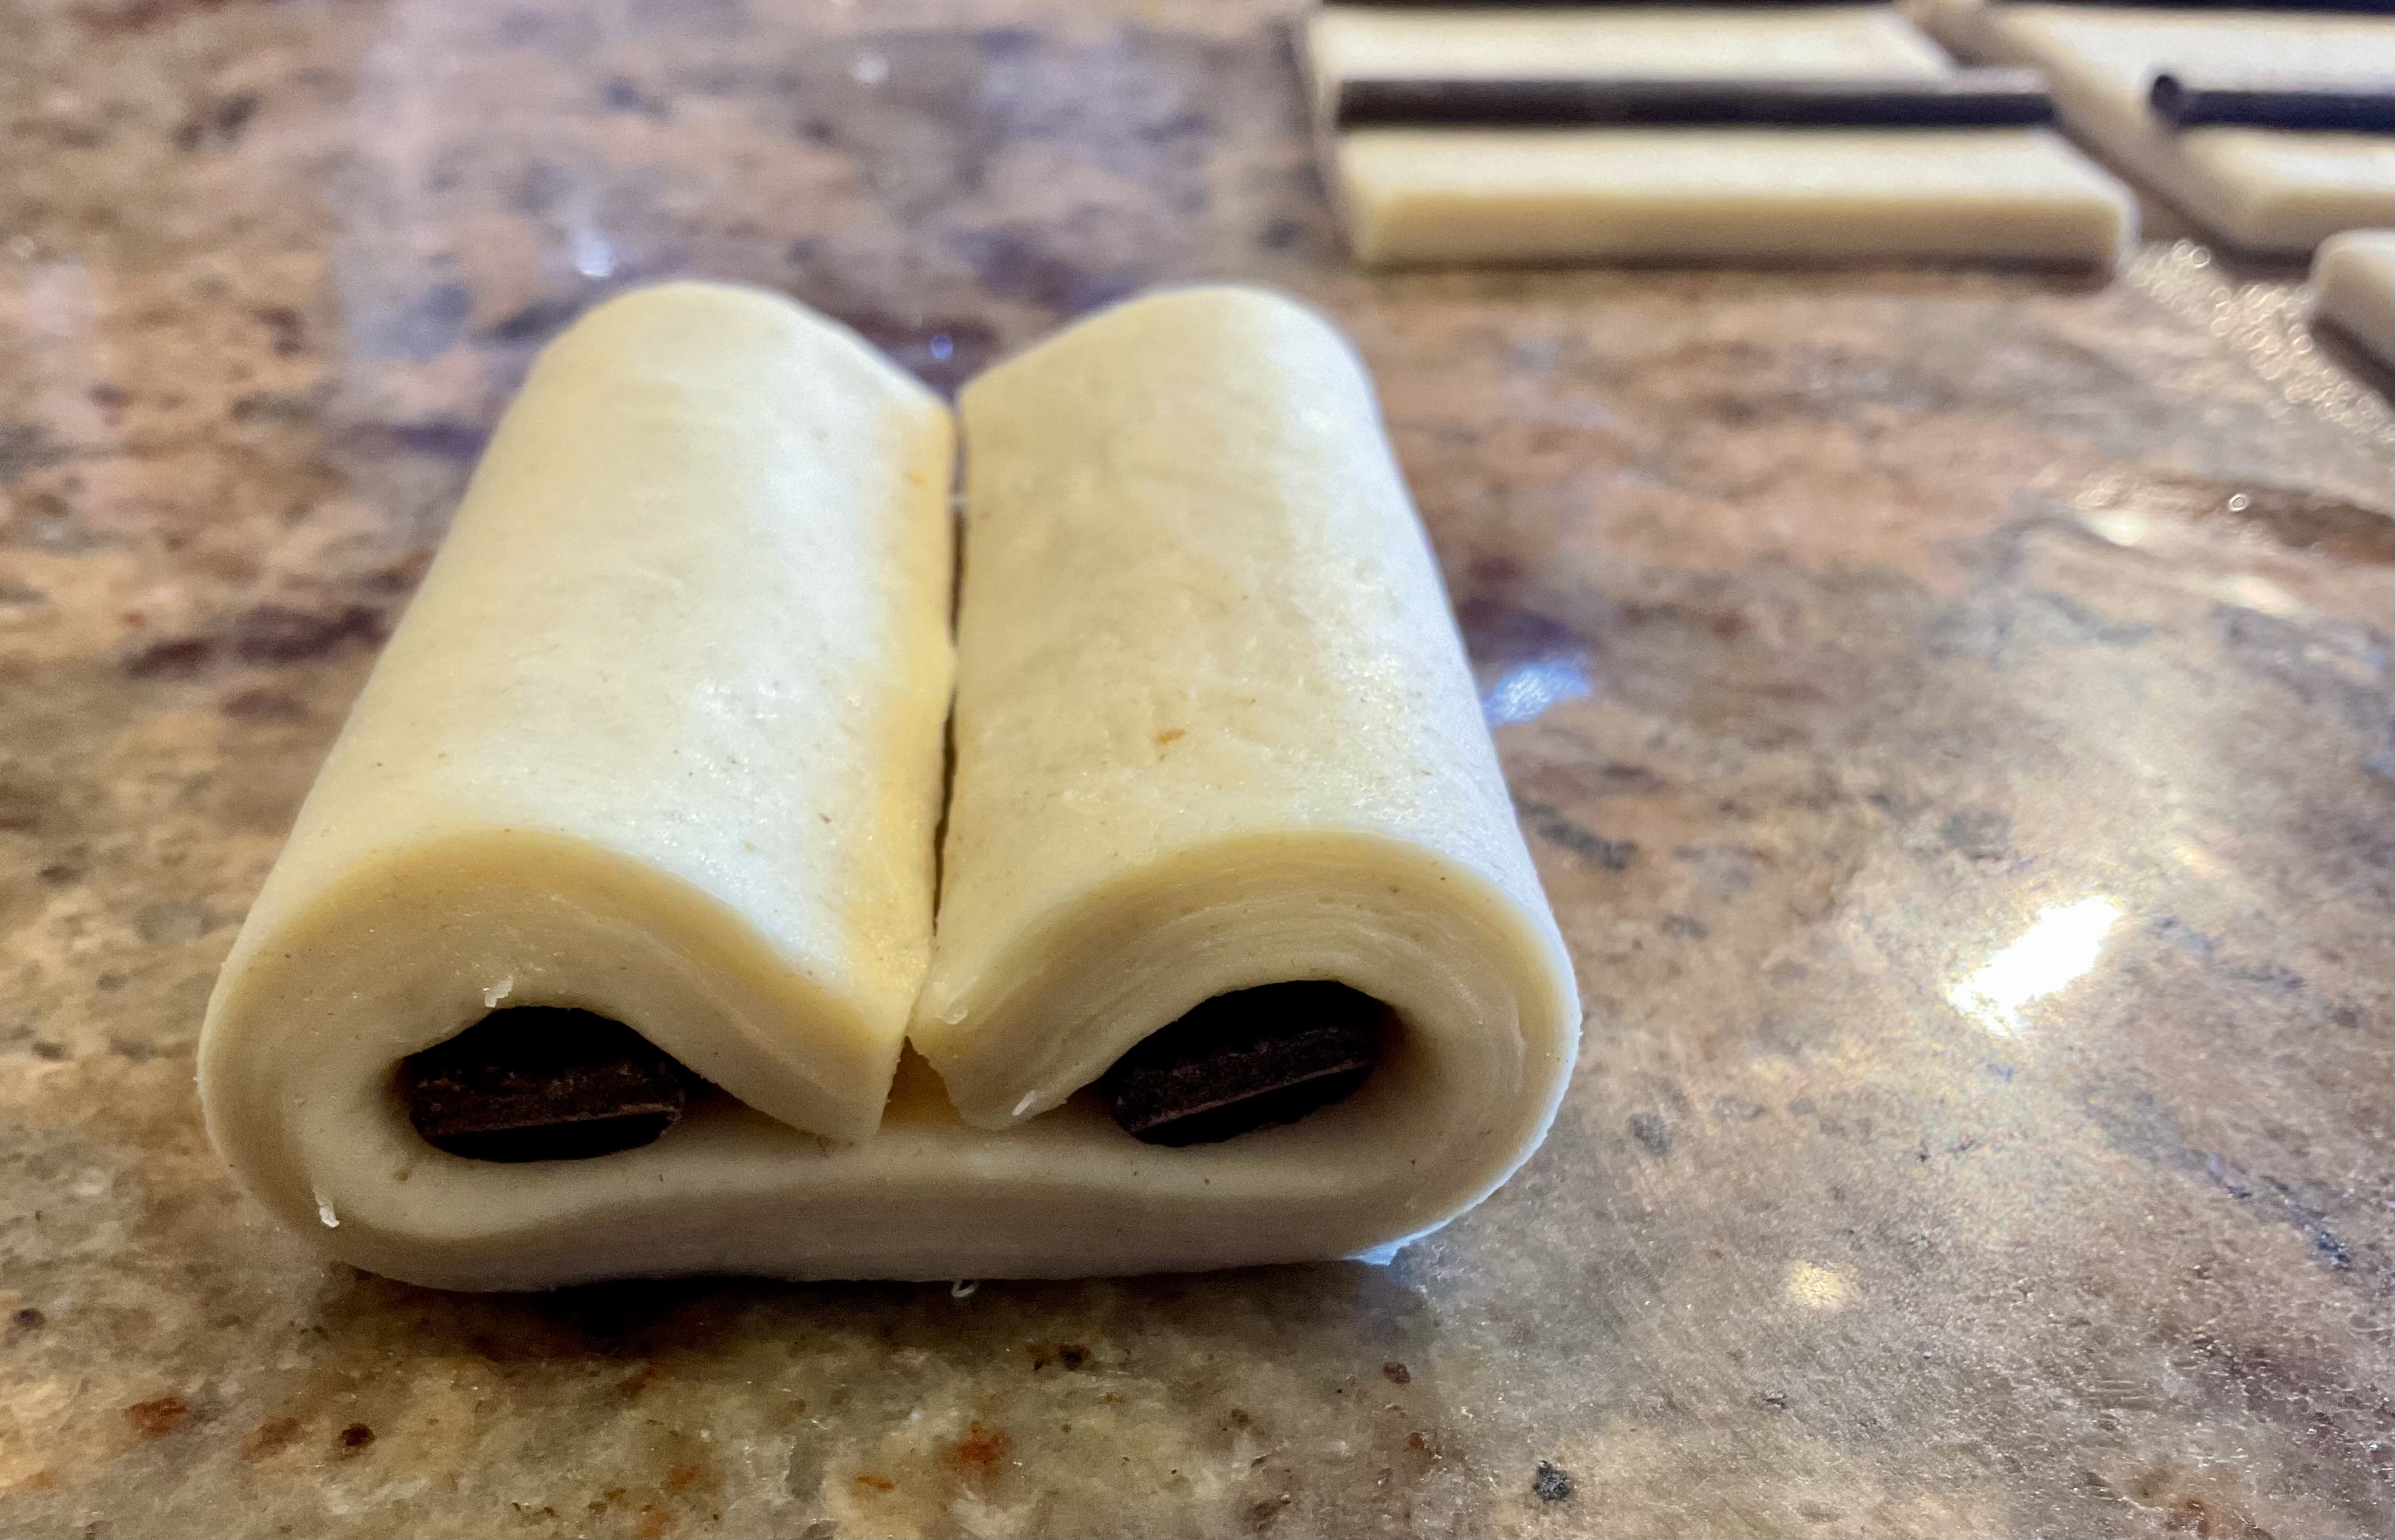

Shaping method 2:


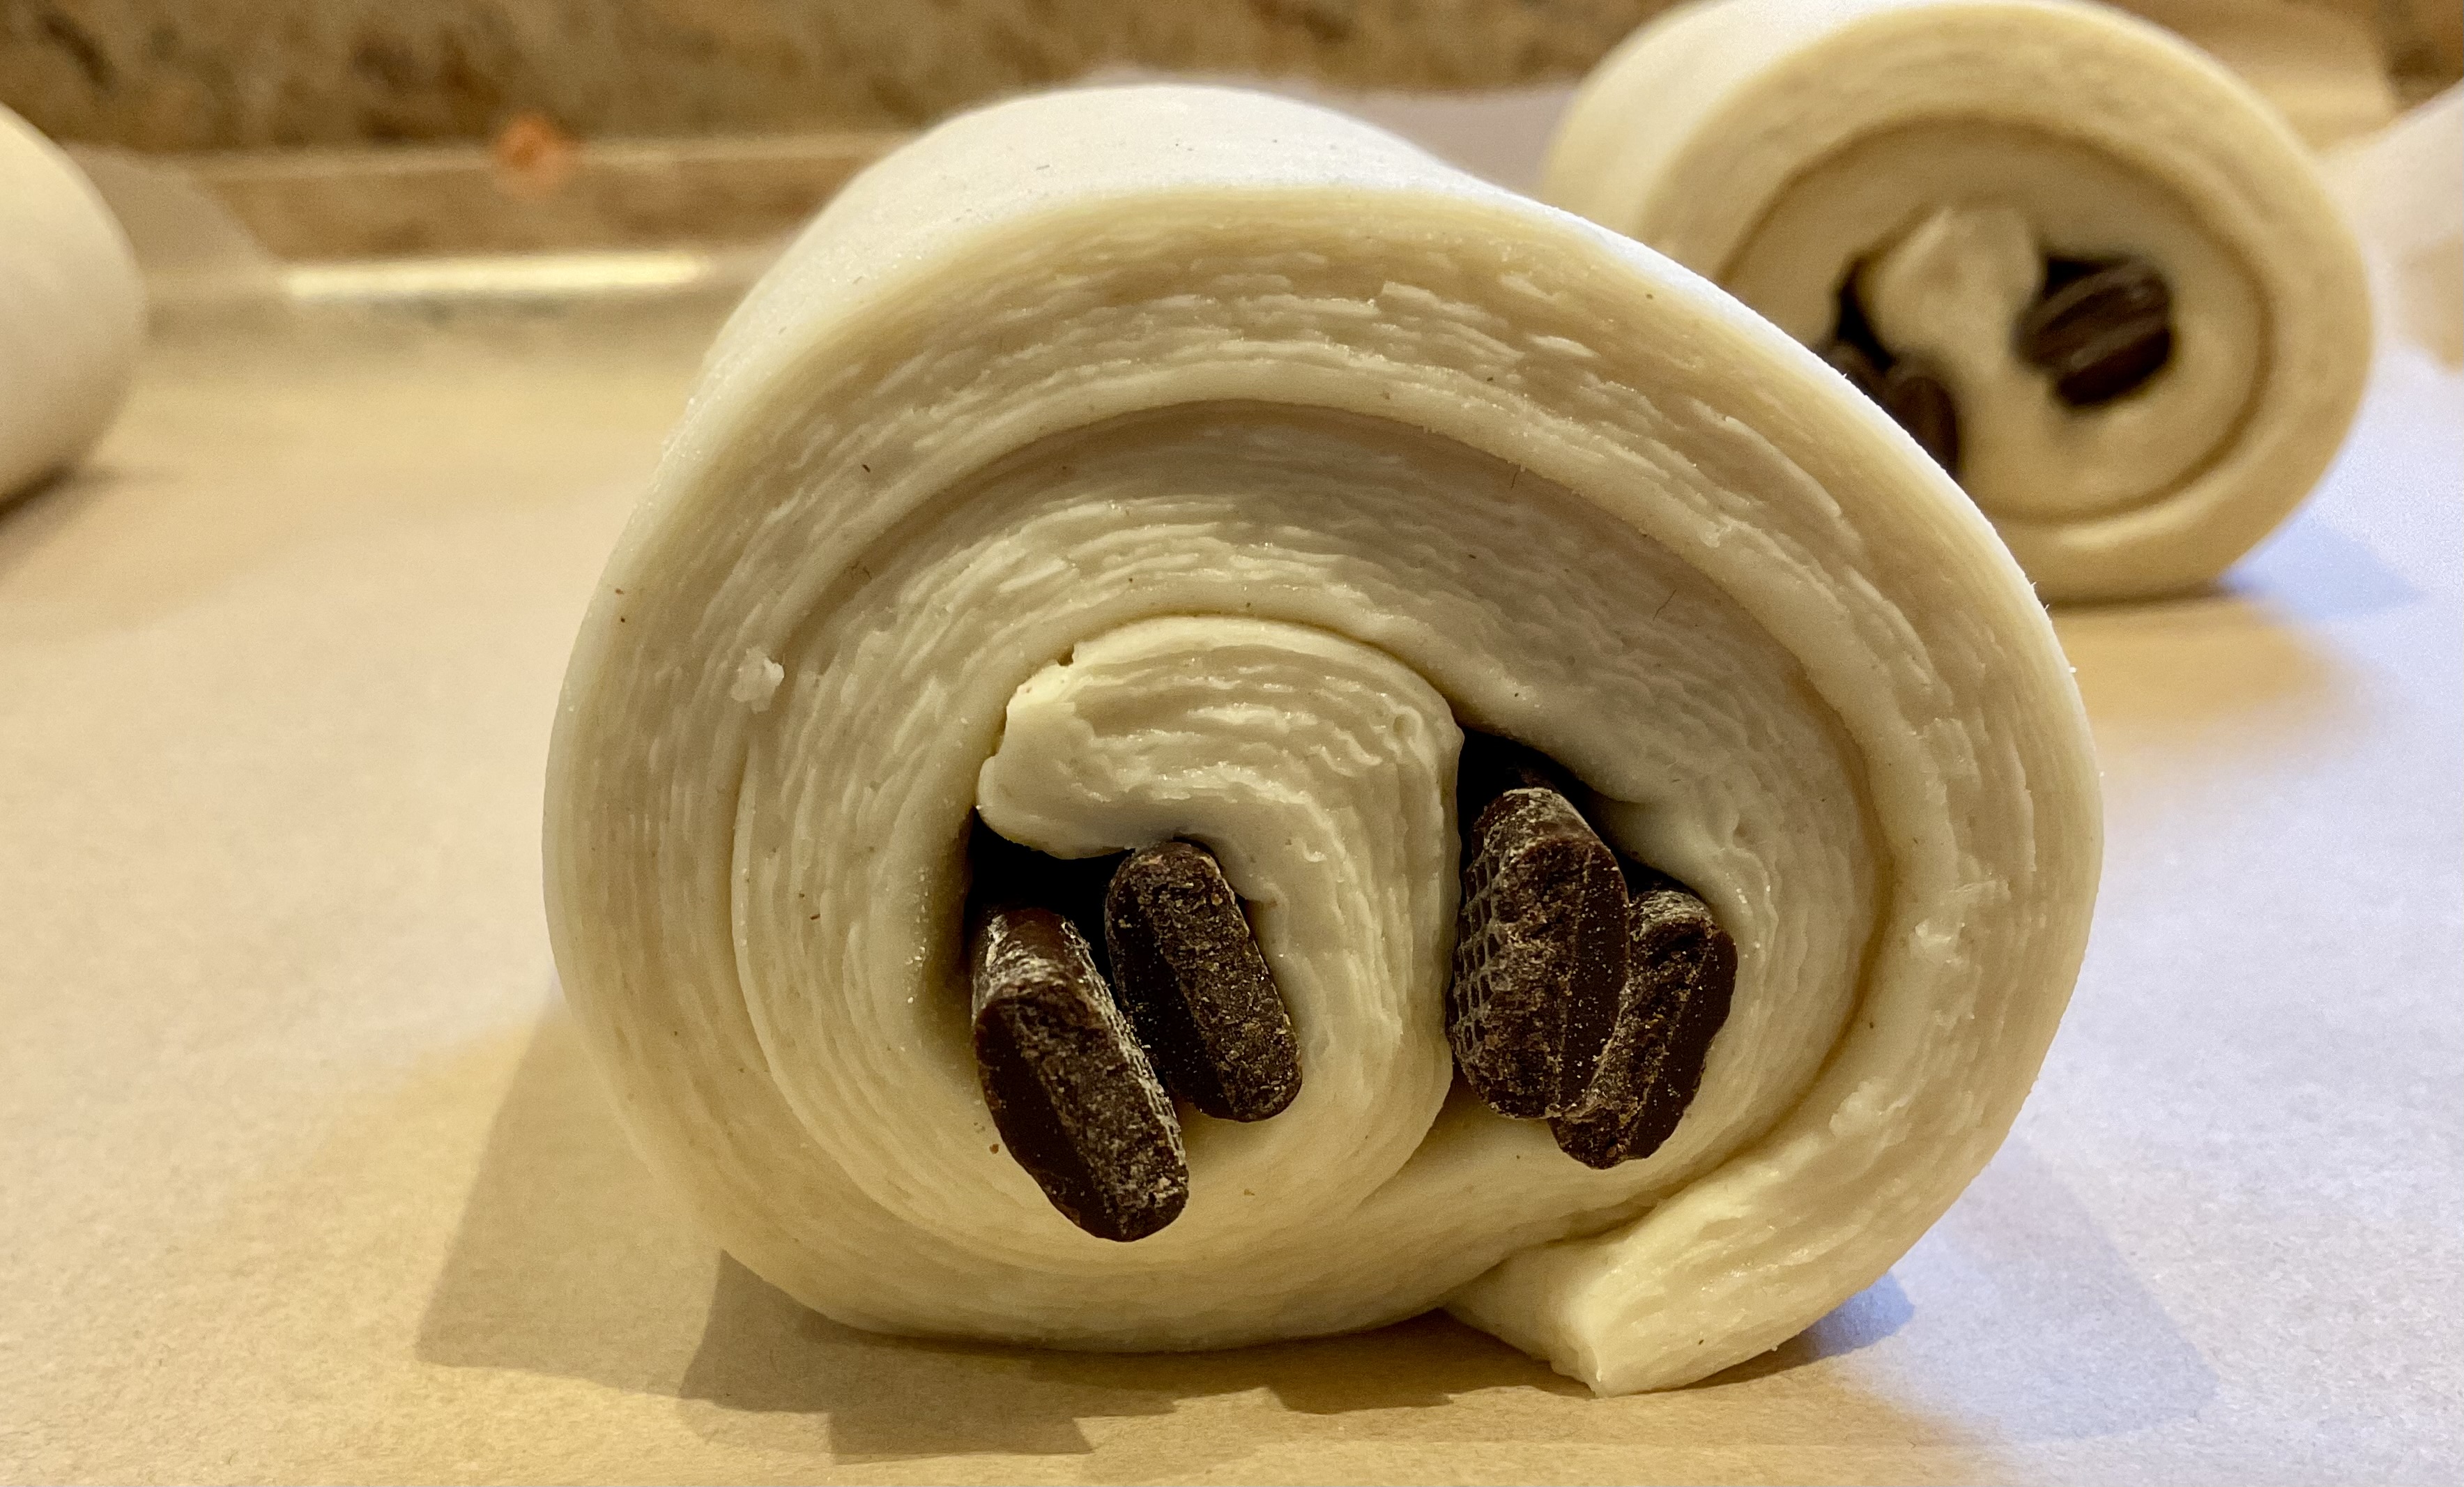
- Place the shaped dough on greaseproof-lined baking trays with the seam face down and gently pat down each one before egg-washing and then leaving to proof until well risen and puffy. Bake them as for croissants.
Top tips for croissant dough
It really takes a few goes at making croissants or pains au chocolat to get a feel for the processes involved, but these particular tips – which are referred to in the recipe steps above – should help achieve excellent results:
Ensure the dough is firm and very cold before encasing the butter
This helps bring the dough to a similar texture to the butter which in turn makes the rolling out easier and starts off the lamination process effectively.
The trick is to put the chilled dough into the freezer for about 15-20 minutes before you want the butter block to be encased inside the dough. During this freezing, remove the butter from the fridge until it just becomes pliable and you can bend over a corner easily without it snapping. When encased in the very cold dough, the dough will help keep the butter at the ideal texture.
Freeze and chill often to control the temperature and texture of the dough as well as the yeast’s fermentation
Freezing the dough (wrapped up) for 15-30 minutes at any stage of the process, followed by chilling for up to an hour will firm up the butter enough and help relax the gluten so the subsequent rollings out are much easier to do. The freezing/chilling also controls the yeast’s fermentation as without it, the yeast will ferment too quickly and too much: you don’t want it to be particularly active when trying to roll out the dough as it will resist, so you end up putting more pressure into the rolling out and ruin the lamination.
Try to avoid making a laminated dough in a warm kitchen
A warm kitchen makes croissant making even more of a challenge, so expect to have more frequent freezing (10-15 minute blasts at a time) followed by around an hour of refrigerating to prevent the butter softening too much. This more frequent freezing/chilling might feel a bit of a pain but it really helps give great results.
If my kitchen is very warm, I sometimes pop bags of frozen veg on the worktop before I roll out so that the worktop is very cold for the dough: just dry the work surface fully before rolling the dough on it!
Trim the edges and cut the folded dough
At each rolling out stage, cut the short edges to reveal the butter inside. This ensures there is no “trapped dough” inside which would hinder good lamination.
Once a turn have been performed, such as a book turn or envelope turn, cut the length of the dough where it is folded. This opens up the dough to reveal the butter inside and also releases the surface tension of the dough to make the subsequent rolling out easier.
Brush any excess flour off the surface of the dough
Too much flour trapped between the layers will affect the lamination and give a heavier, doughier interior rather than a light, open structure. Use a pastry brush or clean paint brush to brush away the surplus flour each time you have rolled out and as you fold up the dough for the turns.
Don’t rush the proofing of the shaped dough
Leave the shaped dough at room temperature to proof. You want the shaped dough to be puffy and with a slight wobble, and you should be able to see the layers of butter in there more clearly: this is always an exciting thing to see.
It will proof in a cool room (albeit slowly) or perhaps 3-4 hours if the room is fairly warm. However, don’t be tempted to pop the dough into the airing cupboard as it will be too warm and the butter might melt.
Check the progress of dough after a couple of hours and thereafter every half hour or so: you want to avoid any over-proofing which will be the case of the dough starts to tear on top, so be ready with the oven.
Line the baking trays well
I always go for a double thickness of greaseproof paper to prevent the croissants getting too dark on their bases.
Rough timescales for making croissants:
Making croissants is more a weekend affair for me, and I often stick to the timescale below, which work well for me:
Timescale:
Day one – morning:
- make up butter block (about 16cm by 16cm) and chill
- make up the initial dough and knead well
- cover and proof until risen to about half its original volume
- roll out to a rectangle: to just over 16cm by 32cm. The width needs to be the same as the butter square; the length needs to be as close to twice this butter size as possible (don’t encase the butter yet!)
- wrap dough in clingfilm (folding it over if needed to fit on the tray) and freeze for an hour
- refrigerate until the evening (the dough needs at least 7 hours)
Day one – evening:
- encase the butter block in the dough
- roll out and do the turns to laminate the dough
- roll it to about 1cm thickness
- wrap in clingfilm and freeze the laminated dough for about an hour
- transfer to the fridge until the morning
Day two – morning:
- roll out dough thinly
- shape and leave to proof
Day two – afternoon:
- bake

Variations
Below is a selection of some of my favourite variations. You can scale the ingredients down as I’ve done with the main recipe above if you want to work with a smaller amount of dough.
One of my favourite sweet variations is bitter orange pains au chocolat incredibly indulgent and divine to eat slightly warm.

But I am quite partial to chocolate and ginger pains au chocolat
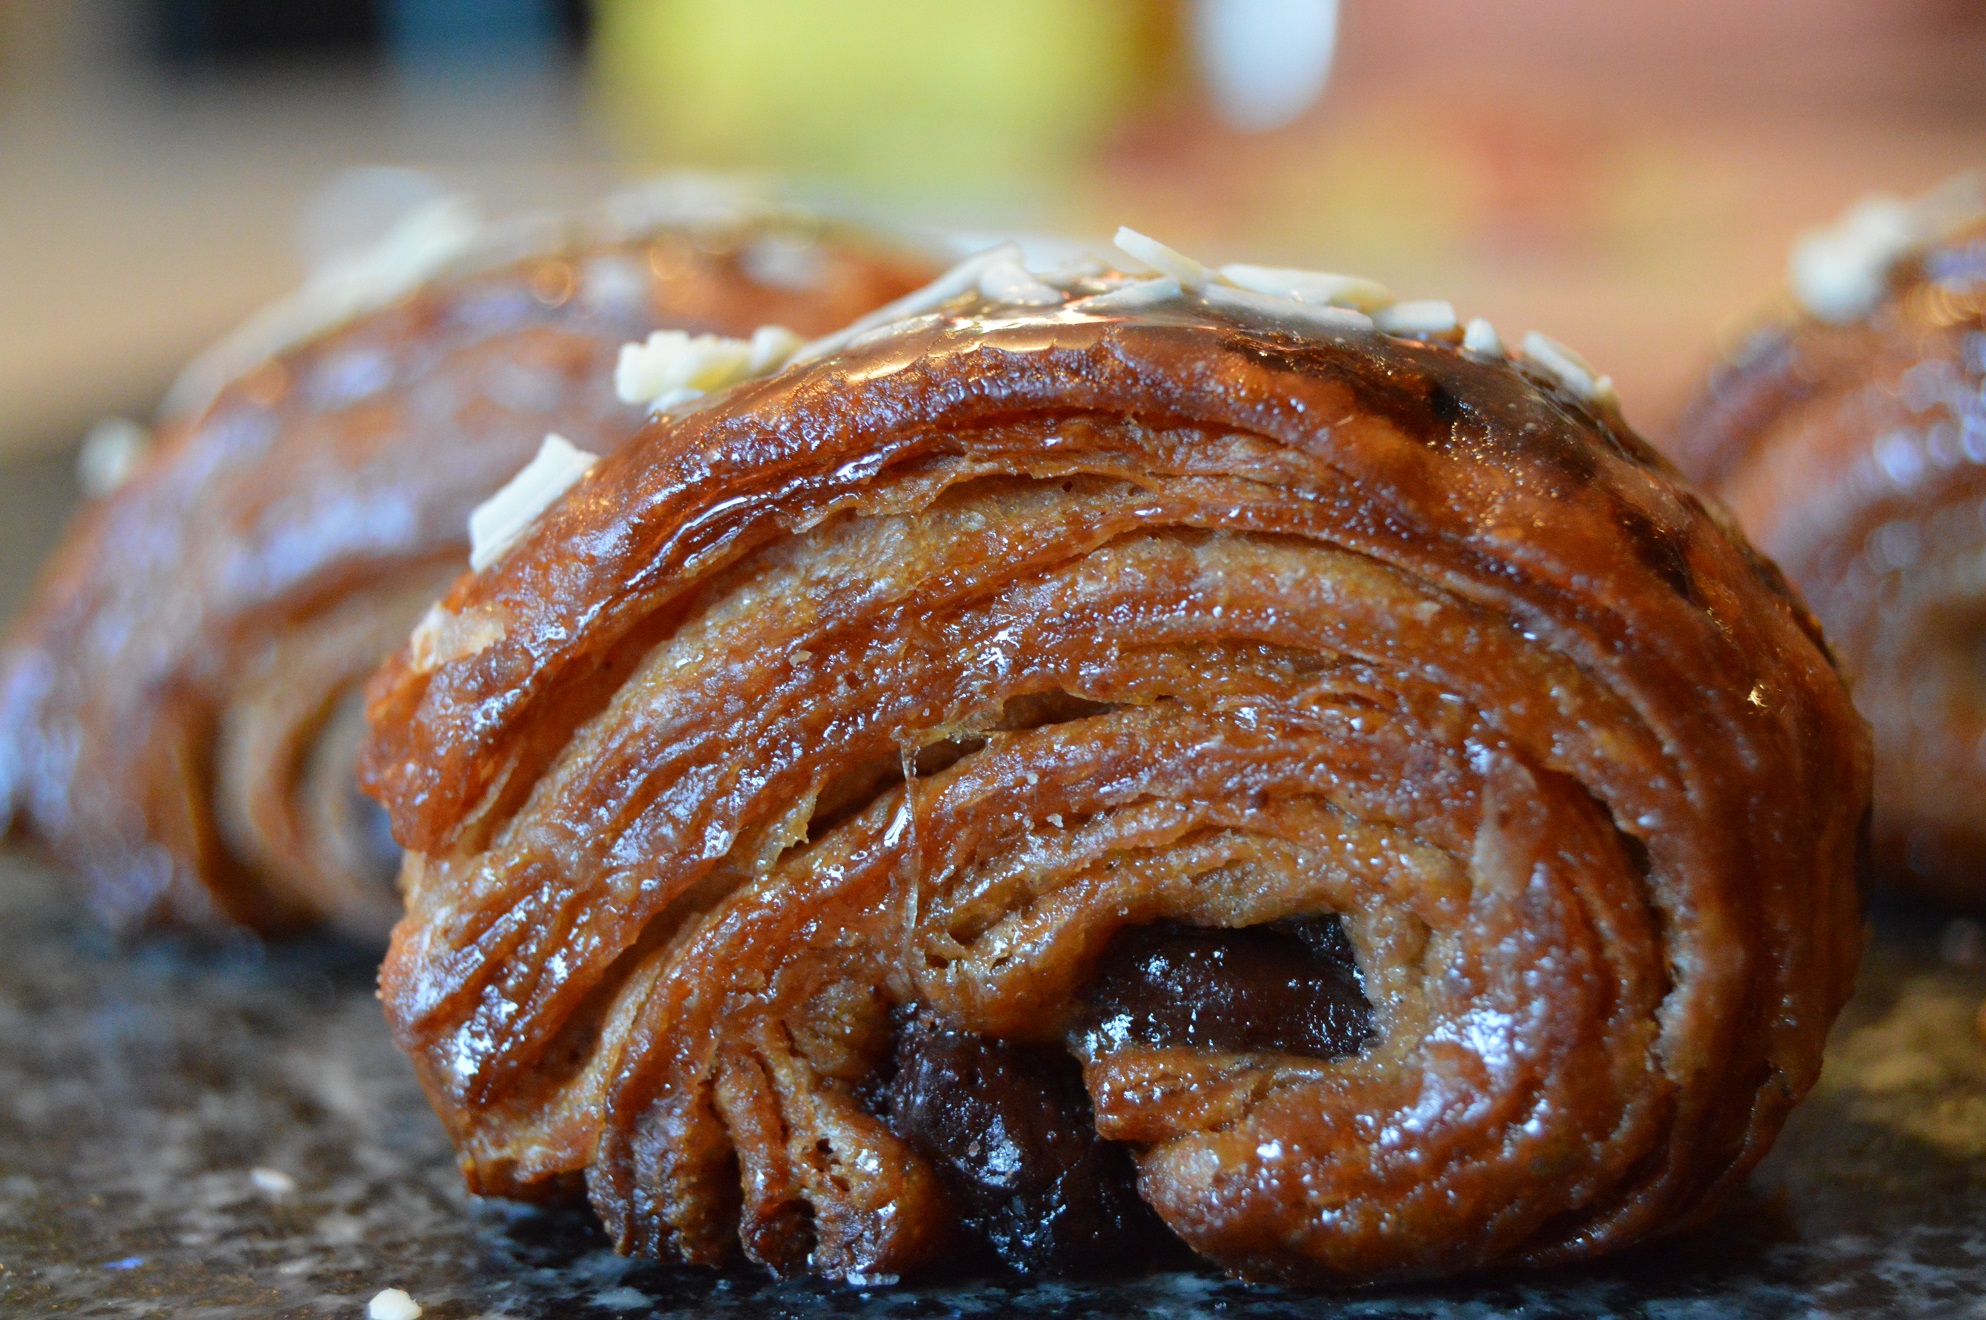
Mind you, spreading salted caramel over the dough before adding the chocolate and shaping gives wonderful salted caramel pains au chocolat:
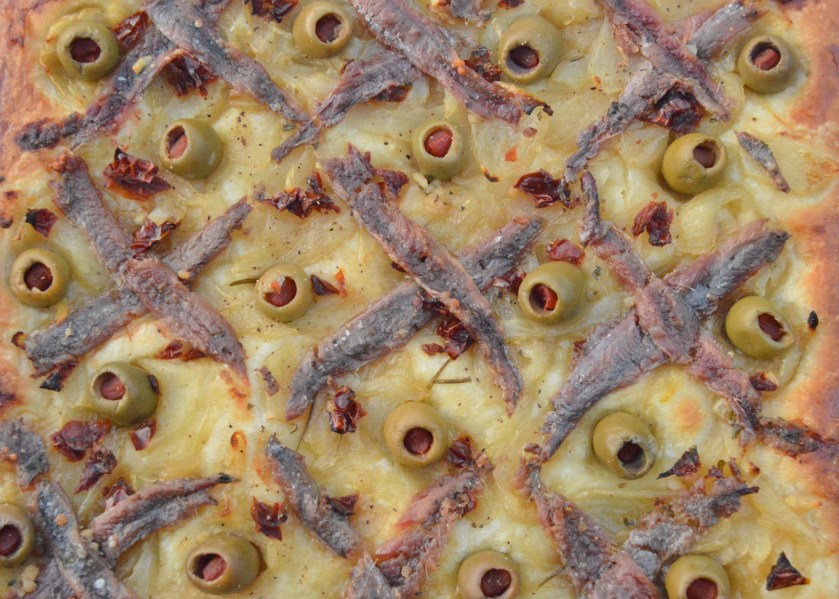
My favourite savoury variations include:
- croissant-based “pizza” (topped with slow-roasted onions, anchovies and olives) – my croissant dough version of the classic pissaladière:
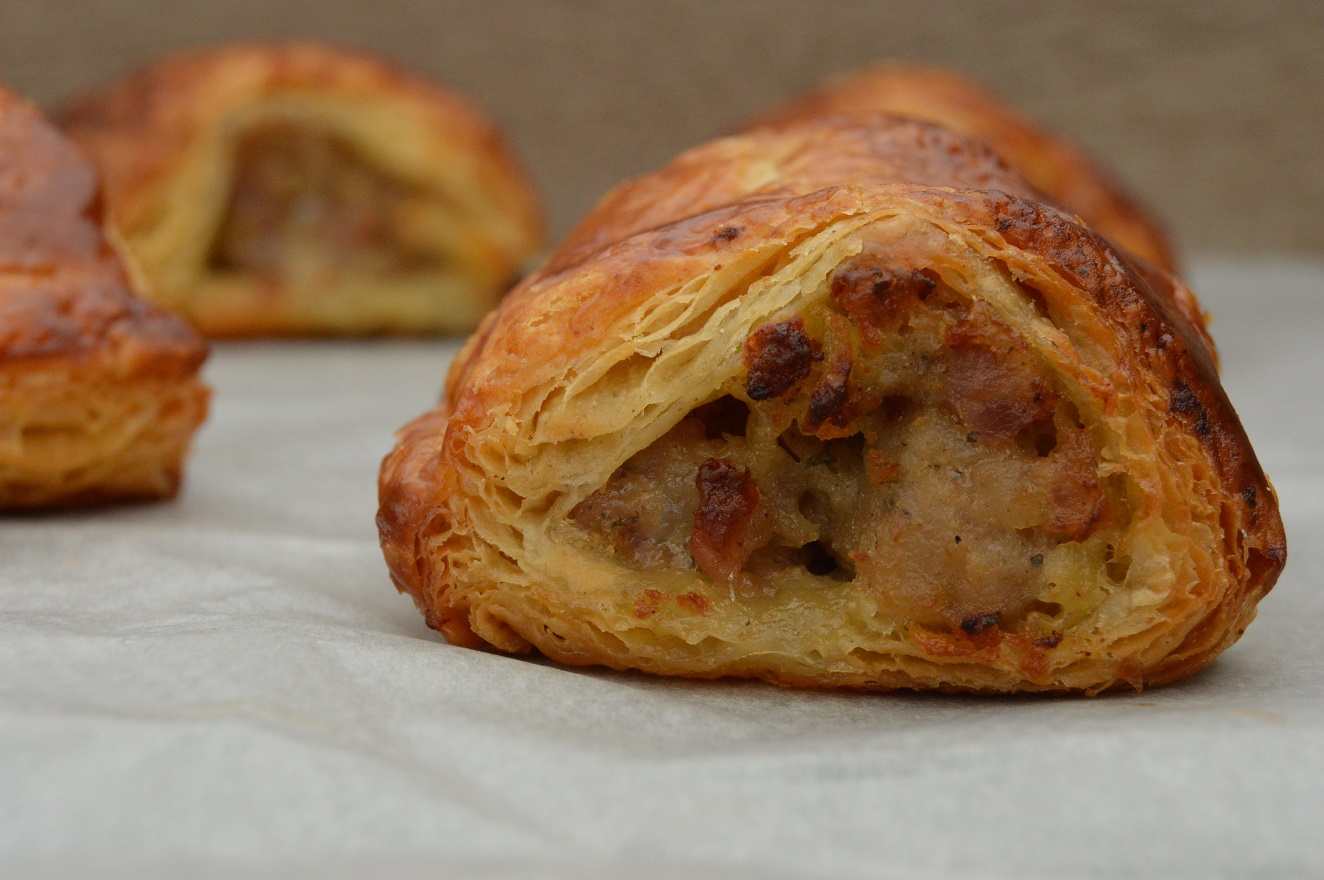
- croissage rolls (essentially sausage rolls made using croissant dough rather than puff pastry)
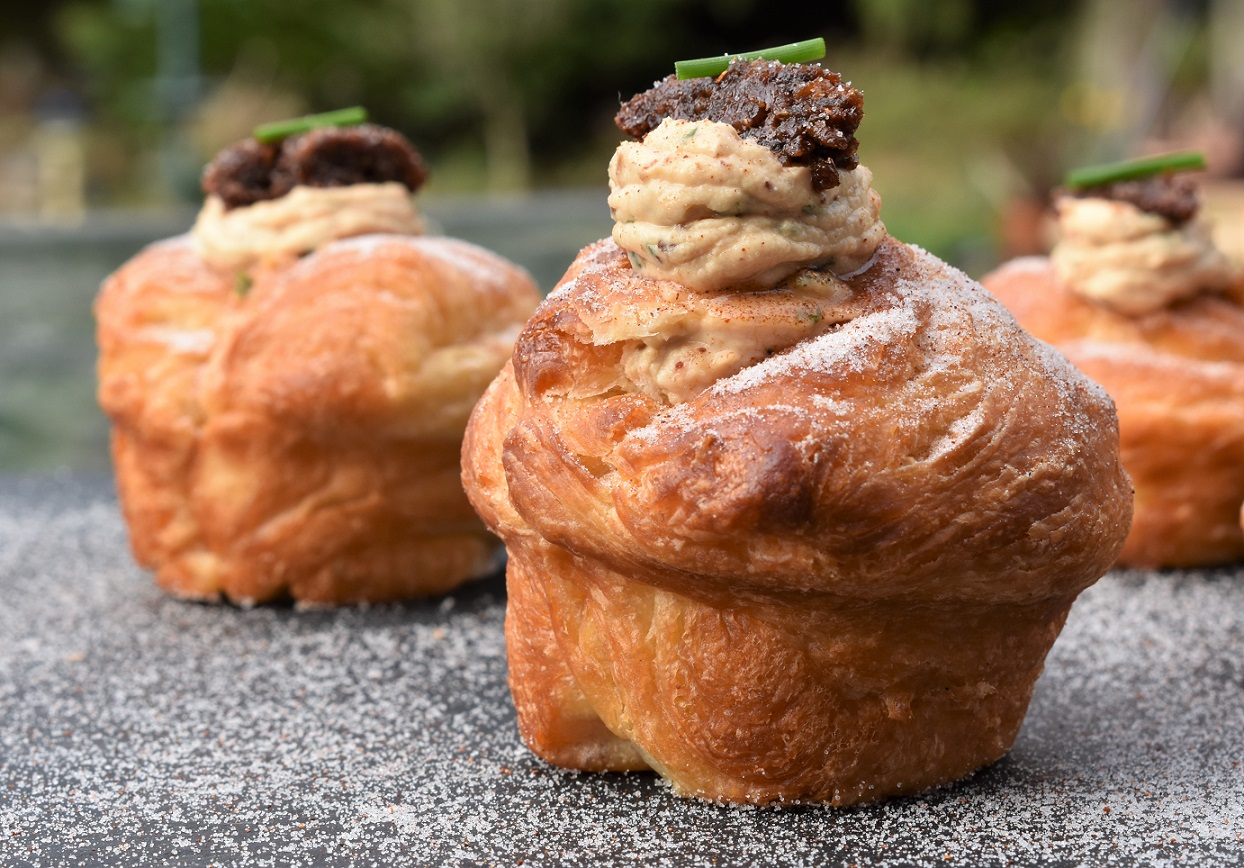
- bacon and goats’ cheese “cruffins”: strips of croissant dough rolled up and shaped in muffin tins before getting filled
Quicker croissants:
You can incorporate the butter grated from a frozen block of butter, which gives a dough that takes about 20 minutes to make up (before it needs to rest, get shaped and proof).
This is certainly an easier method and it is much quicker to get the dough laminated, taking no more than half an hour. While the dough still benefits from overnight resting prior to shaping, it works very well with just a few hours rest in the fridge before shaping.
The result is a flaky croissant with a nice structure, although it does not have quite the same level of honeycombed interior as you get with the traditional method. But it does give a pretty decent croissant!
My recipe for these quicker croissants is here.


The croissants are beautiful. Croissants are probably my favorite thing in the world to eat. It is pretty rare that I do eat them but would love to try and make them. Maybe on a cool day this fall- I’m bookmarking this recipe!
LikeLike
Thank you. Yes, croissants are great to eat. Do make some – it’s great fun.
LikeLike
Reblogged this on Bunz Bakes.
LikeLike
Nice post well done. You can really see how your laminating technique has gotten better from 2010 to 2012 to 2013 in the finished product. Laminating is for sure an art that takes time to perfect. Check out our Kouign Amann. It took me 9 months of doing it 6 days a week to get to that point and you really have to push yourself to be better every day.
LikeLike
Ah, i have never eaten let alone tried to make Kouign Amann but will certainly given them a go. They look gorgeous.
LikeLike
At last a recipe for croissants that works properly for me. I followed your advice to the letter and got amazing results. I agree with you about the resting. the more the better for sure.
LikeLike
Definitely on the resting. And you can just let them do their thing while getting on with other things!
LikeLike
I have made croissants for years but have usually suffered with doughy rather than flaky croissants so I tried these out. First time round I didn’t rest them overnight and although they flaked ok they were not as light inside but they tasted great. Second time I did rest them overnight and they were perfect. Thank you.
LikeLike
Glad they worked out. It’s always a joy to get the flake and the lightness inside
LikeLike
Reblogged this on bakingfanatic and commented:
Updated with further troubleshooting and general tips
LikeLike
Made these this weekend and they turned out great. I was a little concerned though when I saw that some of the butter was leaking out, even though I’d kept them in the fridge after proofing. (Had to open all the windows in the kitchen as it was getting smoky, I’m sure the neighbours thought I was burning something, little did they know it was only butter!). Got the dimensions slightly wrong on the pain au Chocolat, the dough seemed quite small, but the end result is what counts and they are very tasty. Am going to have to stock up on uncooked croissants for the summer, when it is definitely too hot, here in Spain!
LikeLiked by 1 person
Hi there, just want to say thank you for this post; it’s really helped me to improve my croissants I notice you’ve changed your recipe to use all strong flour instead of a mix as well as a few other tweaks. Could you explain what the benefits of the new recipe are?
LikeLike
Hi, yes I just switched to strong flour but purely to give a slightly firmer interior. But to be honest there is not a lot in it. The normal plain flour works excellently though and to be honest I vary between a mix and between all strong.
I also now roll out a little less lengthways before: purely for less chance for me to over-do the rolling and risk squashing some of the layers. You still get excellent flakes and a nice honeycombed structure.
I am glad you have found the recipe and tips useful.
LikeLike
if you are in a hot place, like Mumbai, what do you do for the final proving? Can you prove inside a fridge albeit longer. I don’t want the butter to melt while proving.
LikeLike
Yes the fridge is best to use in such heat; they will rise slowly but surely and when they have risen a fair bit put them straight into the hot oven.
LikeLike