

As moreish as sweet biscotti unquestionably are, savoury biscotti are in a slightly higher league for me, but then more-ish savoury food is one of my weaknesses!


In this post I have given two recipes: one for sun-dried tomato, basil & pine nut biscotti; the other for olive and rosemary biscotti.
These biscotti are great on their own to nibble, but are wonderful used to dunk shamelessly into a gutsy dip or eaten with a hearty soup.
Gluten-free:
These are great as gluten-free treats with no sacrifice in terms of taste. Simply use gluten-free flour in place of the plain flour. I use Dove’s gluten-free bread flour which holds together well here.
As canapés
As well as using with dips, savoury biscotti are excellent as a base for canapés, topped with goodies such as the following:
- mackerel pâté
- baba ghanoush
- roasted vegetables
- goats cheese, lightly grilled & drizzled with reduced balsamic vinegar
Altering the recipe from sweet biscotti
I altered the basic sweet biscotti dough significantly, eliminating the sugar completely.
The savoury dough needs to be a little wetter than for sweet biscotti, so I find I usually need to add all of the 3 eggs. It is a very forgiving dough, too, so you can get away with adding a little more milk if needed until you get a dough that shapes easily without cracking as you roll it.
I also use a few ground walnuts, a little Parmesan and some smoked garlic powder in the basic dough, which add a lovely subtle flavour, before splitting the dough and adding the extra flavours for each type of biscotti.
Two biscotti flavours


I add extra smoked garlic powder in the olive & rosemary biscotti and extra Parmesan in the sun-dried tomato, basil & pine nut biscotti.
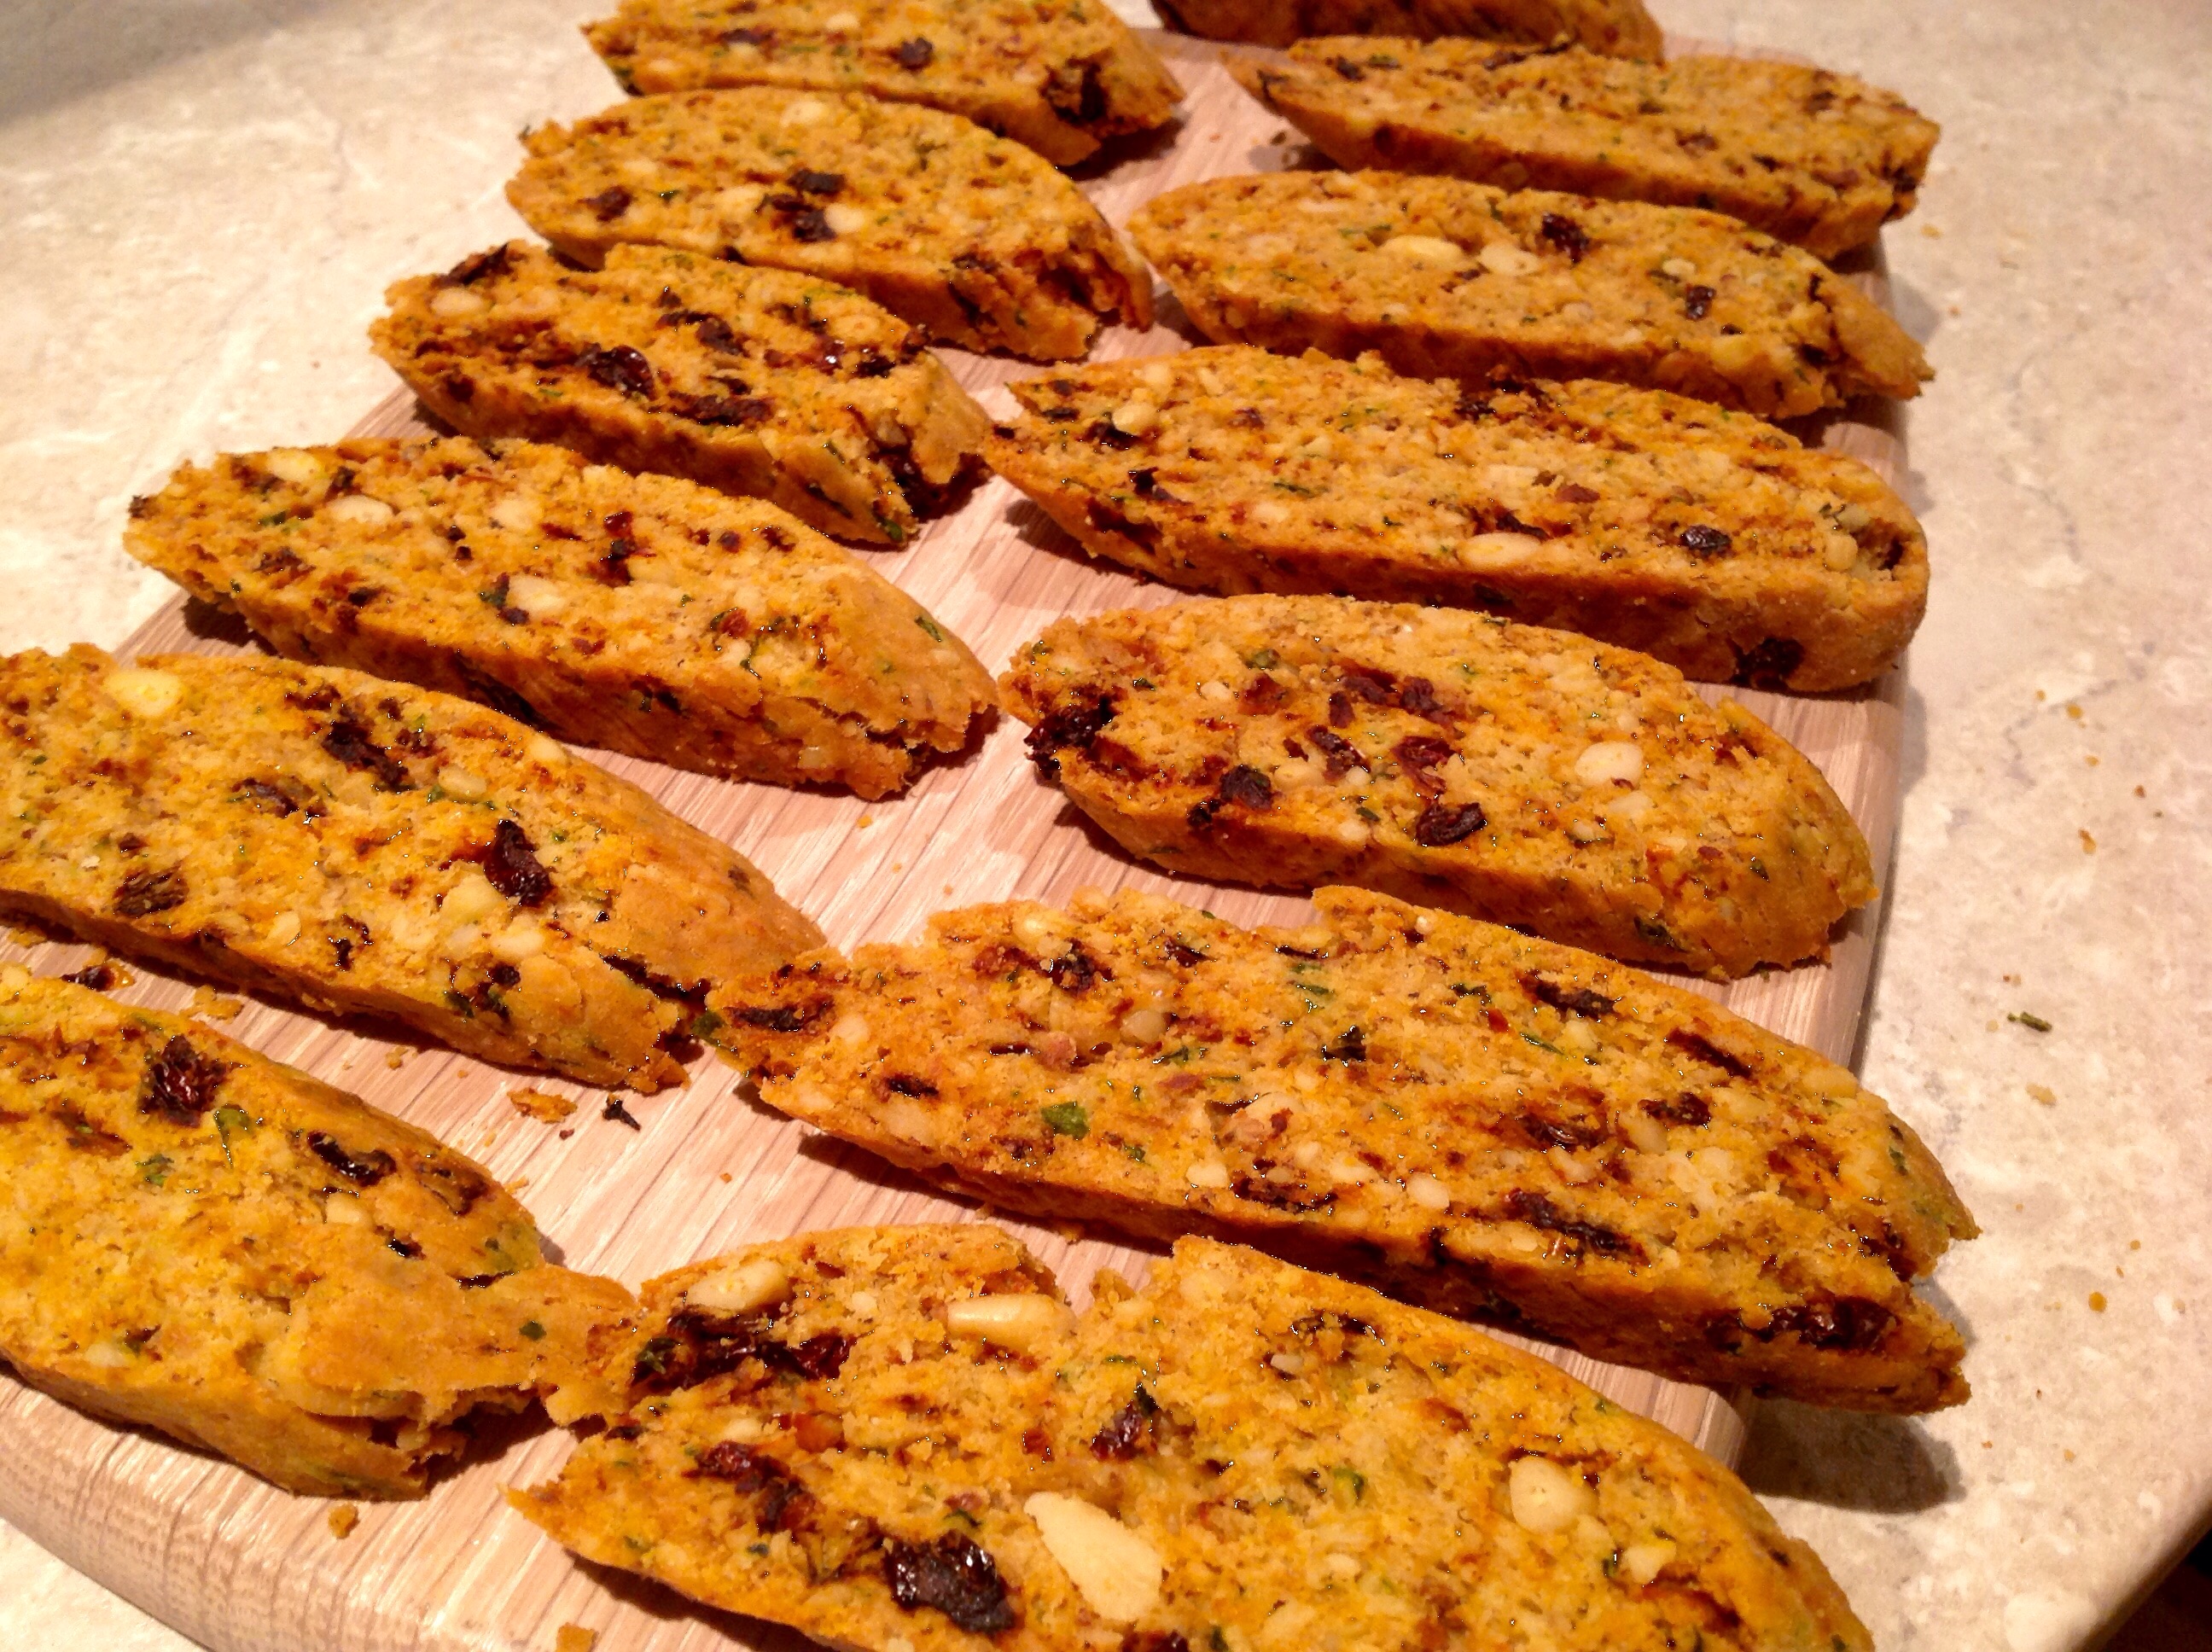
I have found that with the sun-dried tomato, basil & pine nut biscotti, it is best to blitz most of the pine nuts, leaving just a few whole: it helps when it comes to slice the log after the first bake – otherwise it tends to crumble.
Savoury biscotti: makes about 20 of each
Base dough:
- 250g plain flour
- 50g walnuts, blitzed to a fine powder
- 1 teaspoon baking powder
- 5g fine sea salt
- several grindings of black pepper
- 2 teaspoons smoked garlic powder or mustard powder (or a mixture!)
- 40g finely grated Parmesan
- 3 medium eggs, beaten
Olive & rosemary:
- 100g black olives, drained and dried as much as possible
- 1 teaspoon smoked garlic powder
- leaves from a small sprig of fresh rosemary, finely chopped (to give about a tablespoon of chopped rosemary)
Sun-dried tomato, basil & pine nut:
- 10 sun-dried tomatoes, rehdrated in boiling water, dried and roughly chopped (dried thoroughly if in oil)
- small handful fresh basil, roughly chopped
- 25g finely grated Parmesan
- 60g pine nuts, lightly toasted and blitzed to a powder
- 20g pine nuts, lightly toasted and left whole
(1) Preheat the oven to 140C(fan). Make the main dough by mixing the flour, walnuts, salt, garlic powder, pepper, baking powder and Parmesan together in a bowl. Add the eggs, a bit at a time, mixing enough to form a fairly soft but not sticky dough: it should be able to hold its shape without cracking but not be dry. Add extra milk if needed.
(2) Split into two equal portions – one for each of the two flavours – and gently work in the ingredients for each flavour. Knead very gently to give two smooth but soft balls of dough.
(3) On a lightly floured surface, gently roll each ball into a cylindrical log about 2cm diameter and place apart on a baking tray lined with greaseproof paper.

(4) Bake for 25-30 minutes and remove from the oven to cool a little. They will have spread a little and a crack might appear along the length, which is perfectly fine. Reduce the oven temperature to 120C(fan).
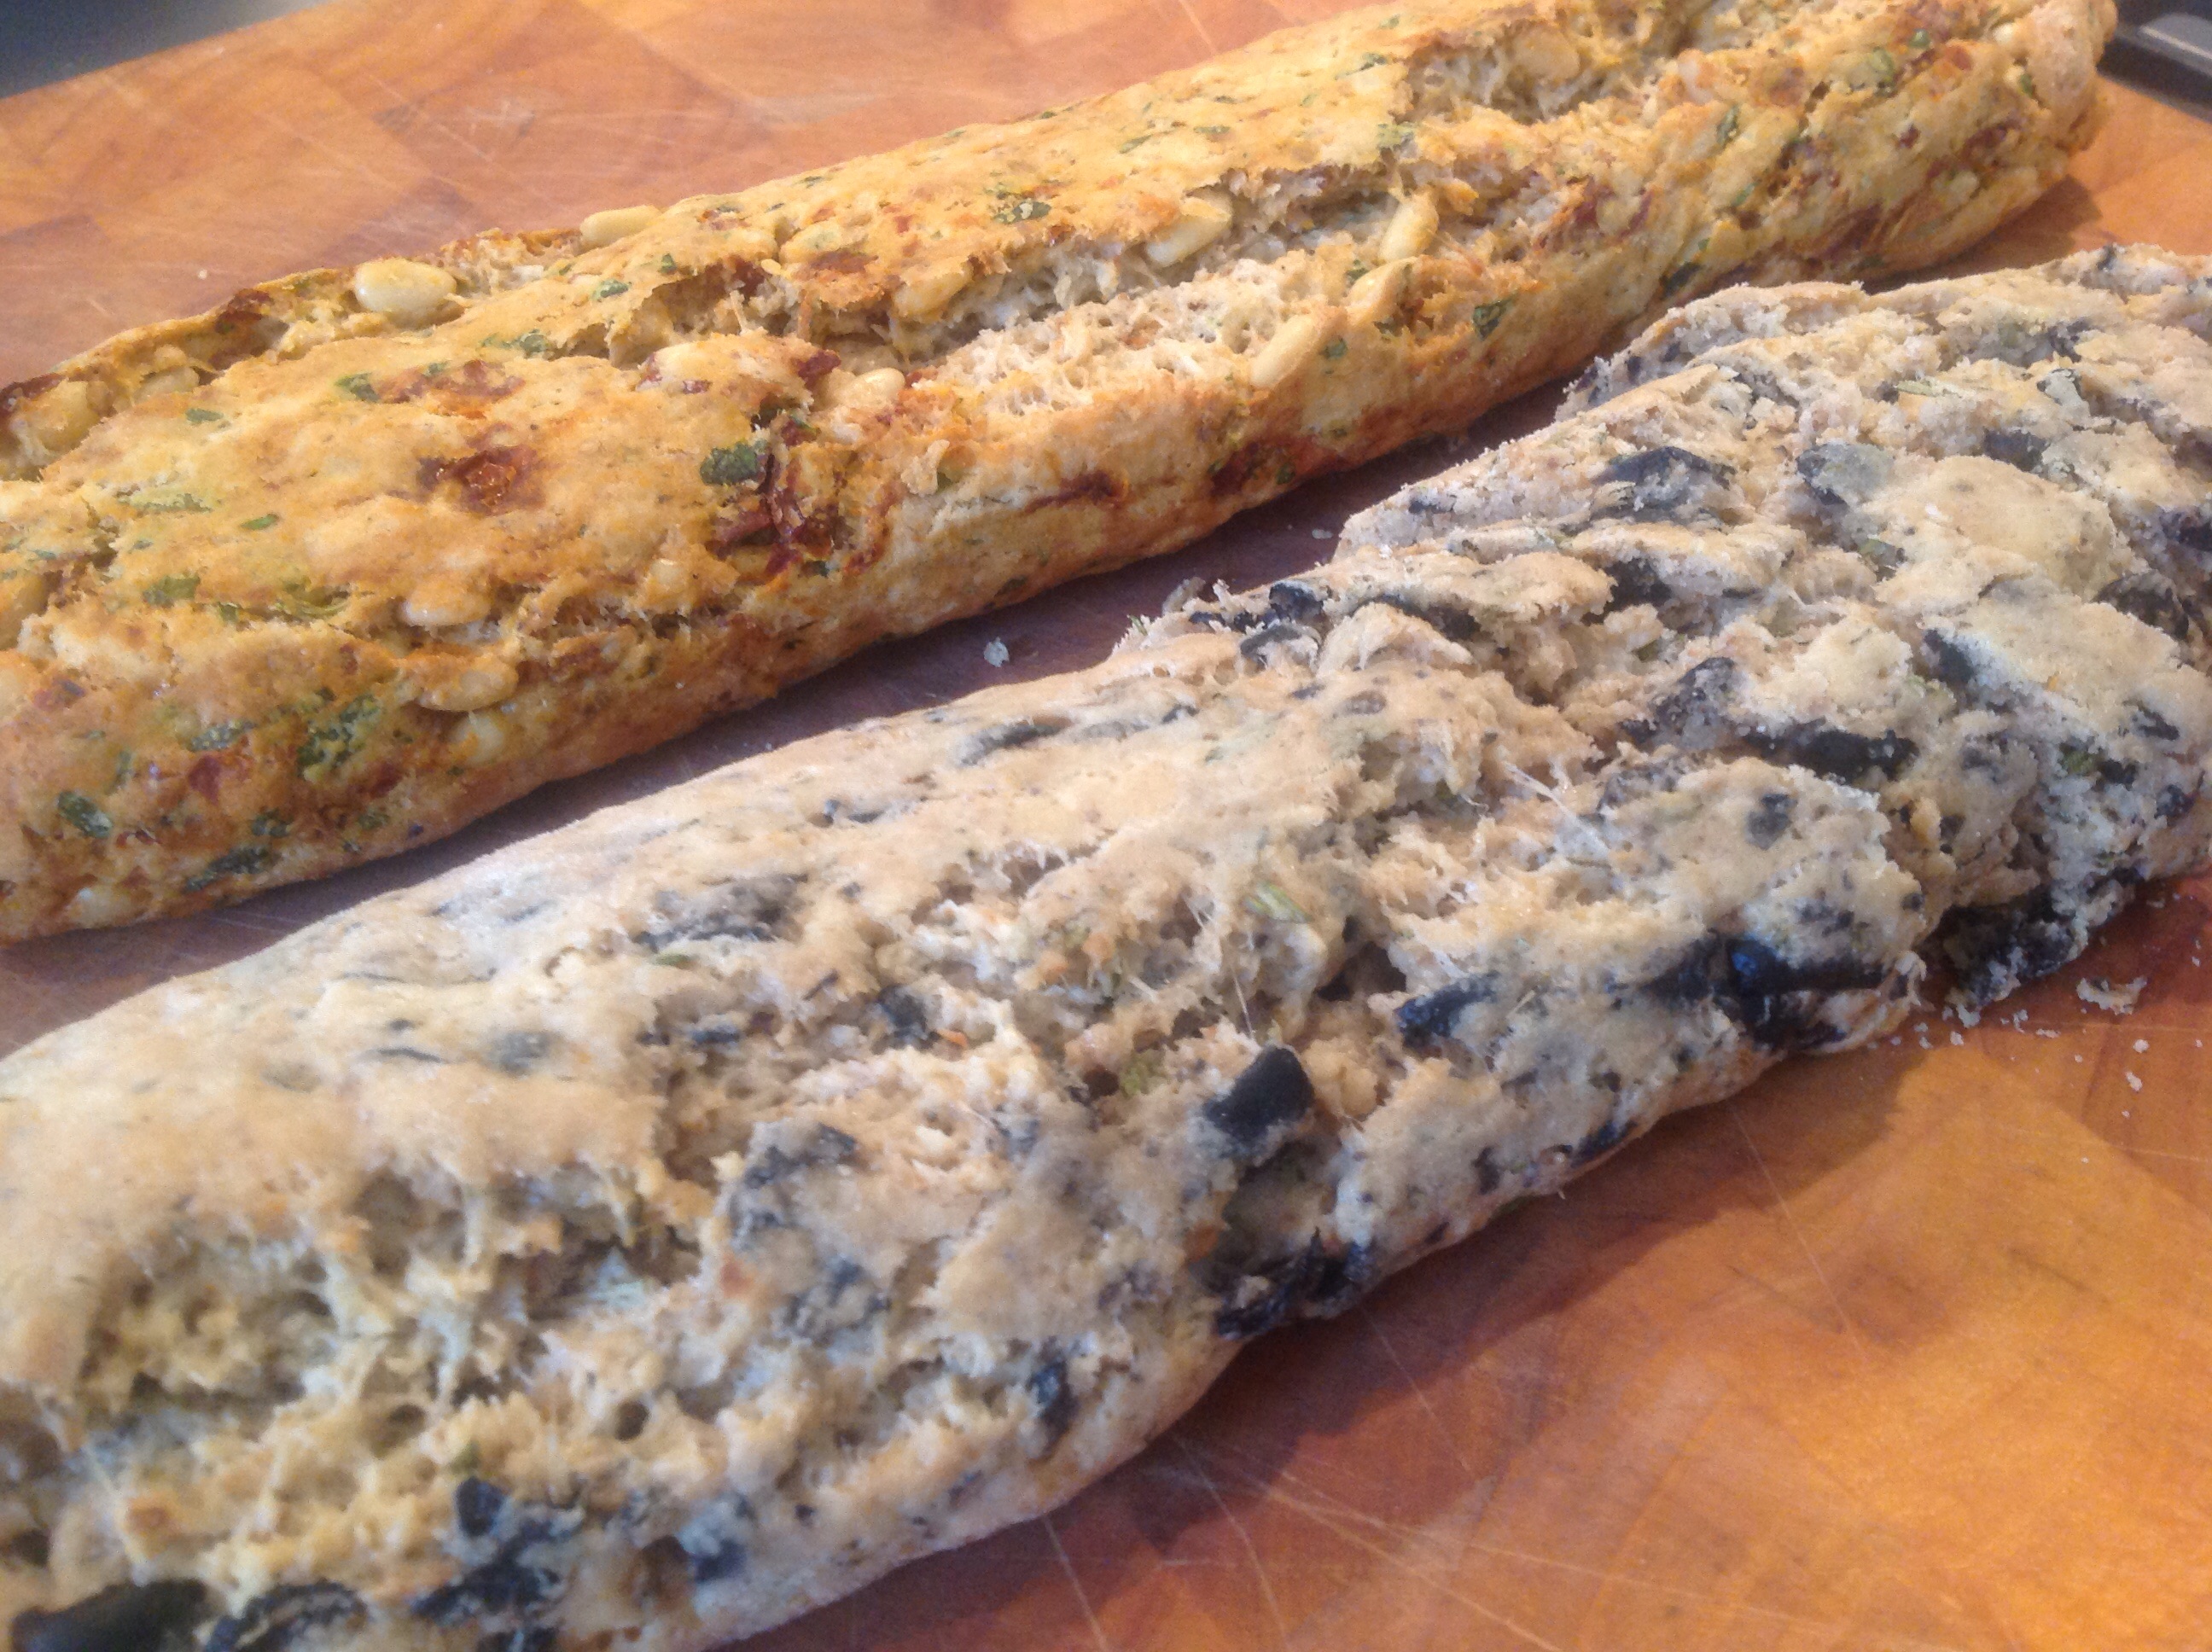
(5) After about 15 minutes the baked dough should be cool enough to handle and will have firmed up a little, making it easier to slice without breaking apart. Slice diagonally, going for thin slices (just under 1cm thick) and place cut-side up on baking sheets.

(6) Bake at the lower temperature for about 45 minutes to 1 hour, rotating the trays after about 25 minutes. The biscotti should feel very firm and should not have taken on too much colour, although you can cover them with greaseproof if needed or even reduce the temperature a little more. Transfer to wire racks to cool, during which they will crisp up fully. Store in an airtight container.

How many grams of egg do you use in this recipe?
LikeLike
For this I go for 3 medium eggs but around 160g
LikeLike