
The idea with this method is that you can make a batch of croissant dough in an easier and quicker way, without having to do lots of different turns.


This is very much an experiment for making croissant dough and I decided to turn them into pains au chocolate rather than croissants.
You basically roll up a yeasted dough that has been spread with soft butter: just like a Swiss Roll! This gives many layers instantly. This roll then gets rolled out and folded in half to double those layers. It is then ready to use for croissants or pains au chocolat.
I’m pretty sure I had seen a video of this type of method floating around on social media ages ago.
A lot of those sped-up videos of food hacks and quirky ideas you see online are dreadful, but this piqued my interest so I thought it was time to give this method a go.
You still need time for the dough to prove, but you really cut down on the book turns or envelope turns that feature in the traditional method.
My verdict on this method, with visual comparisons between this method and a more traditional method, is below the recipe.
I couldn’t remember the full details from the online video, just the rolling up like a Swiss Roll. I found cutting horizontally along the length of the roll to release surface tension in the dough really helps roll out what is a thick piece of dough.
I used a smaller batch of the dough in my main croissant recipe in case this was a disaster but increased the butter proportionally so I could get enough spread over the dough. That recipe is here and it contains the full recipe, along with tips and shaping instructions.
Recipe: “Swiss Roll” method for croissant dough -makes 4
Initial dough:
- 150g strong white plain flour
- 6g “instant” dried yeast
- 3g fine salt
- 20g caster sugar
- 45ml cold, semi-skimmed milk
- 30ml cold water
- 25g soft, unsalted butter
To laminate the dough:
- 100g unsalted butter, slightly softened and at spreadable consistency
Make the initial dough:
(1) Mix the initial dough ingredients together in the bowl of a food mixer to give a fairly firm dough, adding just a little extra water if needed to help it all come together. Knead gently on a low setting for about 5 minutes: just enough to bring it together to form a fairly smooth dough with just a little elasticity.
(2) Place in a bowl and cover. Leave it at room temperature for about a hour to allow the yeast to start to activate and for the dough to expand a little.
(3) Roll the dough to about 15cm by 30cm which, for this amount to dough, gives a thin dough. Wrap it and place on a baking tray. Freeze for about 15 minutes to cool right down and firm it up.
(4) Spread over softened butter in a very thin layer, coming right to the borders: this is easy to do as the dough is firm. Trim the edges just to neaten them up if needed.

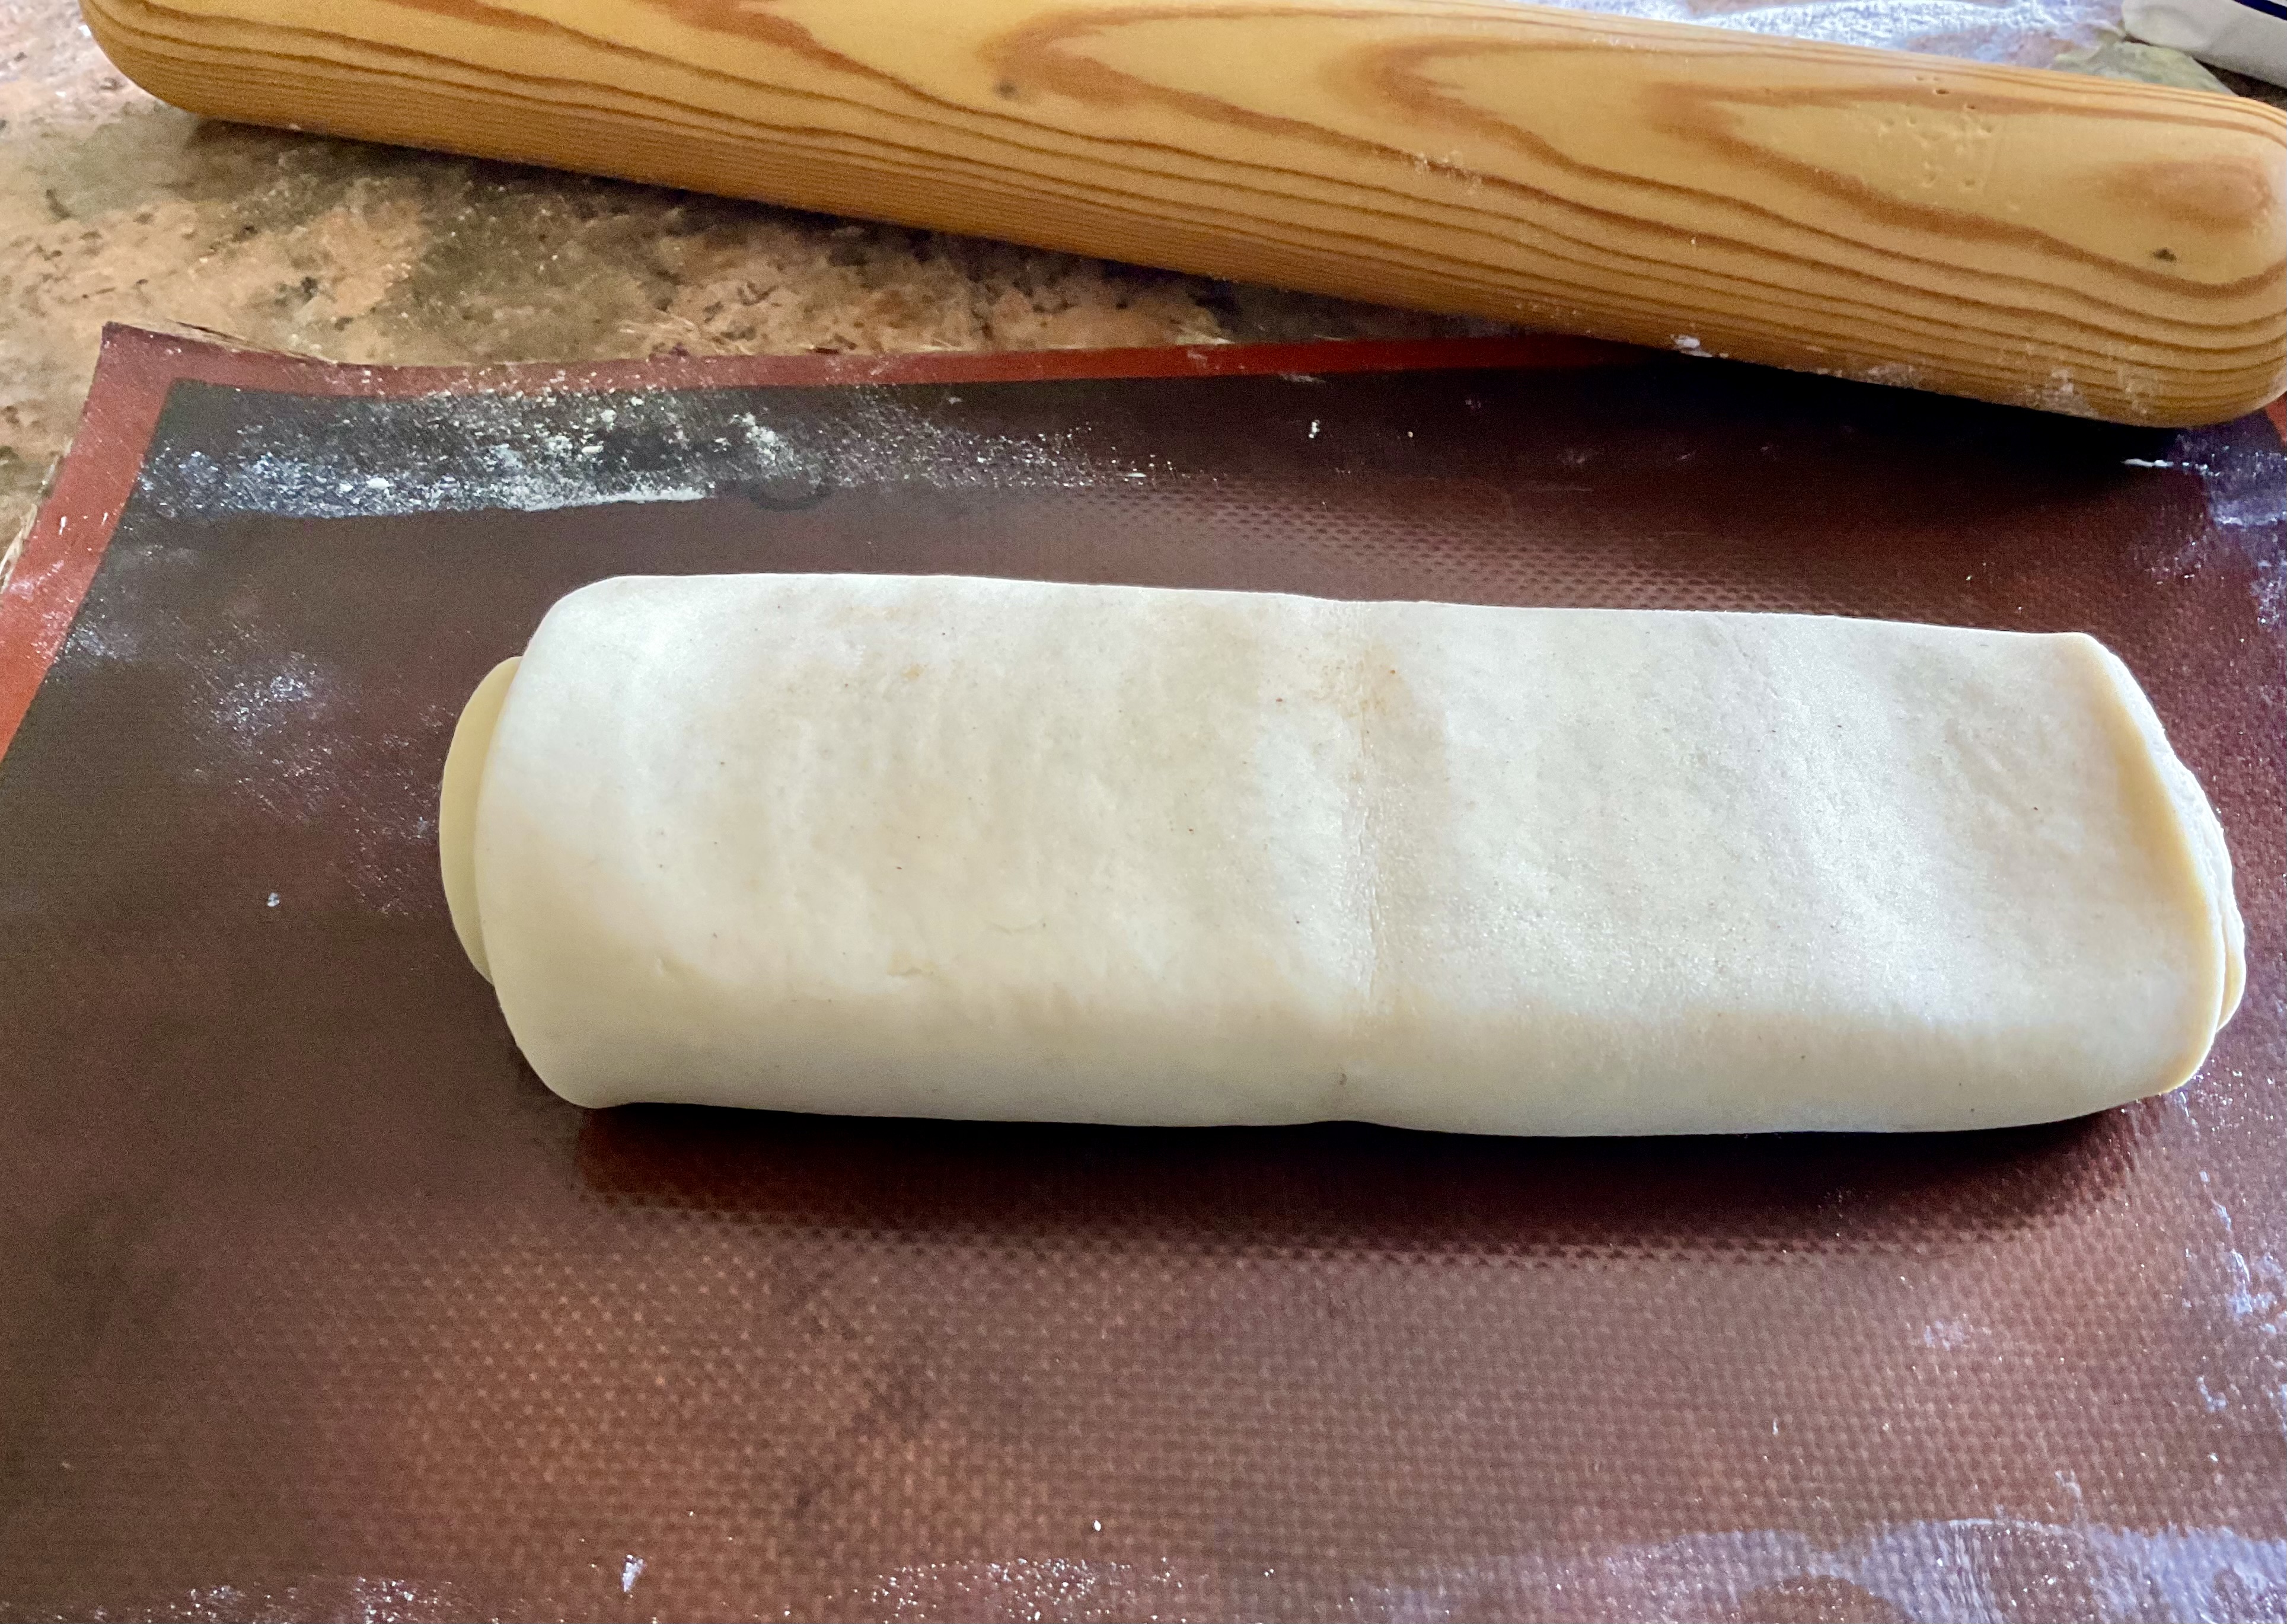
(5) Starting with the shortest edge facing you, roll up the dough, fairly tightly like a Swiss Roll.


(6) Use the rolling pin to pat vertically on top to flatten it out a little bit.
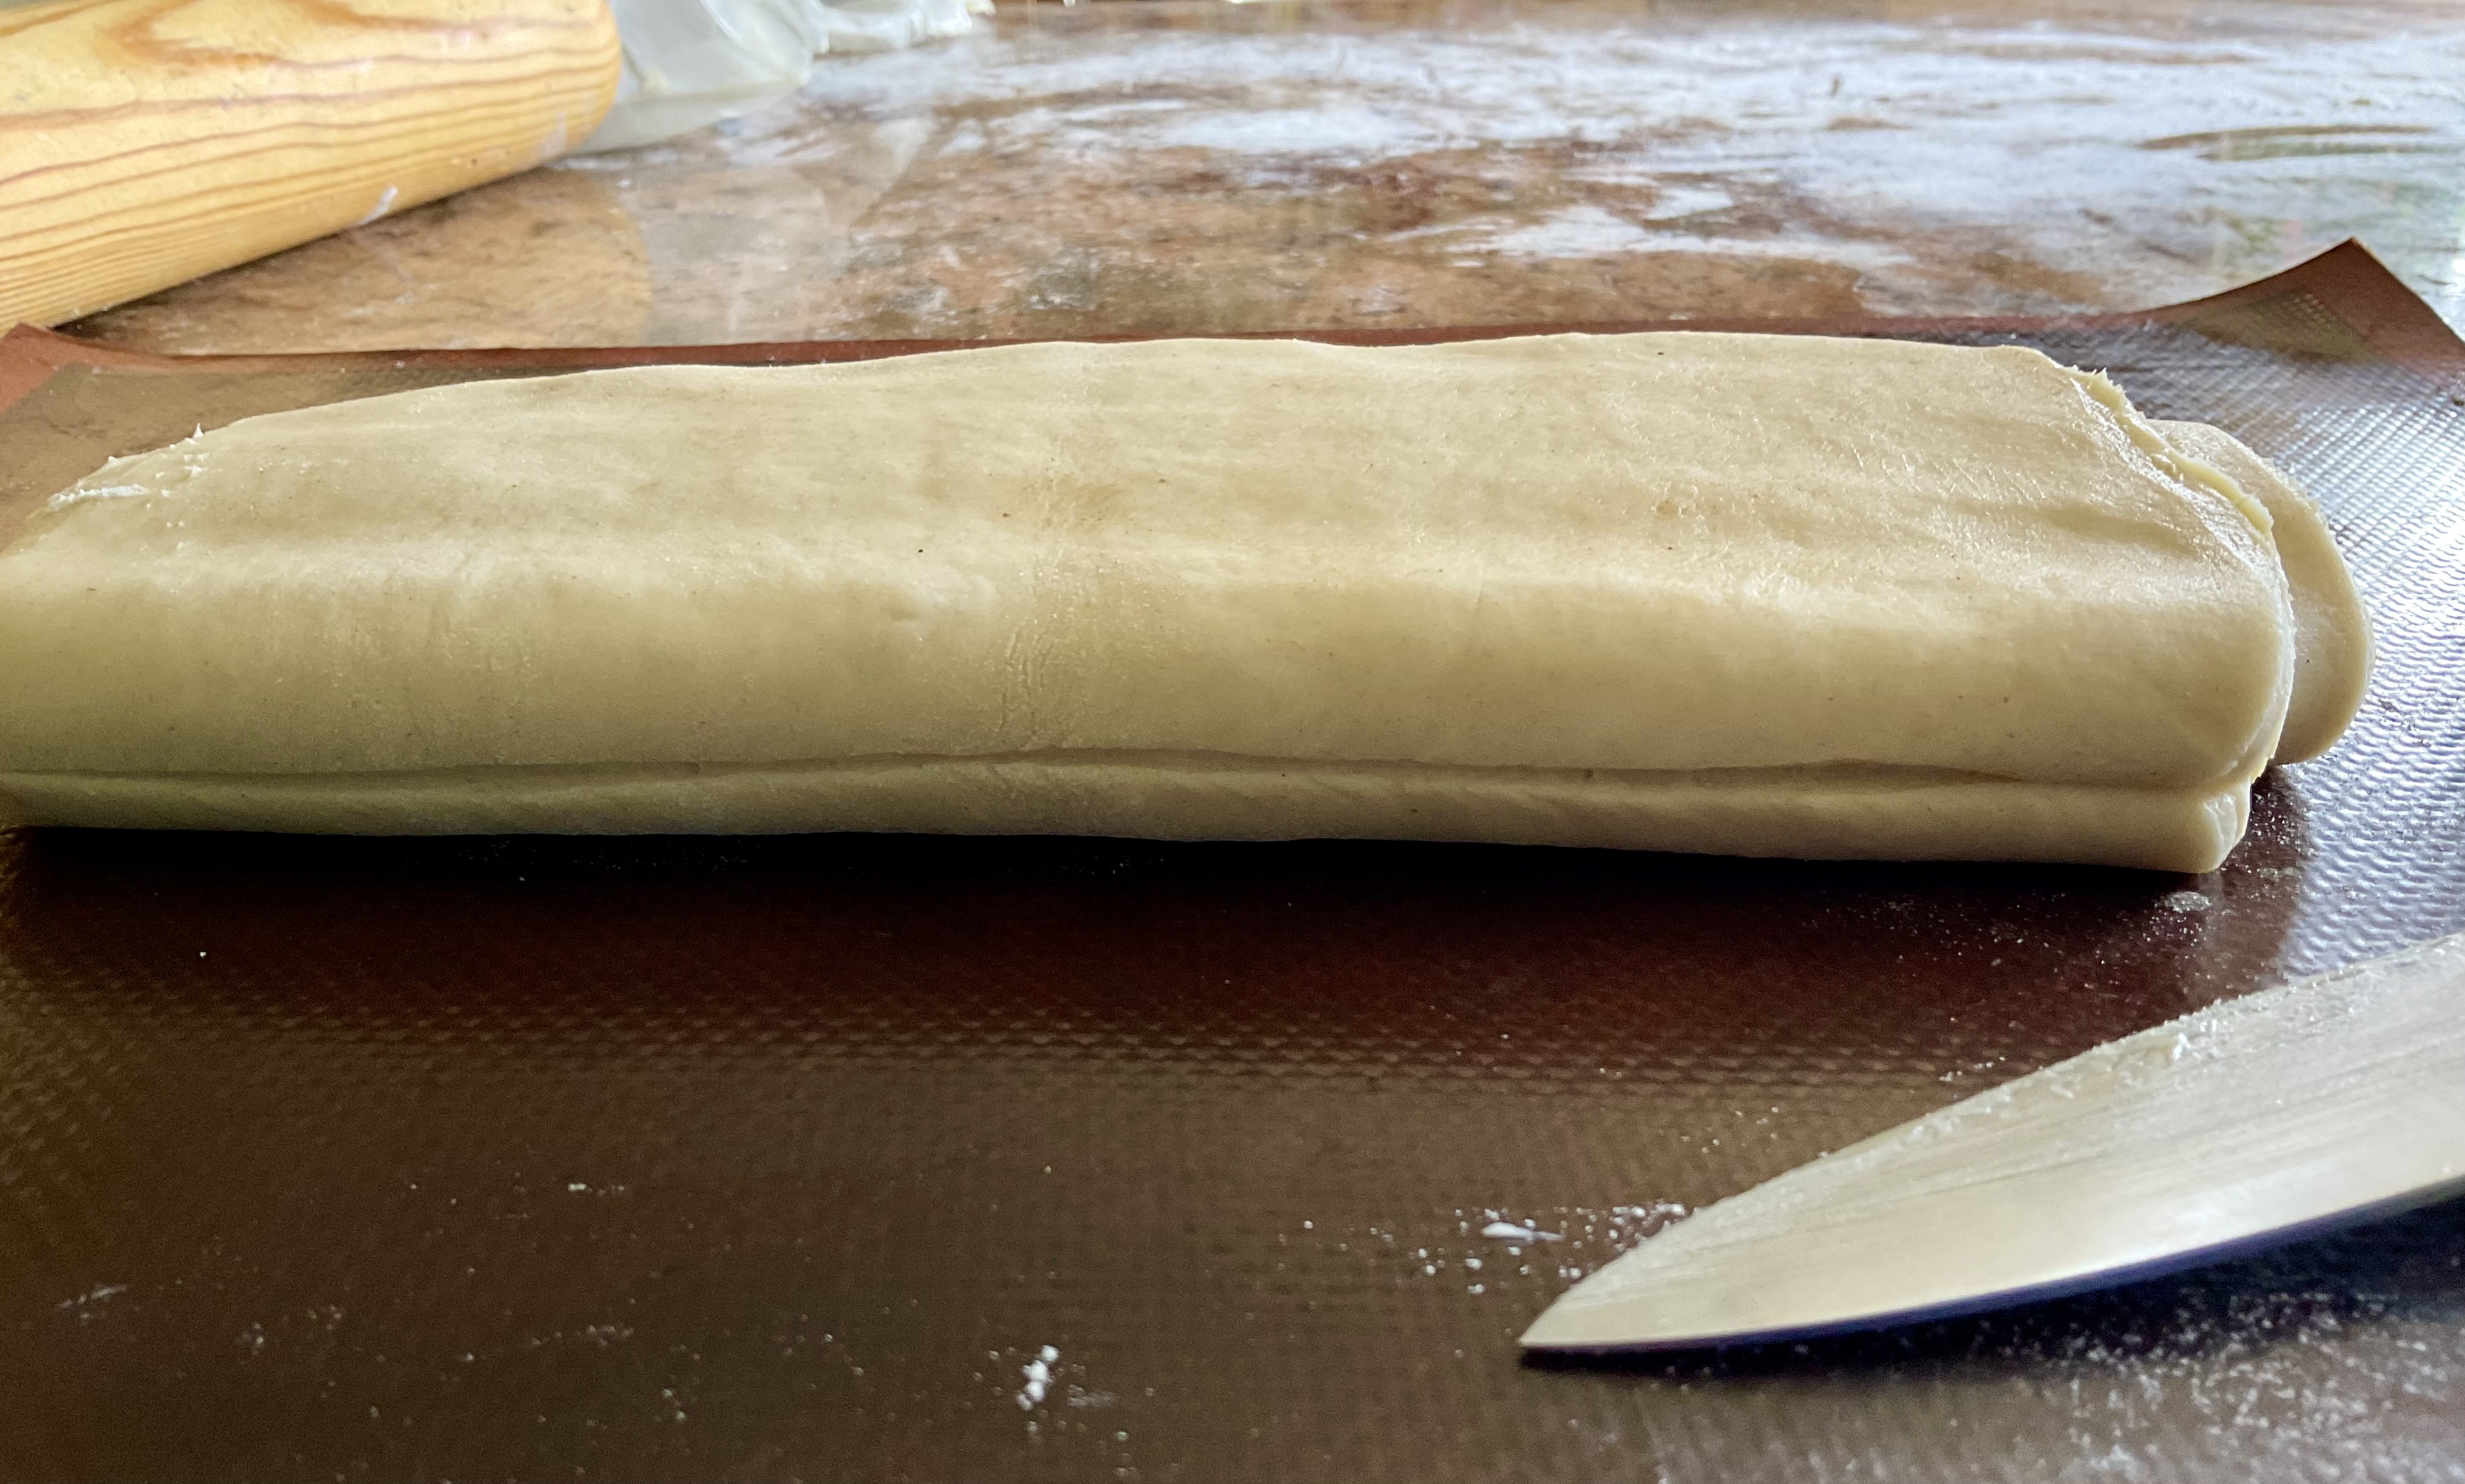
(7) Cut along the longest edges with a sharp knife to release the dough tension and expose some of the butter inside: this really helps when it comes to roll out the dough next, as well as promoting good structure to the baked dough.
(8) Wrap up and then freeze for 15 minutes before chilling for about half an hour. This firms up both the butter and dough just enough to avoid the butter oozing out when you roll it next.
(9) Roll out to a rectangle about a half a centimetre thick and fold the dough it in half.
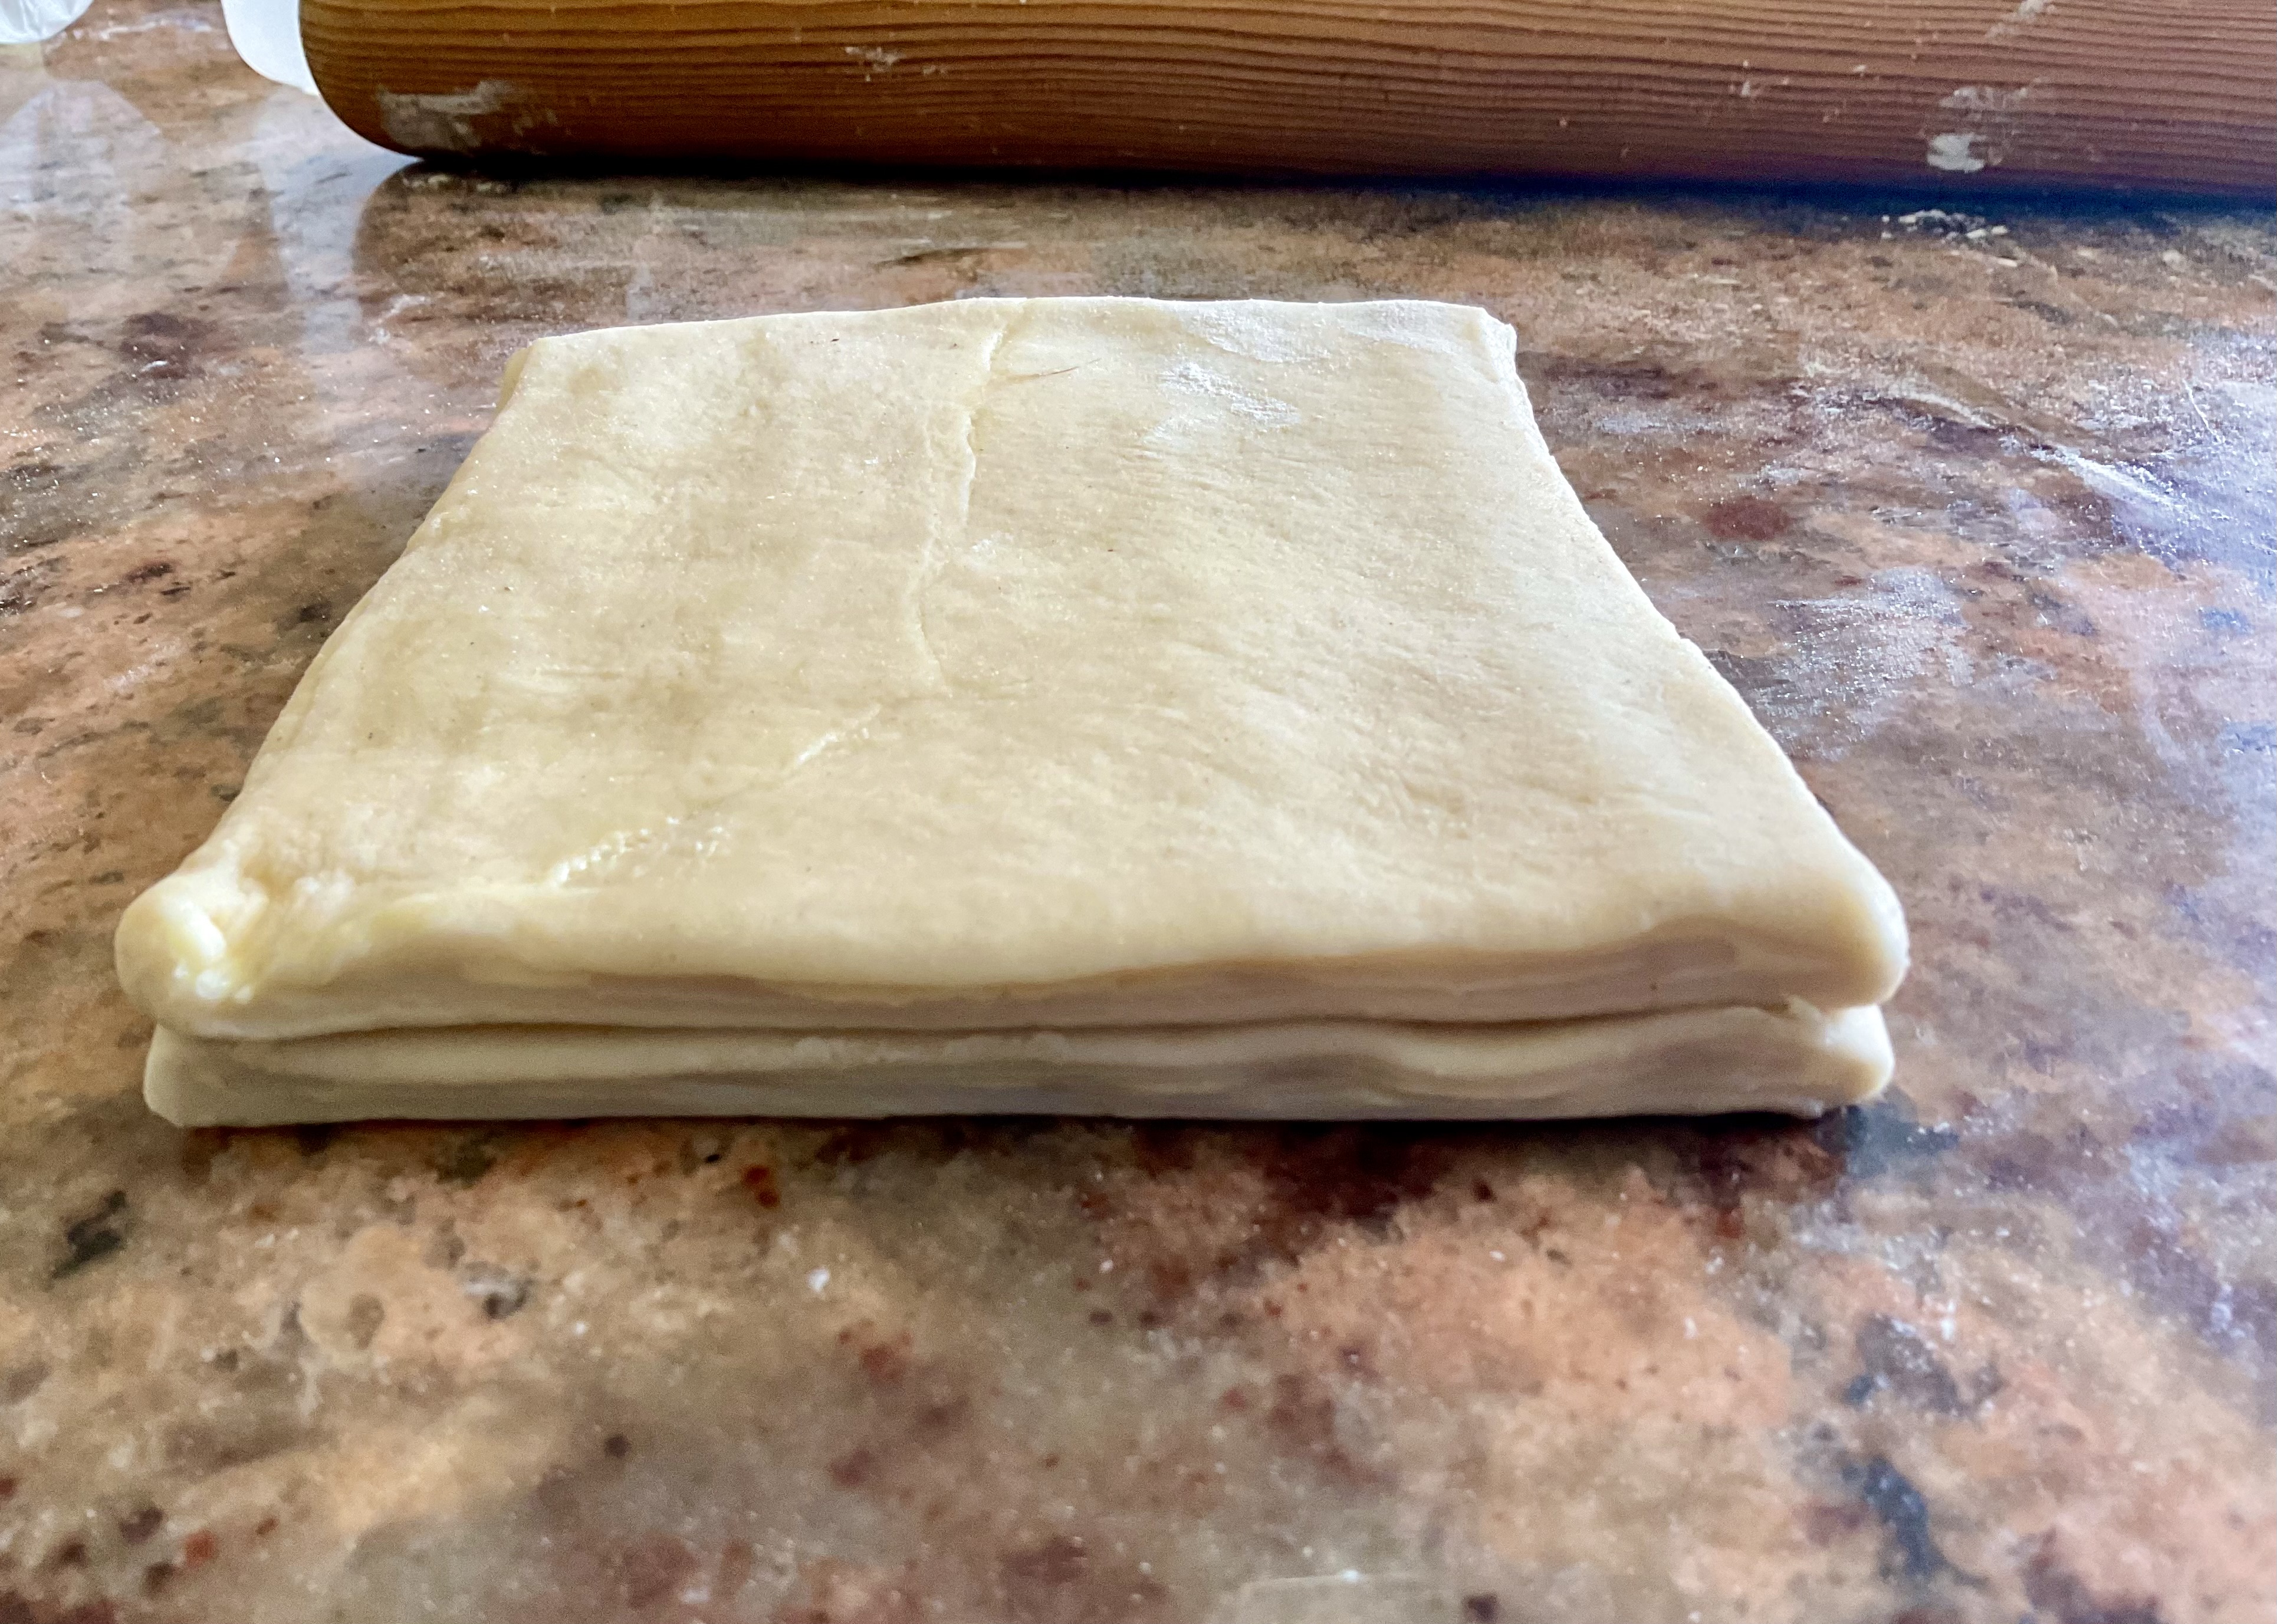
(10) That’s it: the dough should now be chilled for a minimum of an hour before rolling it out and using it:
- let the shaped* dough prove until around double in size and looking puffy, with a gently wobble when you lightly shake the tray.
- brush with beaten egg and bake in an oven preheated to 180C (fan) -although I often put them in at 200C and as soon as they go in, turn the oven down to 175C for about 15 minutes: this allows for a more rapid expansion initally.
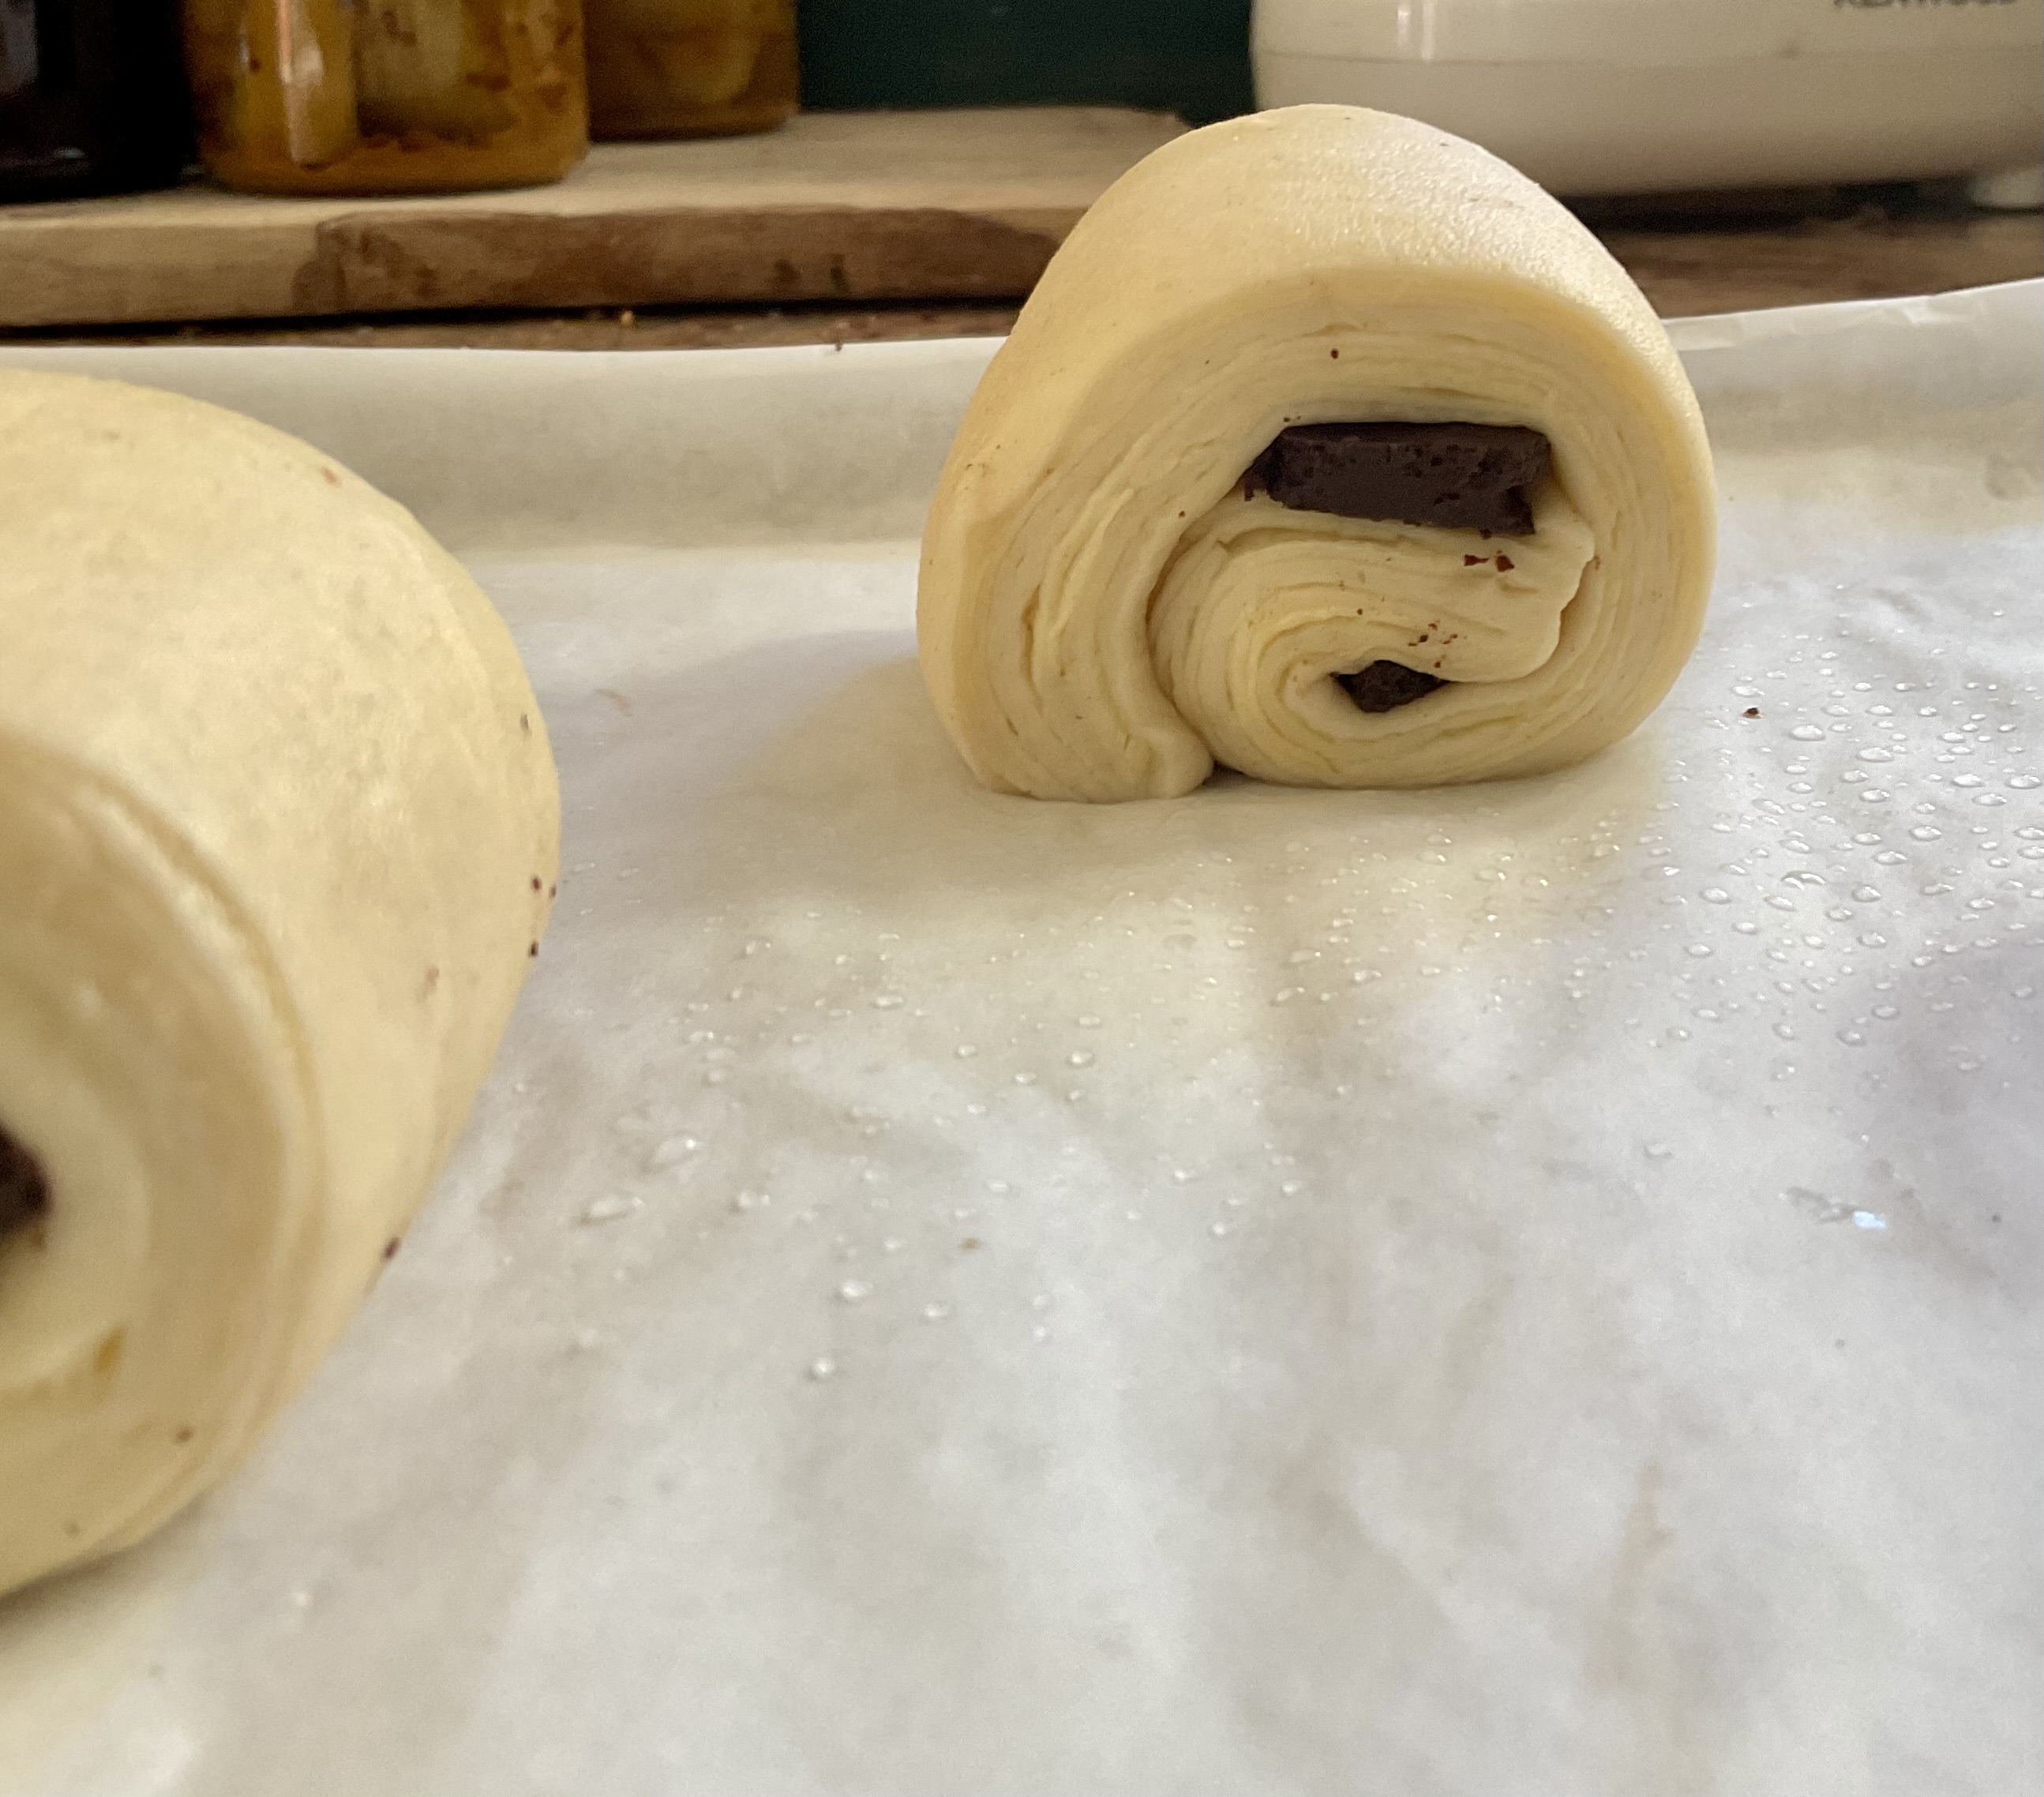
*for these pains au chocolat, I rolled this amount of dough thinly to a rectangle that was about 15cm wide by 30cm long. This was then cut into four rectangles for shaping: these were about 7cm by 15cm.
My verdict!
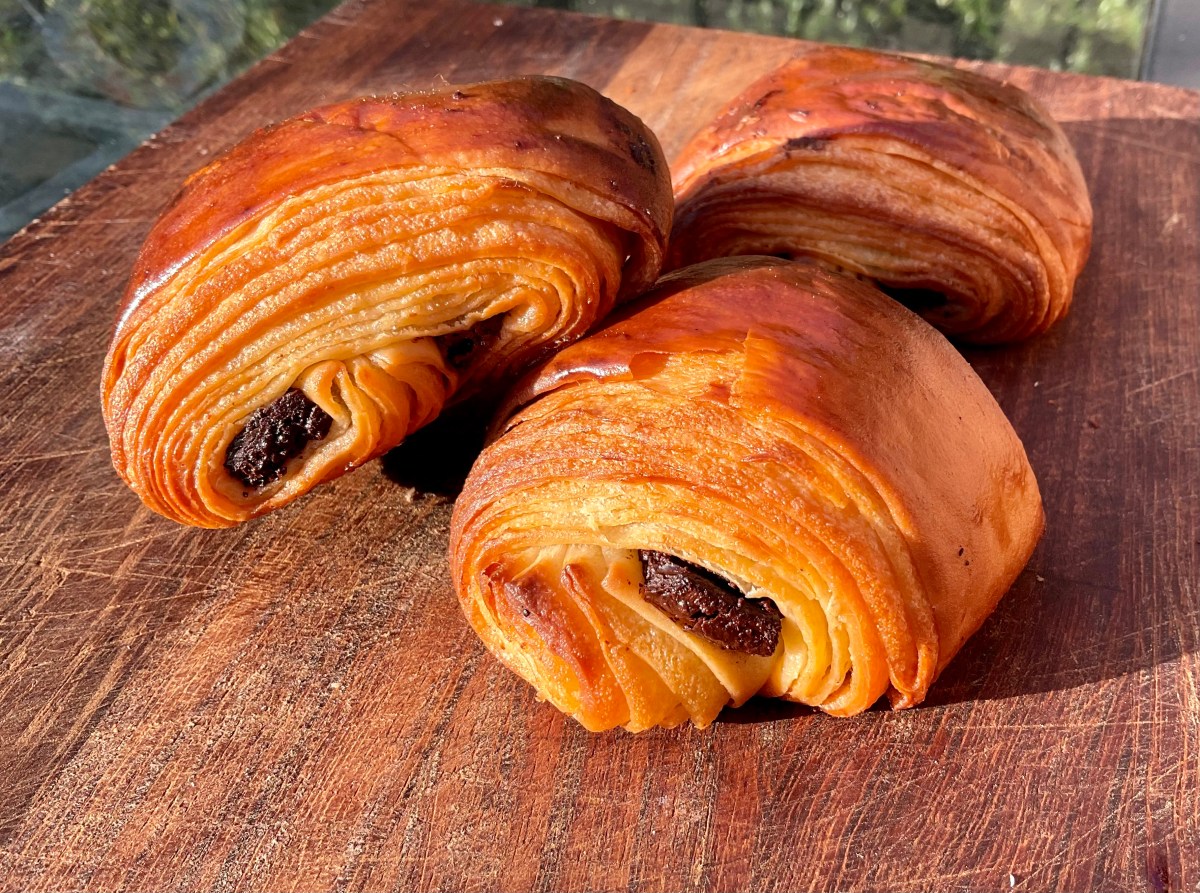
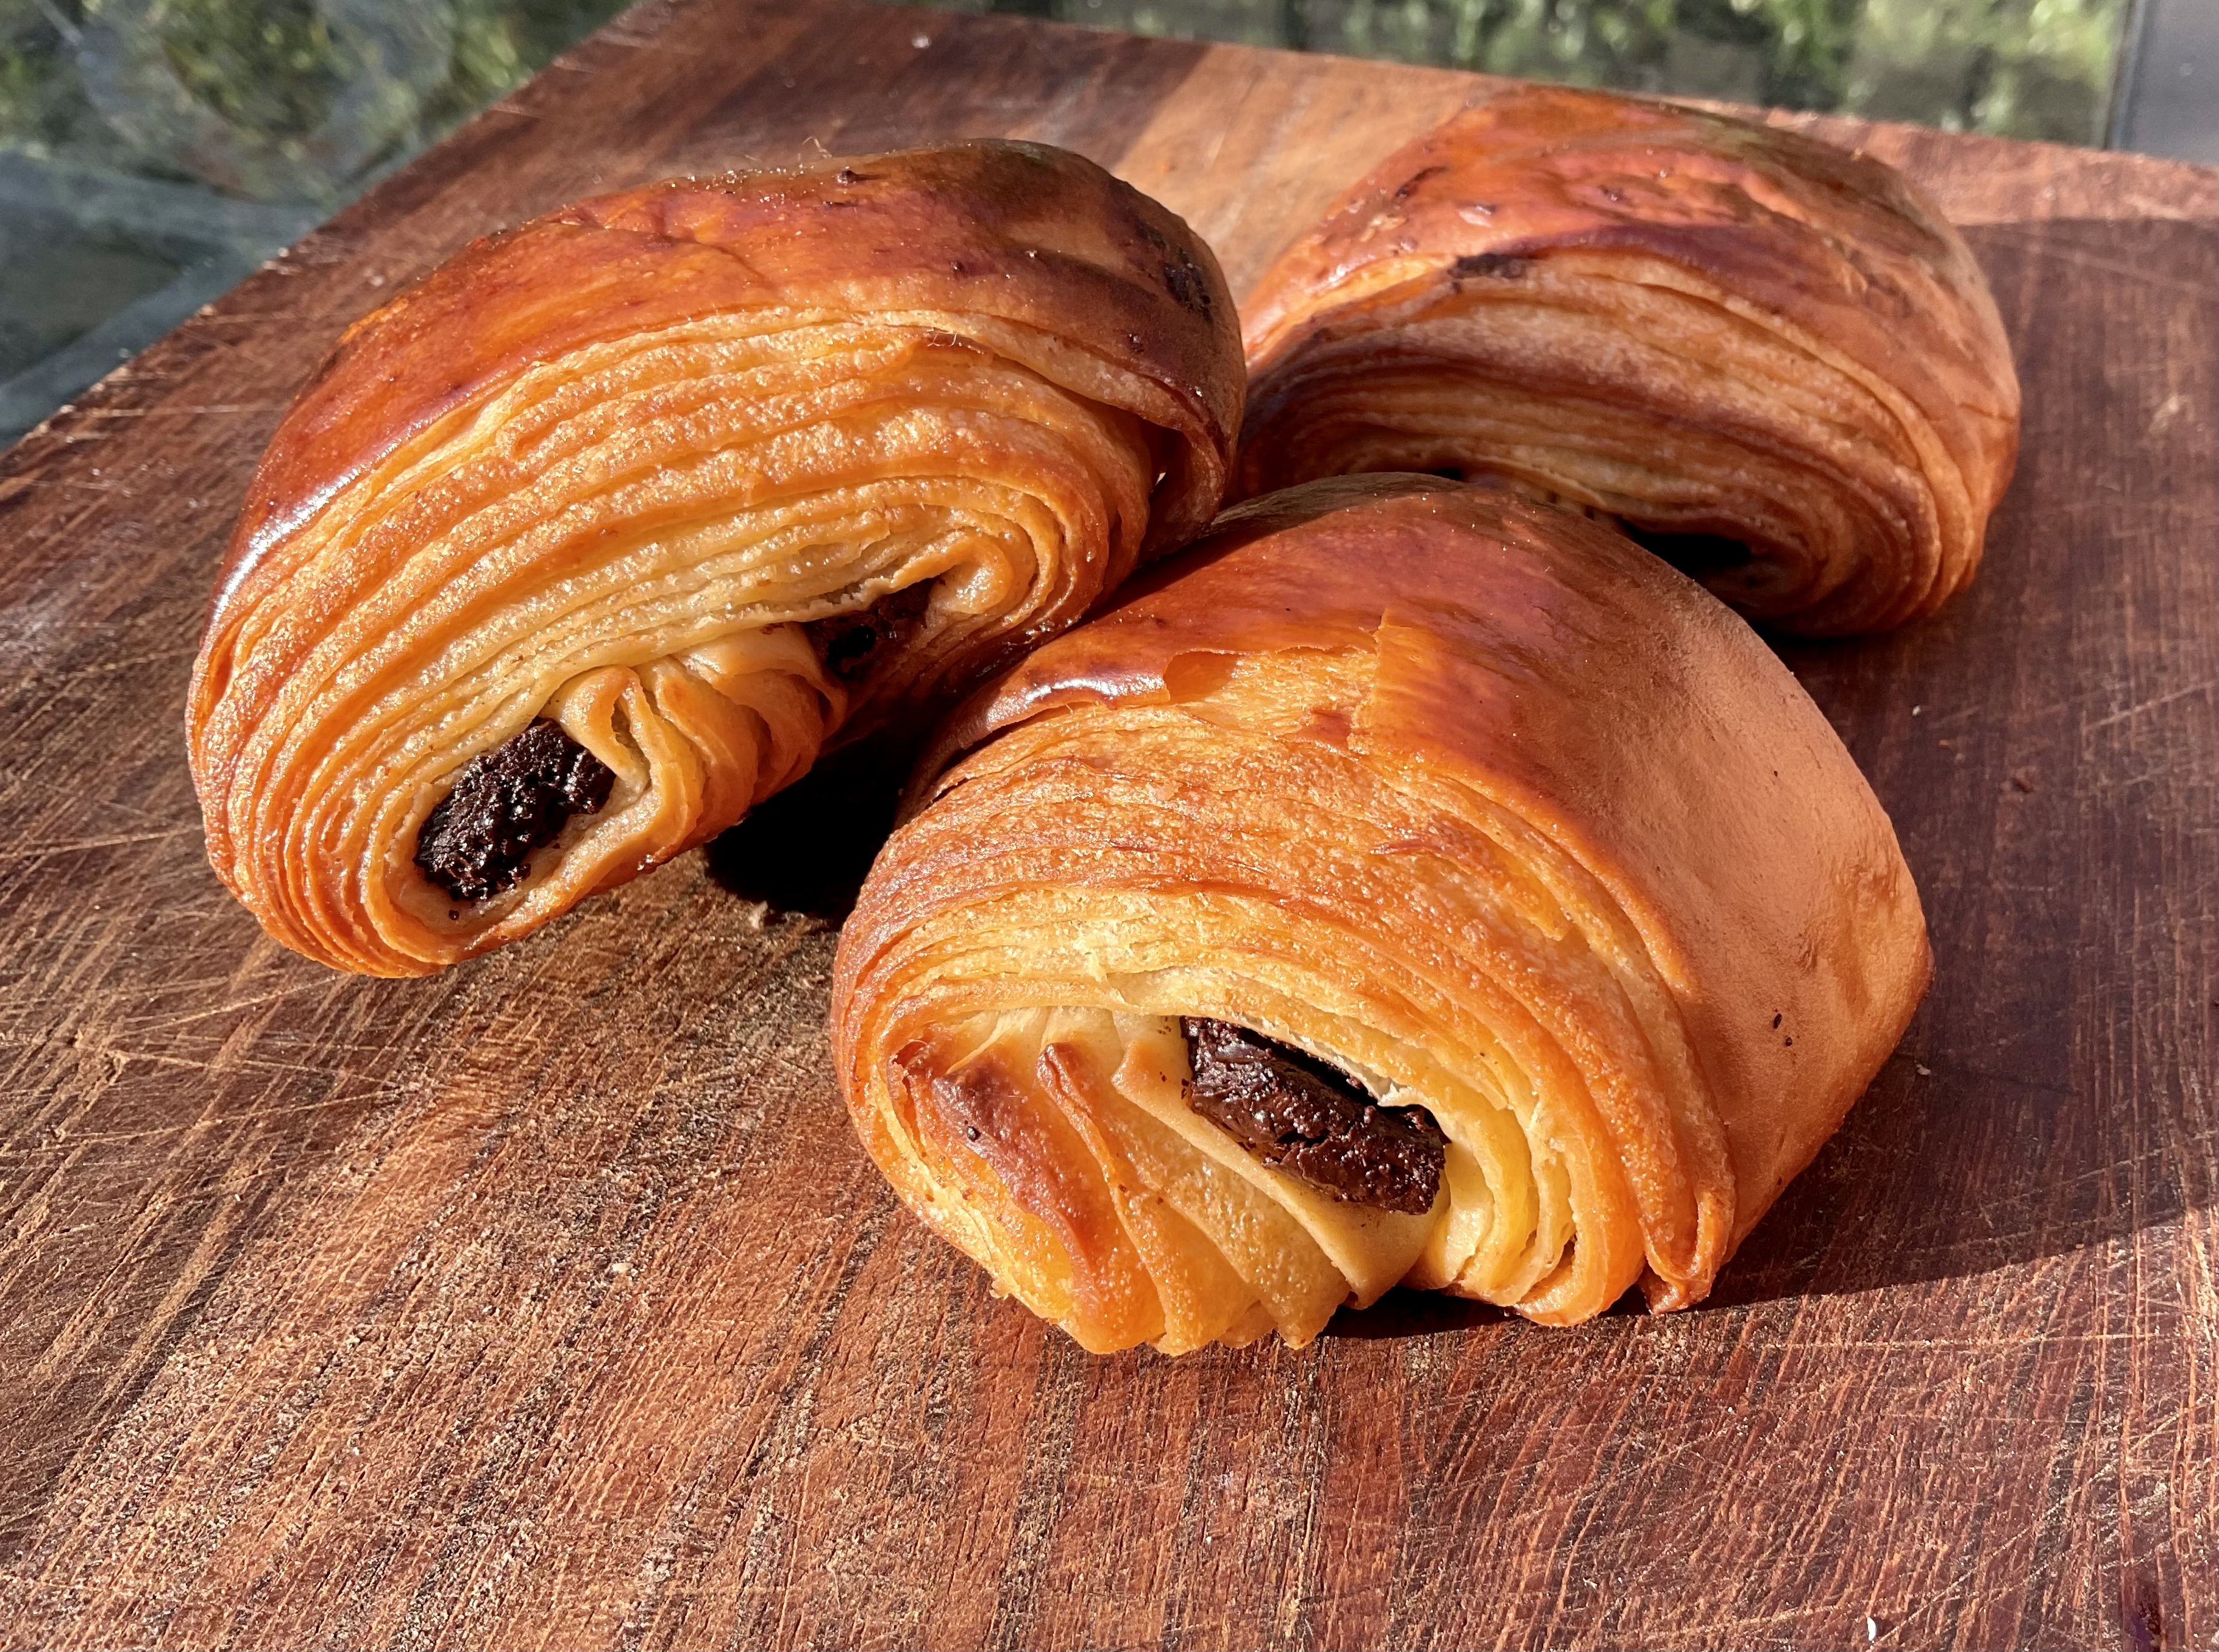
Well, these are most certainly not a disaster and the flavour is excellent.
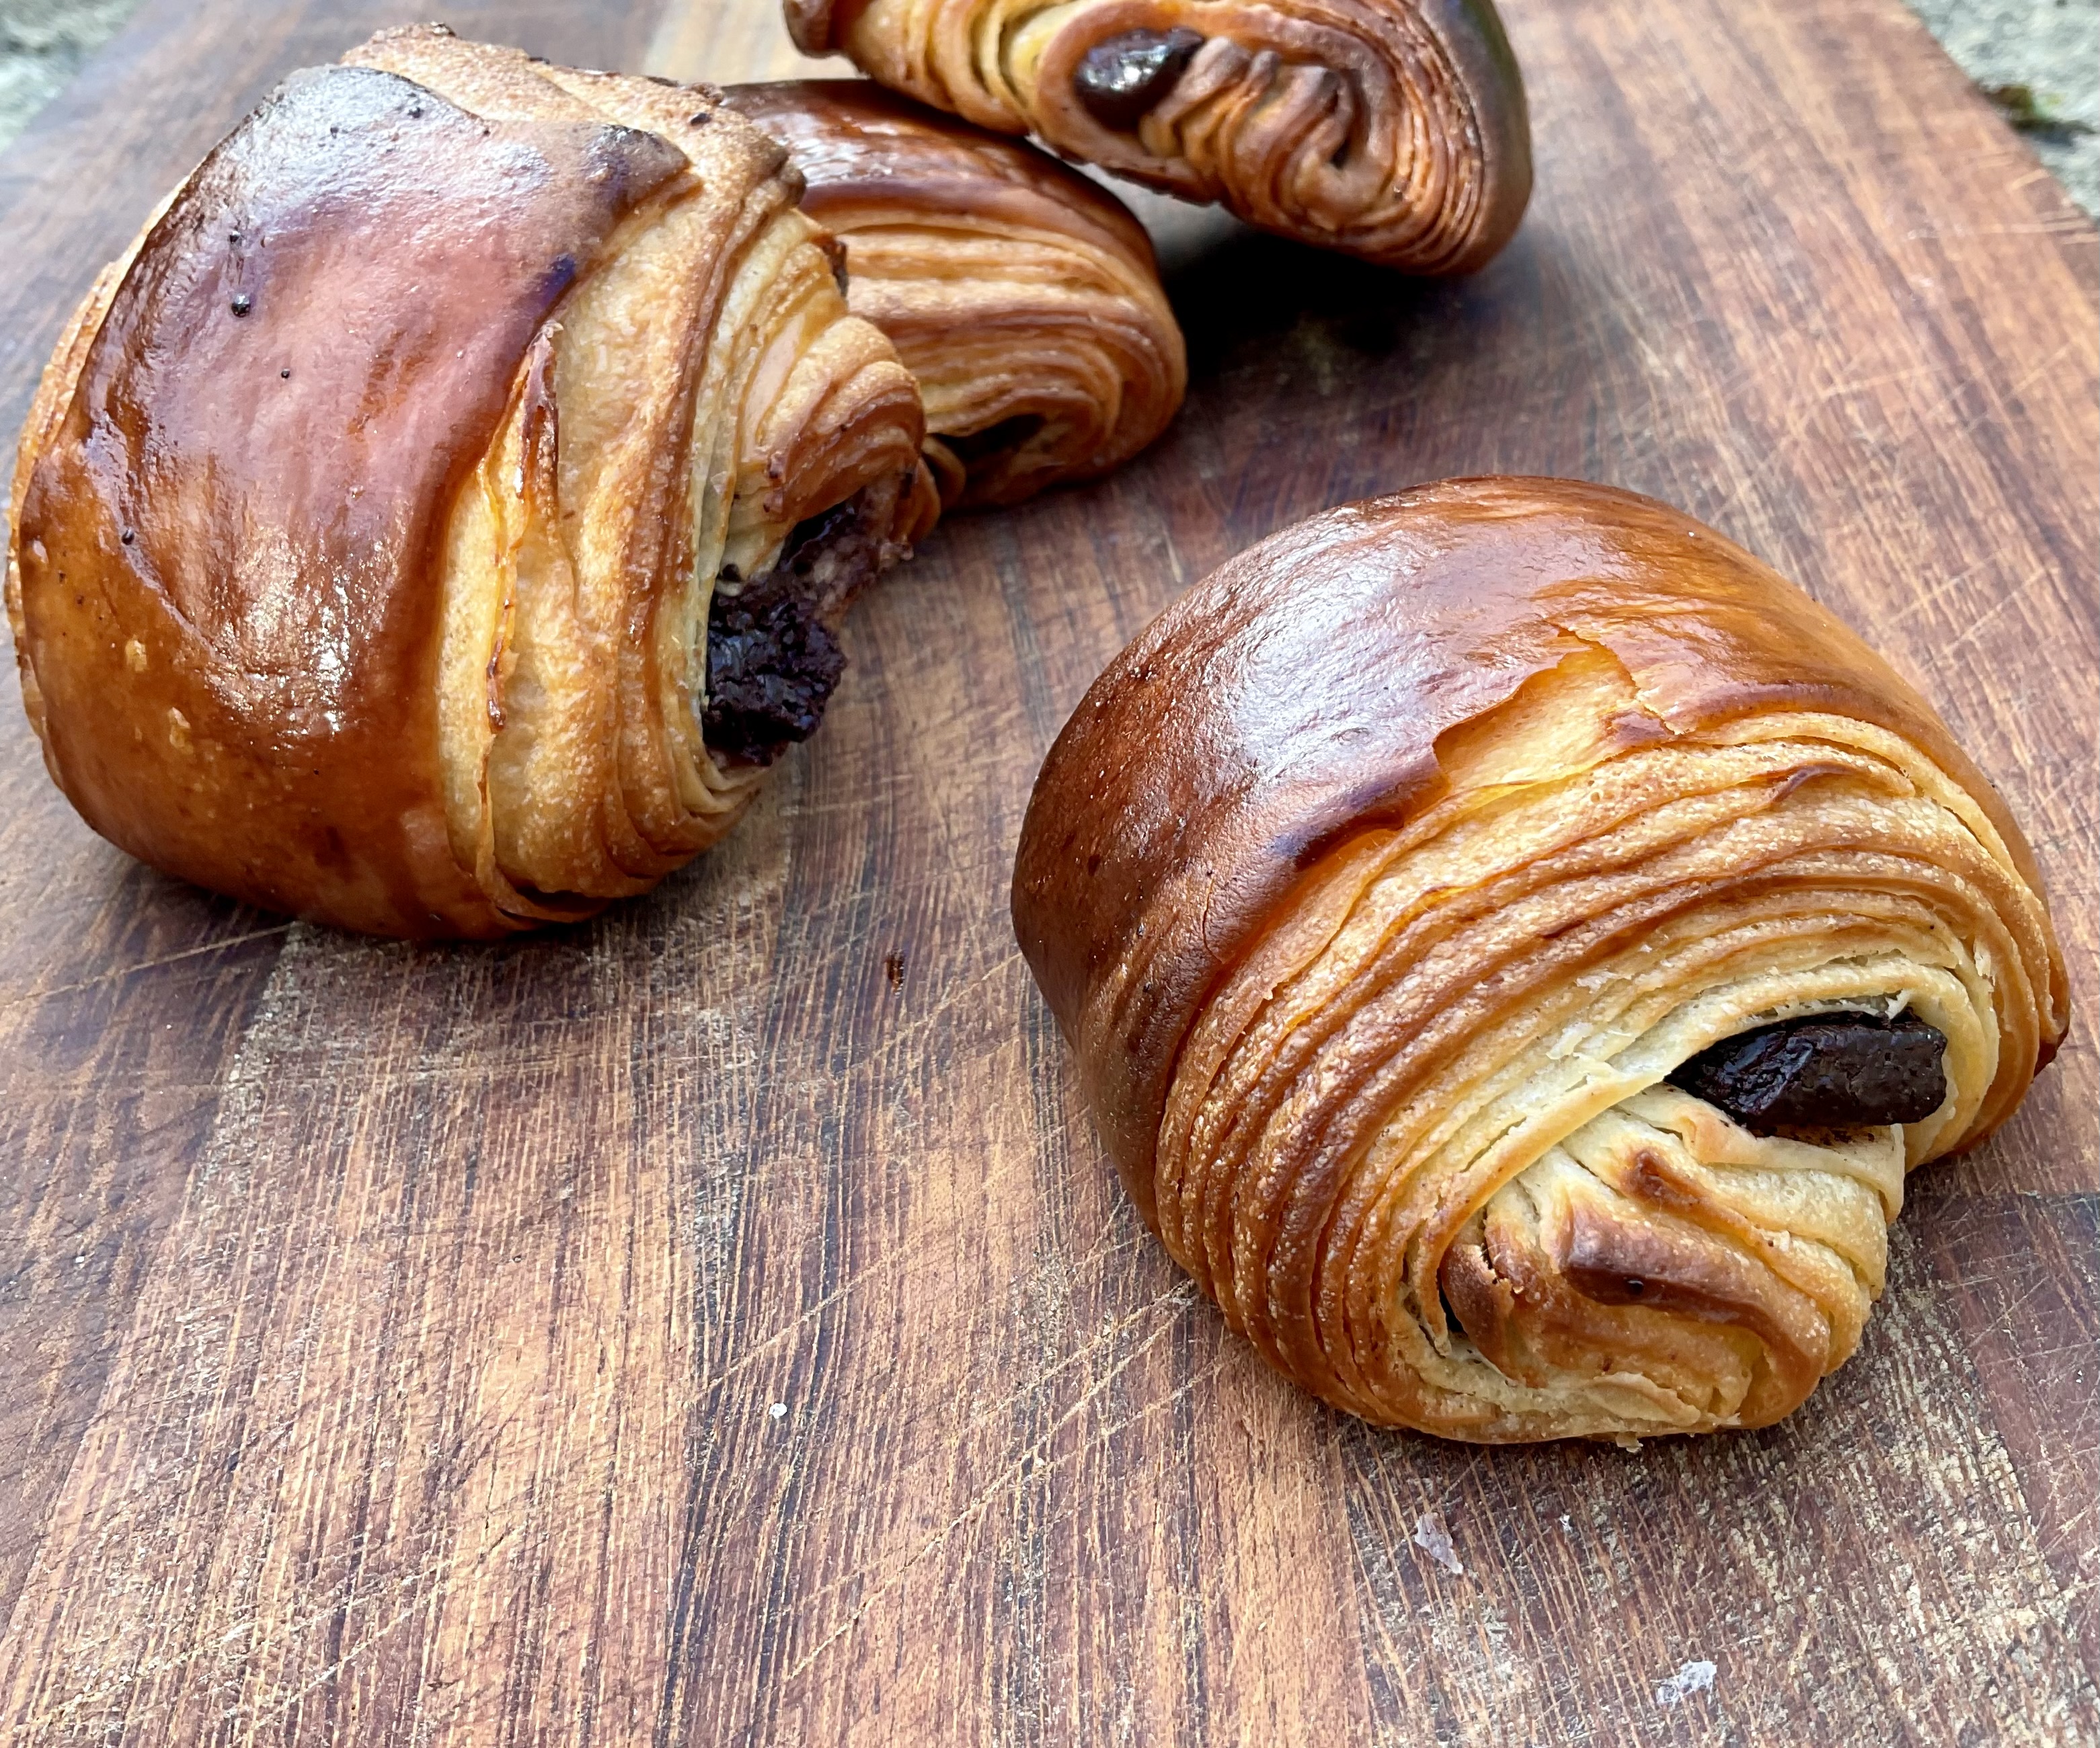
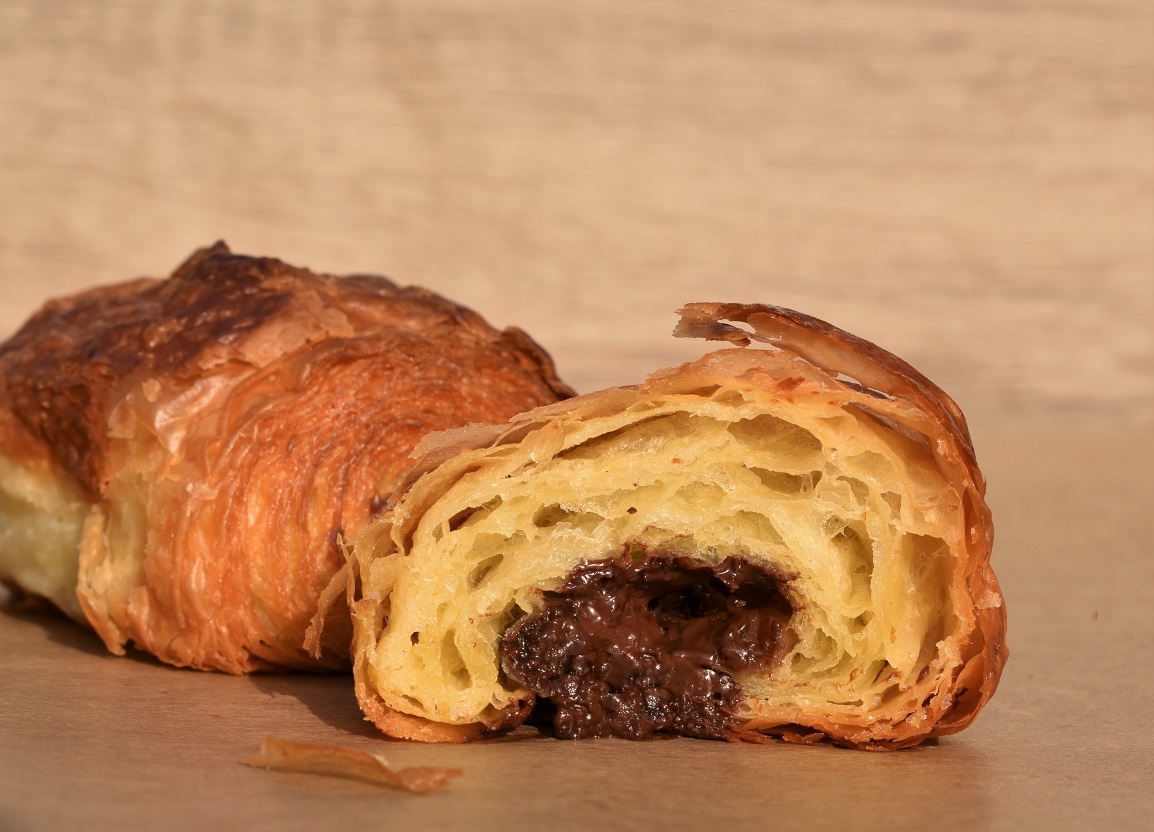
As you can see from the photos, there is decent lamination. The layers are not as thin as with dough made more traditionally but the outer layers themselves are crunchy and firm rather than flaky.
That said, the pains au chocolat still taste very good: and they’re still leaps ahead of supermarket versions!
They are definitely not dense and there is a reasonably open structure inside.
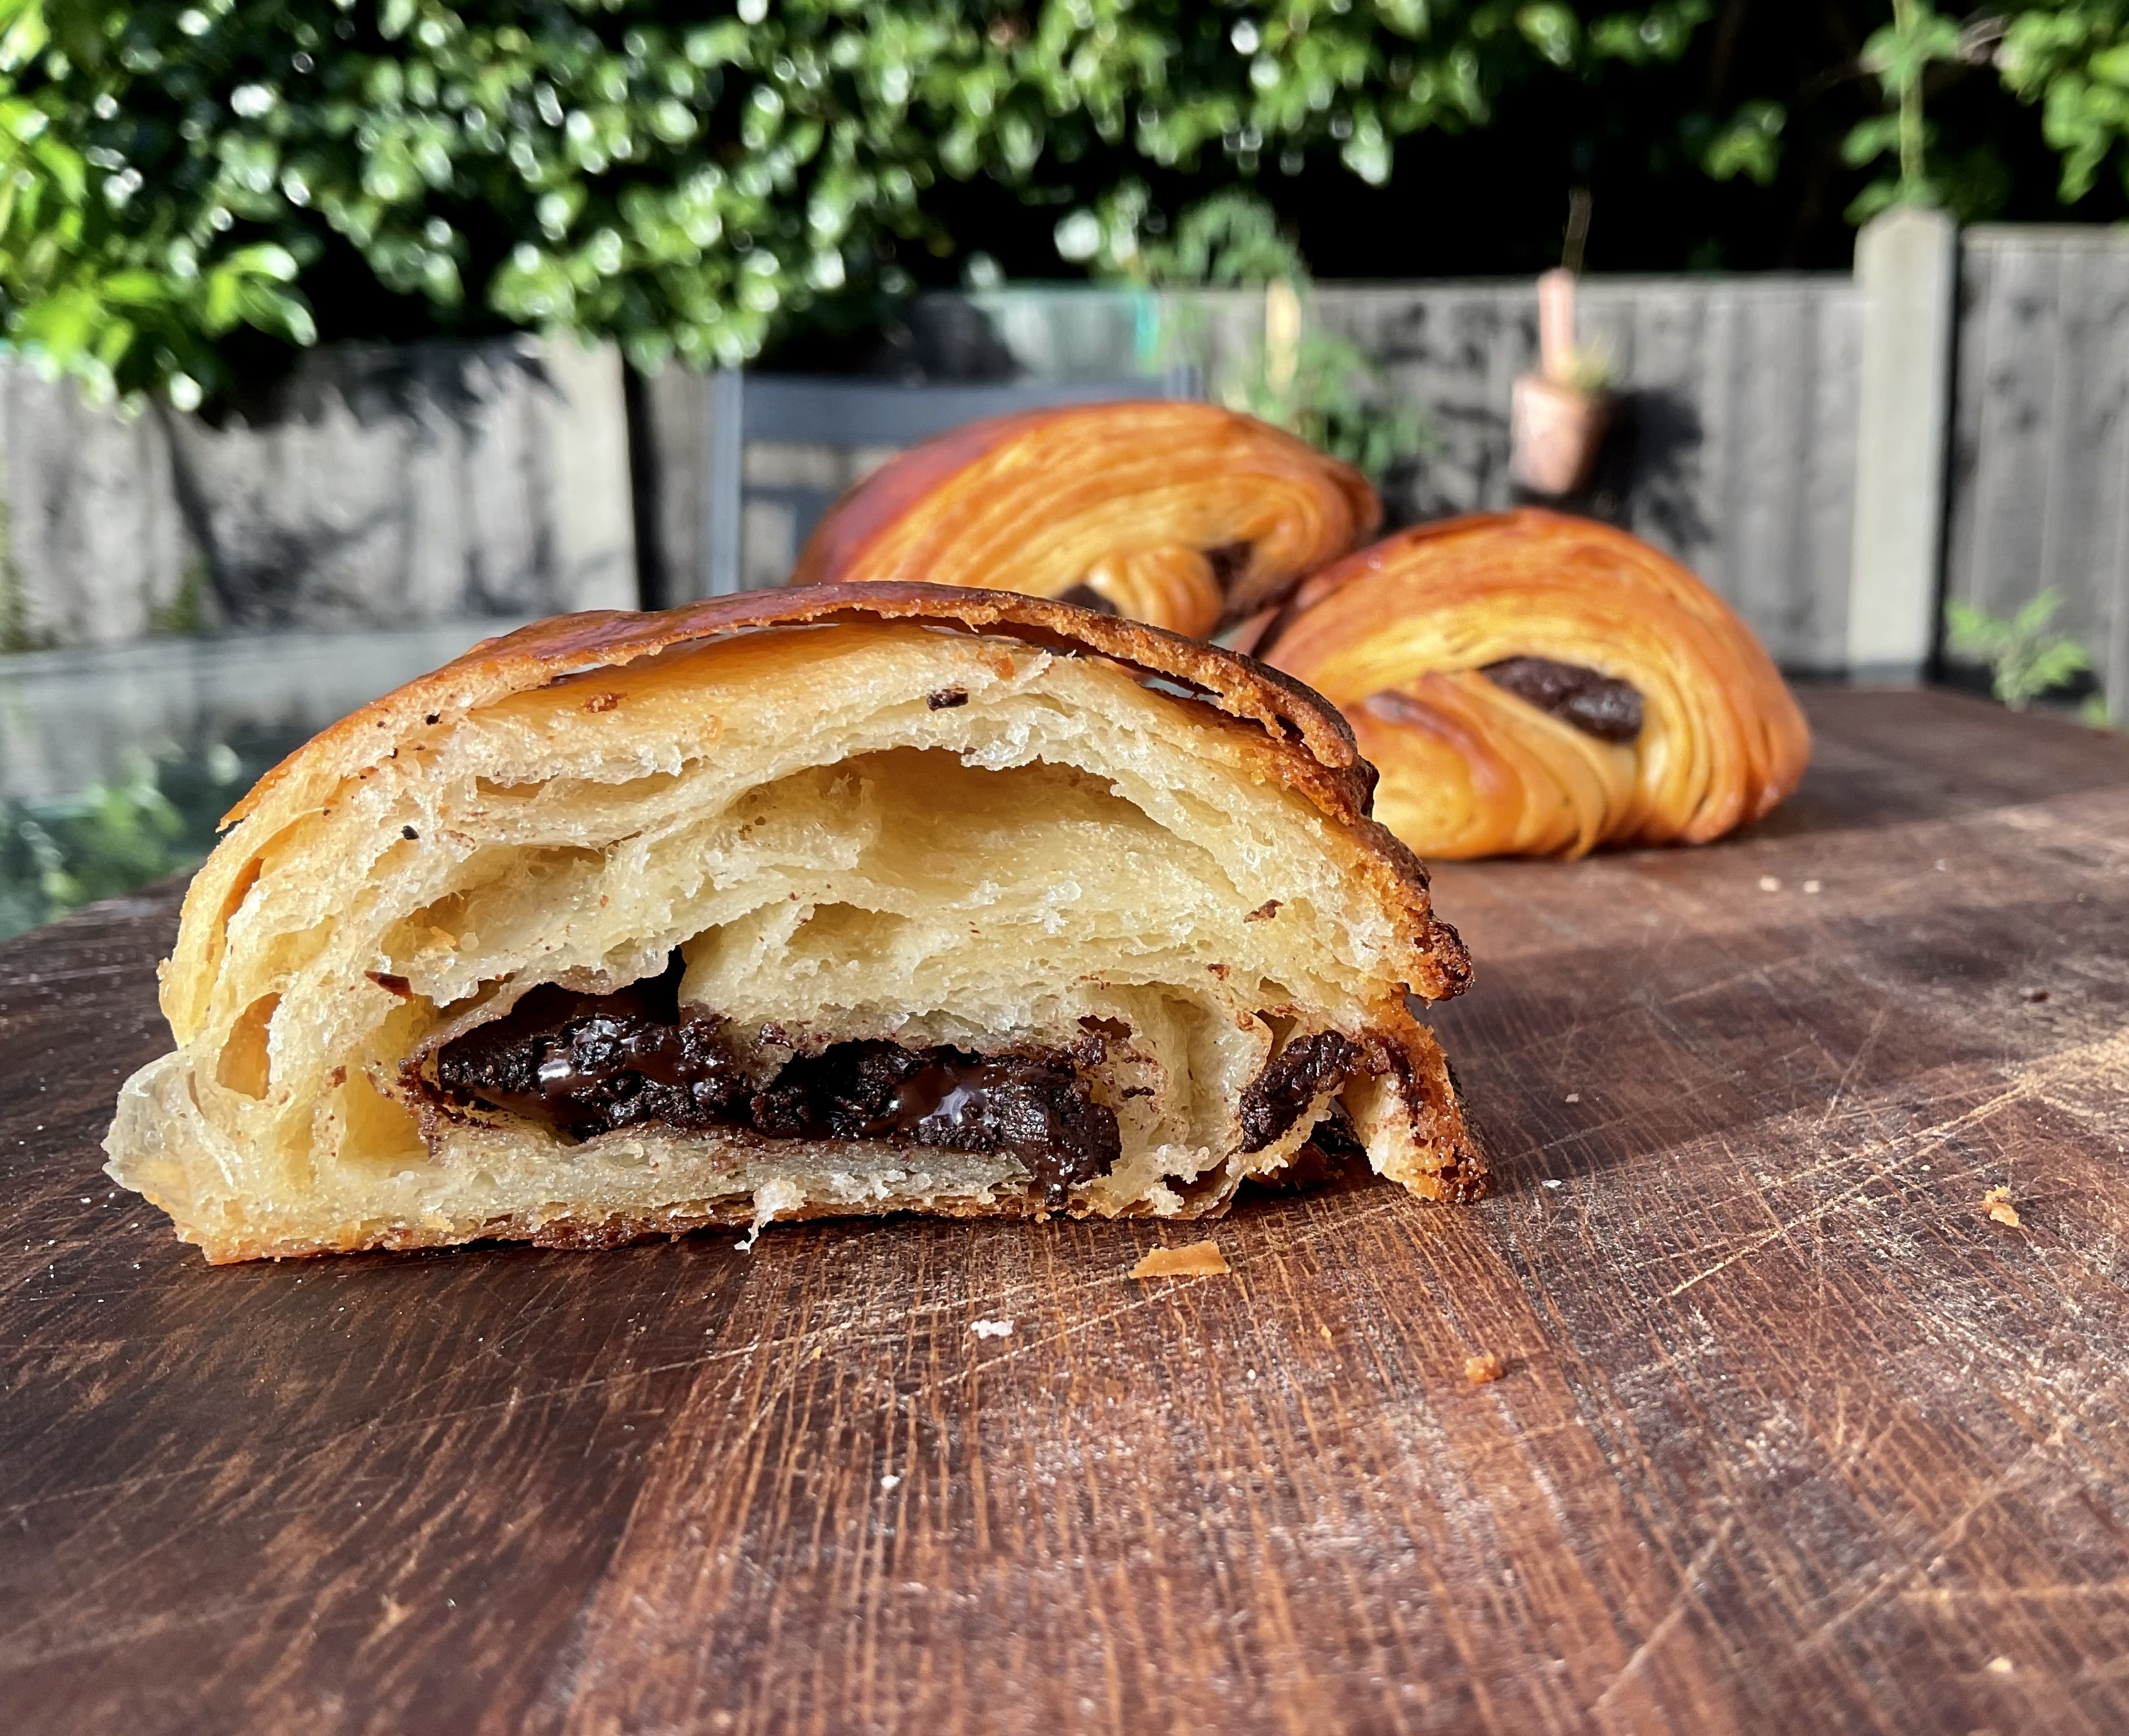
I could have rolled out the initial dough to a longer rectangle to give more of a spiral and therefore more initial layers.
I could also have worked in another fold or turn to incorporate more layers and get a more open texture, but then if I am doing all that I might as well make the dough normally!
As a comparison, I’ve given photos of a batch I’d made previously using the traditional method (2nd row below):

Overall this was a fascinating experiment and it was fun to make something I make often but this time in a different way.
It’s not, I feel, a game-changer in terms of laminating yeasted dough. However, it is possibly worth considering if you’ve never made laminated dough or feel daunted by the lengthier process of a more traditional method.

That is very cool, Phil! Now maybe for croissants and pain au chocolat, when we are used to all those super thin flaky layers, might not beat the “traditional” method, but there are so many other concoctions that could shine with this! I am saving this for later, it is way too hot now for me to face laminated dough…..
GREAT POST!
LikeLiked by 1 person
You make it sound so easy, Phil. 🥐
LikeLike
What is the cooking time and temp please?
LikeLike
these can be cooked at around 180C for 15-20 minutes in a preheated oven.
LikeLike