

A decent sourdough loaf is joy to eat: a crispy crust, a soft but slightly chewy interior and layers of flavour in each bite.


- About the recipe
- The recipe for standard sourdough
- Slight variations to this recipe
- A working time-scale
- Using a dough proofer
- Making a sourdough starter
- Maintaining the starter
- Levains
- A weakened starter
- The “stretch and fold” method
- Bulk fermentation
- Preshaping
- Bannetons
- Shaping
- Cold retardation: a natural flavour enhancer!
- Scoring/slashing the dough
- To steam or not to steam
- Craving a more tangy bread?
- Different flavours for sourdough
- Other recipes using sourdough starter
NOTE: full guidance for making and maintaining a starter, handling the dough, fermentation and shaping are below the recipe, along with ideas for flavour variations. If you are new to sourdoughs, I really recommend reading all of the sections first.

About the recipe
I love sourdough bread and have been making sourdough bread for almost 40 years. That said, a bread made with commercial yeast is still a joy and is something I also make often.

Now I am certainly no expert, but the recipe below gives what I think is a delicious sourdough and, crucially, reliably!

I got the gist of this recipe and the starter – the mother starter – when watching a daytime TV programme decades ago: back then, making yeasted bread at home – let alone sourdoughs – was by no means “a thing”.

Over the years I’ve adapted the recipe I had scribbled down in my quest for even better loaves.

Of course, there are now so many different recipes and methods for sourdoughs that it can be very daunting to know where to begin or which to choose.
Making sourdough can be a challenge and I have certainly had spectacular disasters: but it takes practice to get a real feel for the process.

But if you take it gently, focusing initially on a basic sourdough with a relatively low water content (as in the recipe below), you will certainly become familiar and even comfortable with the process and get to know how your dough should be at each stage.
The recipe for standard sourdough (makes 1 medium loaf)
I have added temperatures if using a dough proofer, which I now use for my sourdoughs

For the levain (which gives 90g for this dough):
- 20g active starter
- 40g strong plain white flour or rye flour
- 30g water
For the dough:
- 500g strong white plain flour
- the 90g levain (above)
- 320ml cold water
- 10g fine sea salt
Note: if it is a very warm kitchen, I recommend using about 2/3 of this levain to slow down the fermentation of the dough and reduce the risk of over-proofing later: you can mix the remaining levain back into the main starter
To finish:
- fine semolina or rice flour for the bannetons/baskets
You will also need one medium banneton, dusted generously with a mixture of fine semolina and/or rice flour. I typically use either a medium oval banneton (21cm by 16cm at the top, about 8cm deep) or a round banneton (22cm diameter at top, about 8cm deep).
For a large oval/rectangular banneton (30cm by 15cm across the top, 8cm deep) I make up a levain using 30g starter, 60g rye flour, 45g water and then use this in the main dough using 750g strong plain flour, 480ml water, 15g salt.
(1) Several hours before you want to make the dough, make the levain by mixing the 20g starter with the 40g flour and 30g water: this will be a stiff levain rather than at all runny or loose. Cover loosely and leave until this levain has at about doubled in volume and is aerated. Be patient as it will get there.
[Dough proofer temperature: 25°C]


NB 1: I find a fairly thick/stiff levain such as this gives the most reliable results but you can add an extra 10-20ml water if you prefer a looser levain (which will also increase in volume more readily).
NB 2: You can also use different flour such as white, wholemeal, buckwheat etc…but I love rye here which also boosts the activation.
(2) Add the dough ingredients, apart from the salt, to a bowl. Mix together with a wooden spoon or a flat-bladed knife to give a fairly rough dough with no visible bits of flour.

Cover the bowl with a shower cap or cloth and leave on the worktop for between about 30 minutes and an hour, which will help the flour hydrate.
[Dough proofer temperature: 21°C]
(3) Sprinkle over the salt and use slightly wet hands to work the salt into the dough, scrunching it in as you go.
(4) Do a stretch and fold session for a couple of minutes or until the dough comes together and can easily be lifted out of the bowl in one piece (see The “stretch and fold” method below). Cover again and leave for about 30 minutes.
[Dough proofer temperature: 21°C]
NB: you don’t need to stick rigidly to 30 minutes: I vary from between 30 minutes and around an hour. A bit longer is not a problem either! This is the first part of what is known as the bulk fermentation stage, during which the natural yeasts are given the chance to slowly multiply.

(5) Repeat this stage until you have done 3 to 4 more “stretch and fold” sessions, covered the dough and leaving it for around 30-60 minutes between each session. [Dough proofer temperature: 21°C]
NB: with each stretch and fold session, the gluten develops and the dough builds strength so that it lifts out of the bowl in one go more easily and with minimal effort. You should also feel the dough has become smoother, more aerated and slightly less sticky.

(6) Cover the bowl of dough again and leave on the work top for the rest of the bulk fermentation stage until the dough has risen by about 50-75% of its initial volume, is slightly domed and has a few bubbles on the surface. It might be easier to see its volume increase if you decant the dough into a plastic container – as in the photos below – but see the section on Bulk Fermentation below this recipe for other signs to check when it is ready. [Dough proofer temperature: 21°C]

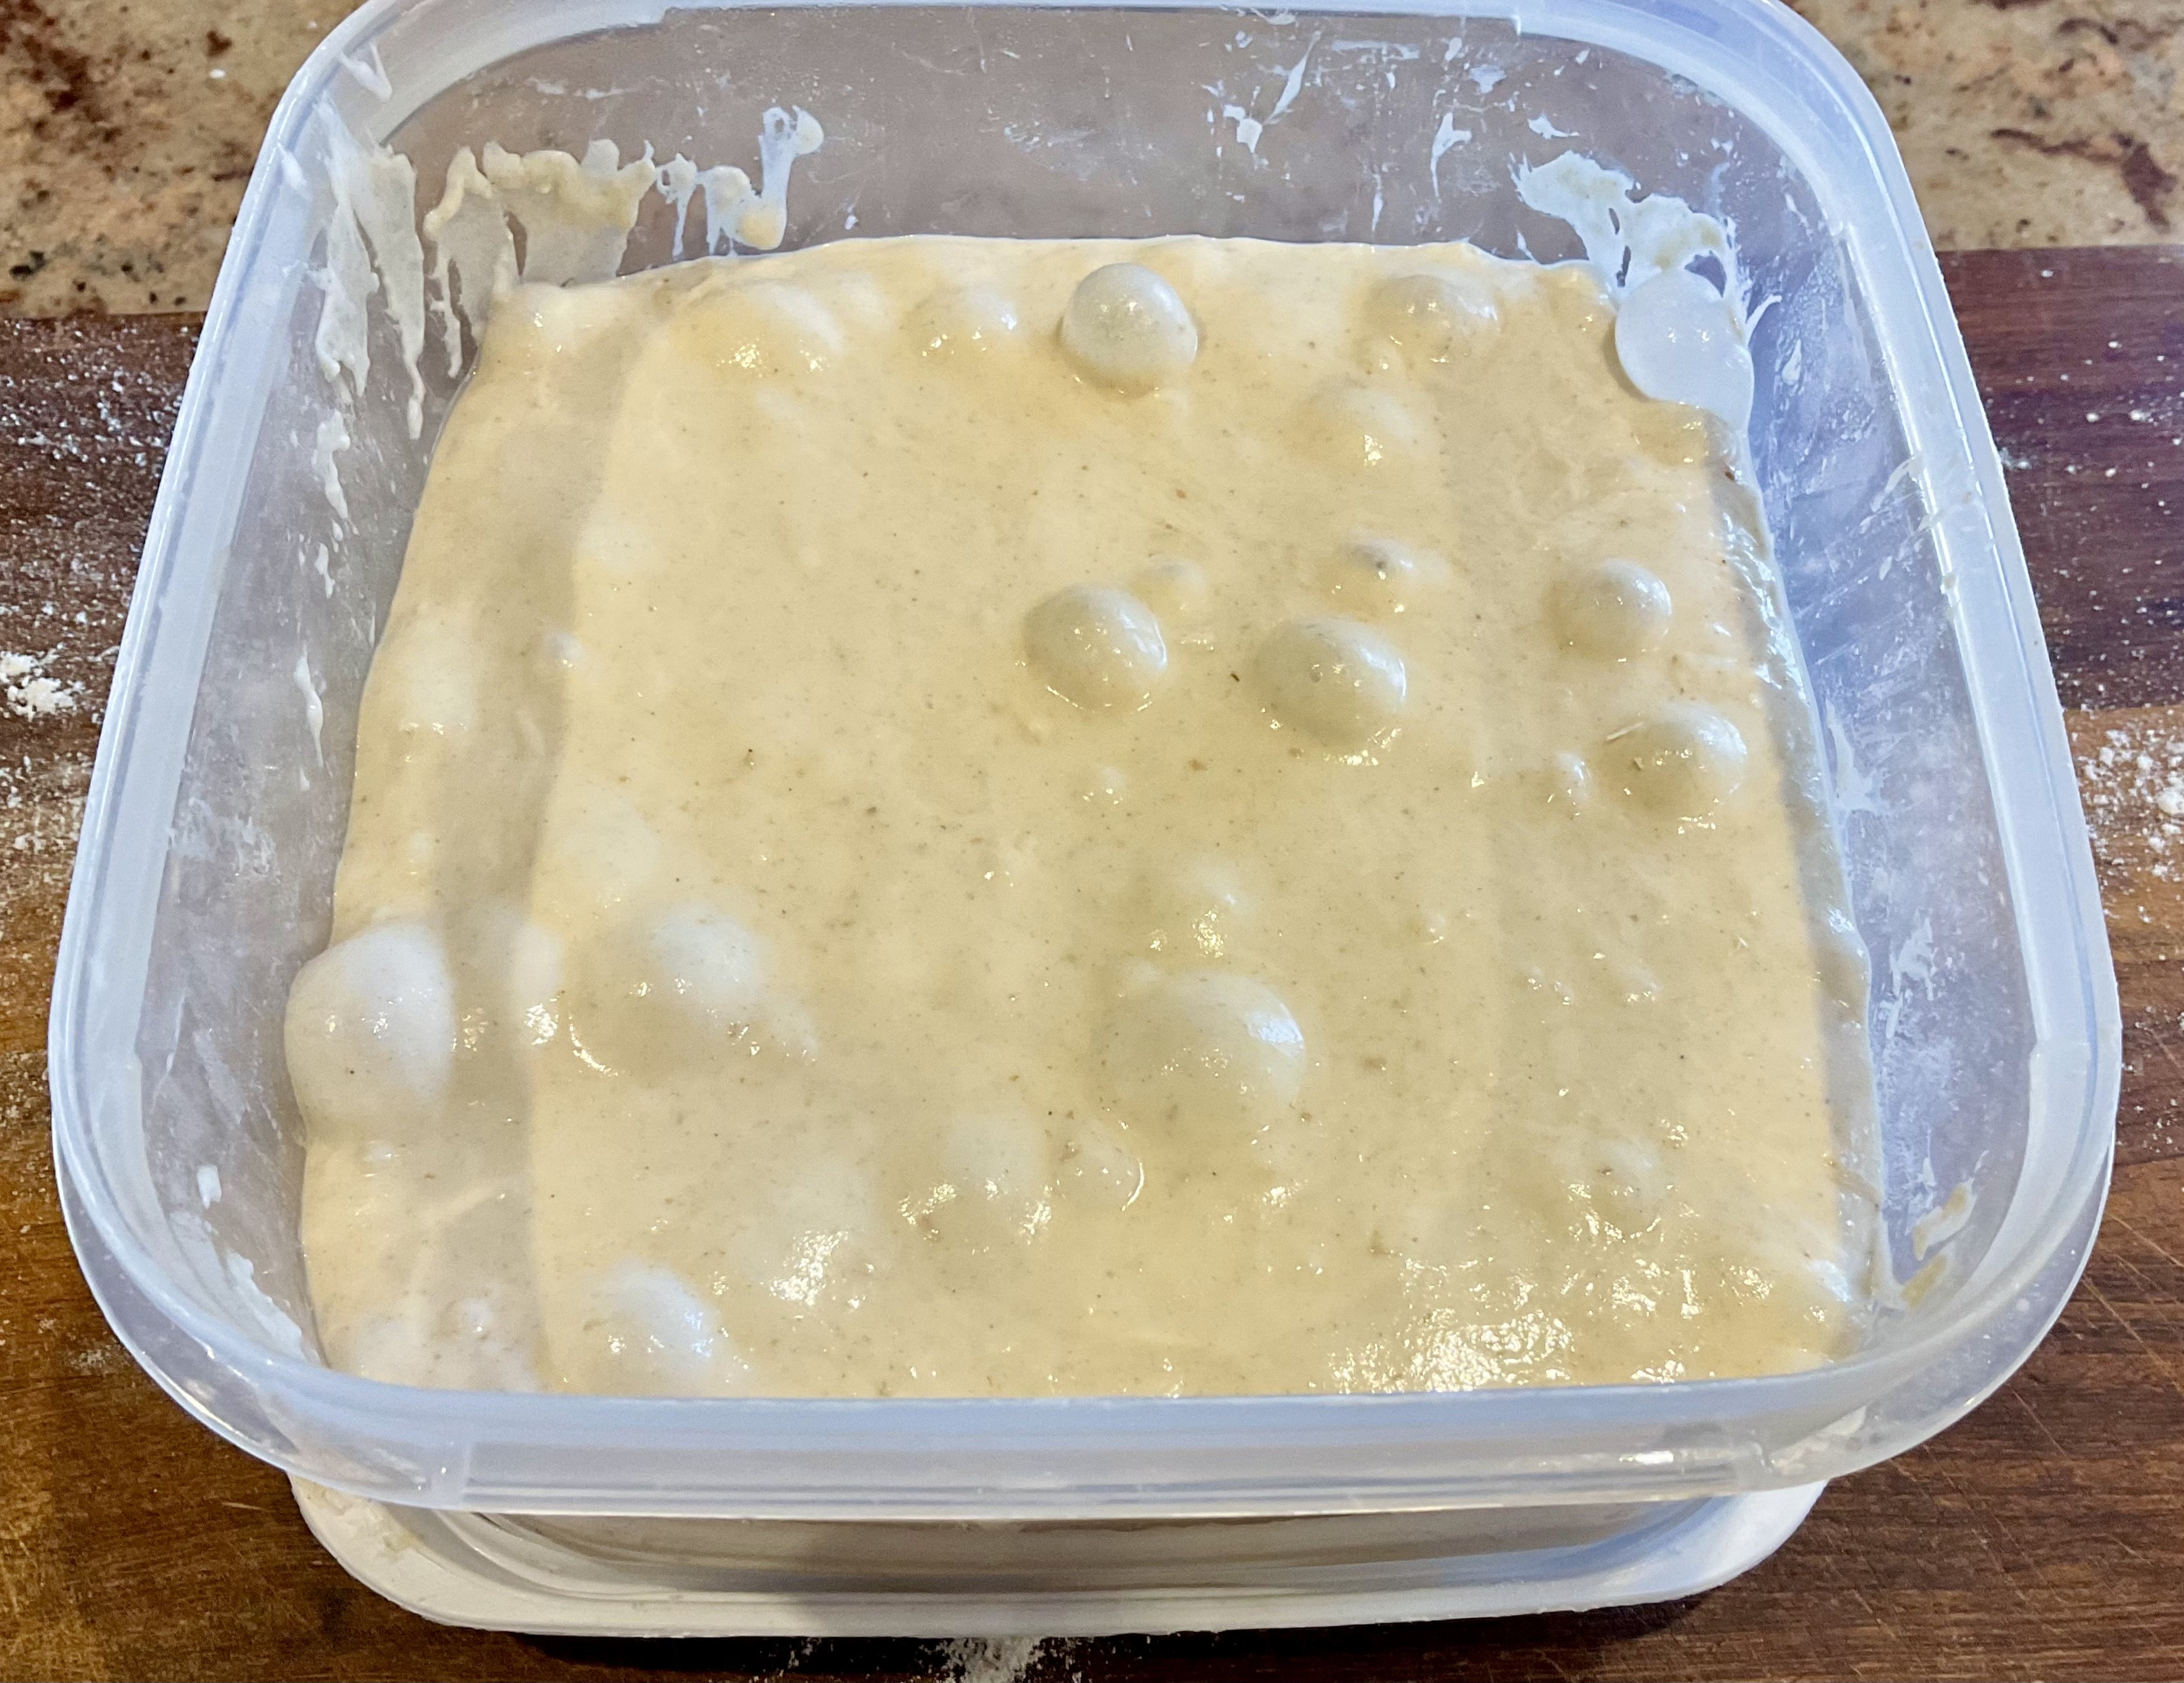
NB 1: precise times do not work with sourdough so it is essential to keep an eye on the dough. I advise against going for a doubling in volume as this usually gives a dough that is over-proofed and is more prone to collapsing later. I find a 50-75% or so increase works best.
NB 2: other visual signs include a slight dome on the surface and a few bubbles visible on top. You can also see air holes up the sides of the container.
NB 3: Be especially careful if the dough is proofing in a warm room as it will rise more quickly; if you overdo this you might end up with a very loose, almost runny dough which will not shape well or hold its structure.
(7) Turn the aerated dough onto a lightly floured surface.
(8) Shape the dough – see below recipe for how to shape – and dip into fine semolina or rice flour to give a light coating all over the dough.
NB: you can preshape the dough first if you wish – this is not essential for a dough such as this which does not have a high water content, but I sometimes do this out of habit. See notes on preshaping below the recipe.

(9) Place in a banneton that has also been liberally sprinkled with fine semolina or rice flour, seam-side upwards and dust a little more semolina/rice flour over the top. You can gently pinch the seam into the dough if you wish, but this is not essential.

(10) Cover again and leave at room temperature to increase in volume just a little. For me, this is typically a rise of 2-3 ridges up the banneton. [Dough proofer: temperature 21°C]

NB 1: this stage is mainly to allow for the dough to expand again after handling it previously for its shaping so it regains a bit of its volume. I find this normally takes around 3-4 hours in the dough proofer. But depending on the temperature of the room. this could be an hour or two shorter or longer.
NB 2: whilst I visually look for a slight rise of just a 2-3 more “ridges” up the bannetons, you can do what is known as a “poke test”:
- sprinkle a little flour over part of the dough
- gently press a finger about a centimetre into that part of the dough and then remove your finger back out of the dough
- if the indent fills in slowly but there is still a bit of an indent, it is proofed enough
- if the indent fills back in almost immediately, the dough is underproofed and the dough needs a bit more time to proof
- if the indent barely fills back in, the dough is overproofed. In which case I would bake it as soon as possible
(11) Put the banneton, still covered, into the fridge for its cold retardation for around 6 hours or for longer such as overnight for more flavour. I often go for around 24 hours, but if you like a tangier loaf you can take it to about 36 hours.
NB: this is when a lot of the flavour will develop. The fridge significantly slows down the fermentation so there is no danger of over-proofing at this stage. The cold dough will also be much easier to score and will give you good oven-spring (the jump in volume of the dough in the heat of the oven).
(12) About an hour before you are ready to bake the sourdough, turn the oven to 230°C (fan) and place a Dutch oven or similar pot into the oven to heat up for about 45 minutes to an hour so it can get really hot. The ones I typically use are in the photo below – from left to right: a cast iron Dutch oven, a cheap and battered metal casserole pan and a ceramic Spring oven. Each works very well indeed, with little difference overall.
NB: alternatively, heat up a solid metal tray or baking stone in the oven and place a solid metal roasting tray at the bottom.

(13) Carefully put the hot Dutch oven onto the hob and remove the lid. Put a sheet of greaseproof onto the top of the banneton and place the bottom of the Dutch oven over this (so the banneton is pretty much hidden in the Dutch oven), using oven gloves at all times. Invert slowly and carefully to allow the dough to release itself from the banneton and now be sitting on the greaseproof on the base of the Dutch oven.
NB: if using a solid baking tray/stone you can instead place greaseproof onto this and carefully place onto the banneton and then turn it over so the baking tray/stone is on the bottom.
(14) Cut the surface of the turned-out dough with a sharp blade, going about a centimetre deep and at roughly a 45° angle. You can do this across the top or along the side: see Scoring the dough below.
(15) Put the lid back on so the dough is fully enclosed in the Dutch Oven
NB: if using a solid baking tray/stone, scatter a handful of ice cubes onto the roasting tray at the bottom to create steam. Spray the dough liberally with water and place in the oven – this slows down the firming up of the crust so the dough can rise well in the oven initially (oven spring)
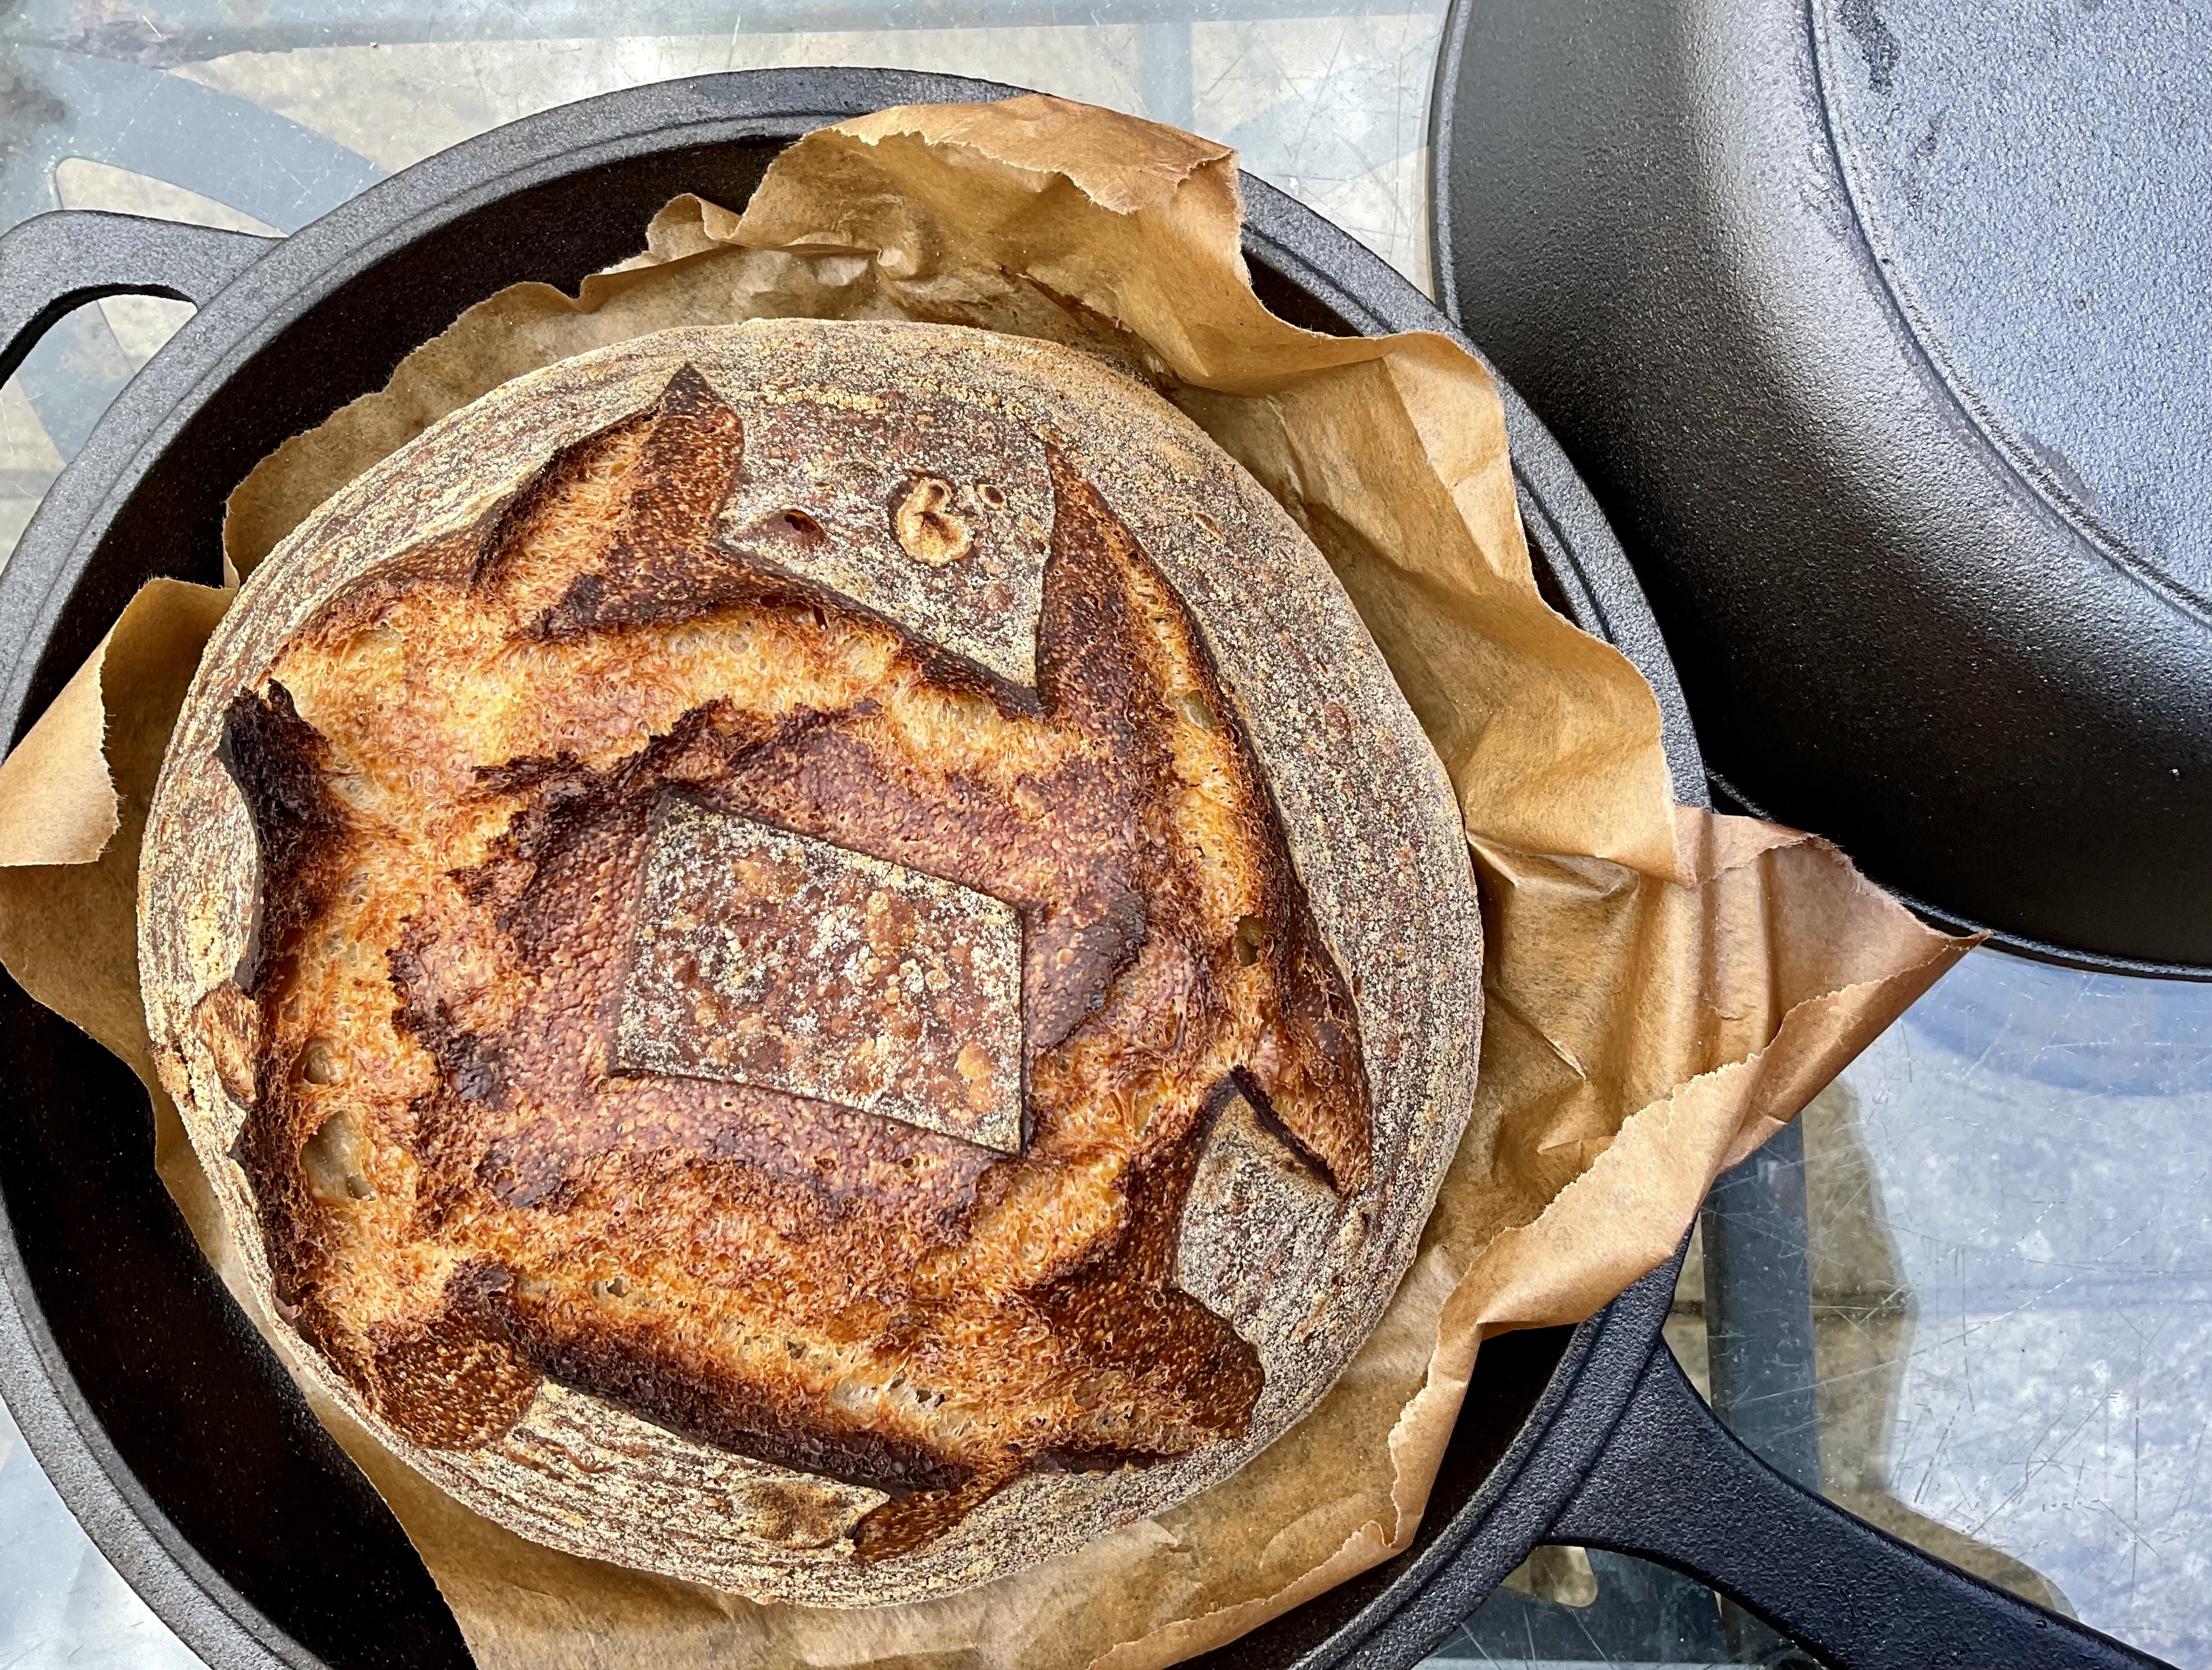
(16) Bake for 40 minutes and then remove the lid of the Dutch oven. Turn the oven down to 200-210°C and continue to cook for a further 15-20 minutes: you want a darker golden colour, or even take it further, which will have the most amazing crust with a fabulous flavour.
NB: if using a baking tray/stone, bake for about 50 minutes in total, reducing the temperature to 200-210°C after about 30 minutes.

(17) Transfer to a wire rack to cool fully before slicing: if you cut while the bread is warm, you can get a gummy texture.

Slight variations to this recipe
Variations that I go for from time to time – depending on my mood! – include:
- adding other flours such as wholemeal to the flour either in the starter/levain or when making up a dough: for 500g flour for a dough I tend to go to for no more than about 100g of other flours ie) 400g white flour, 100g other flours
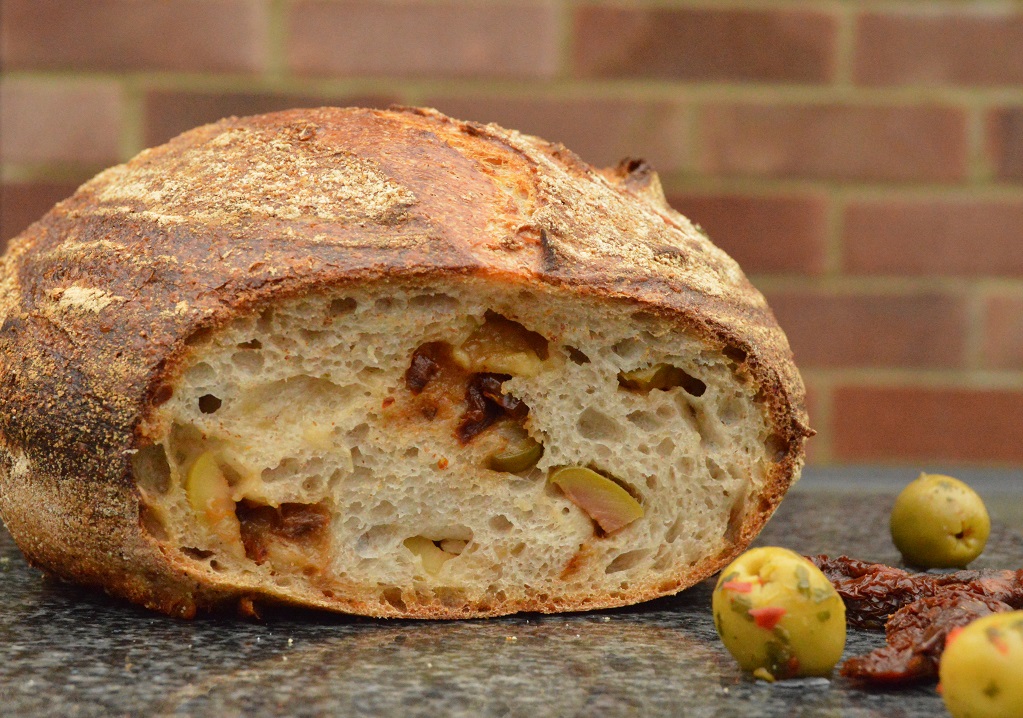
- adding a little more water in the dough recipe: around 350ml-380ml. This will give a more open internal crumb structure (see photo below). A higher water content gives a slacker dough initially but with the stretches and folds it will be able to support its shape when it is turned out of the banneton (as long as it is not over-proofed)
A working time-scale that works for me:
Sourdough cannot be rushed. It takes the best part of 2-3 days for a really good loaf, but most of this is simply letting the dough do its thing: and it is well worth waiting for!
The key stages for making sourdough are:
- feeding the starter and making up a levain
- making up the dough
- bulk fermentation
- shaping the dough
- letting the dough prove
- refrigerating the dough (cold retard)
- baking
I tend to go for the following “time scale” when making sourdough:
– Day 1 morning: mix up the levain ingredients so that it is very active and aerated by the evening
– Day 1 evening: make up the dough, do the stretch & folds and leave overnight to finish its bulk fermentation
– Day 2 early morning: shape the dough and let it proof for a few hours
– Day 2 late morning or early afternoon: put the dough in the fridge
– Day 2 evening or Day 3 morning: bake the dough

Using a dough proofer
As my kitchen is usually on the cold side, I now use a dough proofer. This allows me to keep my dough at a consistent temperature and has been a game changer for sourdough making.
For me the dough proofer has really made things more controllable and reliable when it comes to sourdoughs.

I have experimented with different temperatures in my proofer and I now settle on the following for the each stage. However, the timings are merely a guide: see my notes with each stage of the recipe in terms of what you are looking for with the dough:
- after feeding starter/making a levain: 24-25°C until around doubled to tripled in size.
- resting dough around the stretch & folds: 21°C
- main bulk fermentation: 21°C for roughly 8-9 hours or overnight
- shaped dough: initially for 21°C for roughly 3-4 hours
- chilling the shaped dough: in the fridge for up to about 36 hours.
Making a sourdough starter
The starter is the heart of the sourdough loaf and contains natural/wild yeast and micro-organisms that allow the bread to rise. Acids are also created: if you get more acetic acid (from wholegrain flour in the dough and not feeding the starter as often), you can get a tangier loaf. See “Achieving a more sour or less sour bread” below.
You can buy sourdough starter, but it is easy to make: just don’t be put off by around a week of waiting until it is ready to use properly. Once made, it will keep almost indefinitely if well looked after.
The starter I use at home is many years old and keeps well in the fridge. I feed it just once a week or so with a little bit of flour and water to keep it going, but it can go for a couple of weeks without feeding.
Making a starter from scratch:
I managed to dechiper my scribbles for my first starter all those decades ago:
Day 1: mix together about 30g each of strong plain white flour and water to make a thickish batter. Cover with a clean cloth and put it in a warm place such as the airing cupboard for two days.
Day 3: the mixture should have some small, thick bubbles appearing. Mix in another 30g flour and 30g water, cover and leave it for a day.
Day 4: feed it with another 30g of both flour and water, cover and leave it for another day.
Day 5: there should be more bubbles in and on the starter. Remove about half of this mixture* and then feed it with another 30g of both flour and water and leave it for another day.
*you can give this “discard” to someone who wants a starter or you can already use it in other recipes: there are a few ideas at the bottom of this page
Day 6: the starter should now be very bubbly (how a white-ish chocolate aero bar might look like!) and have a slight vinegary aroma to it. Leave it be at this stage.
Day 7: feed with another 30g each of flour and water and leave a day or so before using. This is now your mother starter. It will be quite weak so if you use it at this point for a bread it might not have the structure you would like. However, as you feed it more your starter will build up strength to make great loaves.
Maintaining the starter
I cover my starter with a clean cloth and leave in the fridge most of the time. However, make sure you don’t put on a tight-fitting lid as the build up of gases could make the starter jar explode – as I discovered very early into my sourdough journey!
If you leave the starter too long without feeding you will find a clear liquid, which might be very pale or slightly yellowish – floating on top. While it might look unsettling, it will be absolutely fine if it smells vinegary and is not too dark: you simply stir it back in.

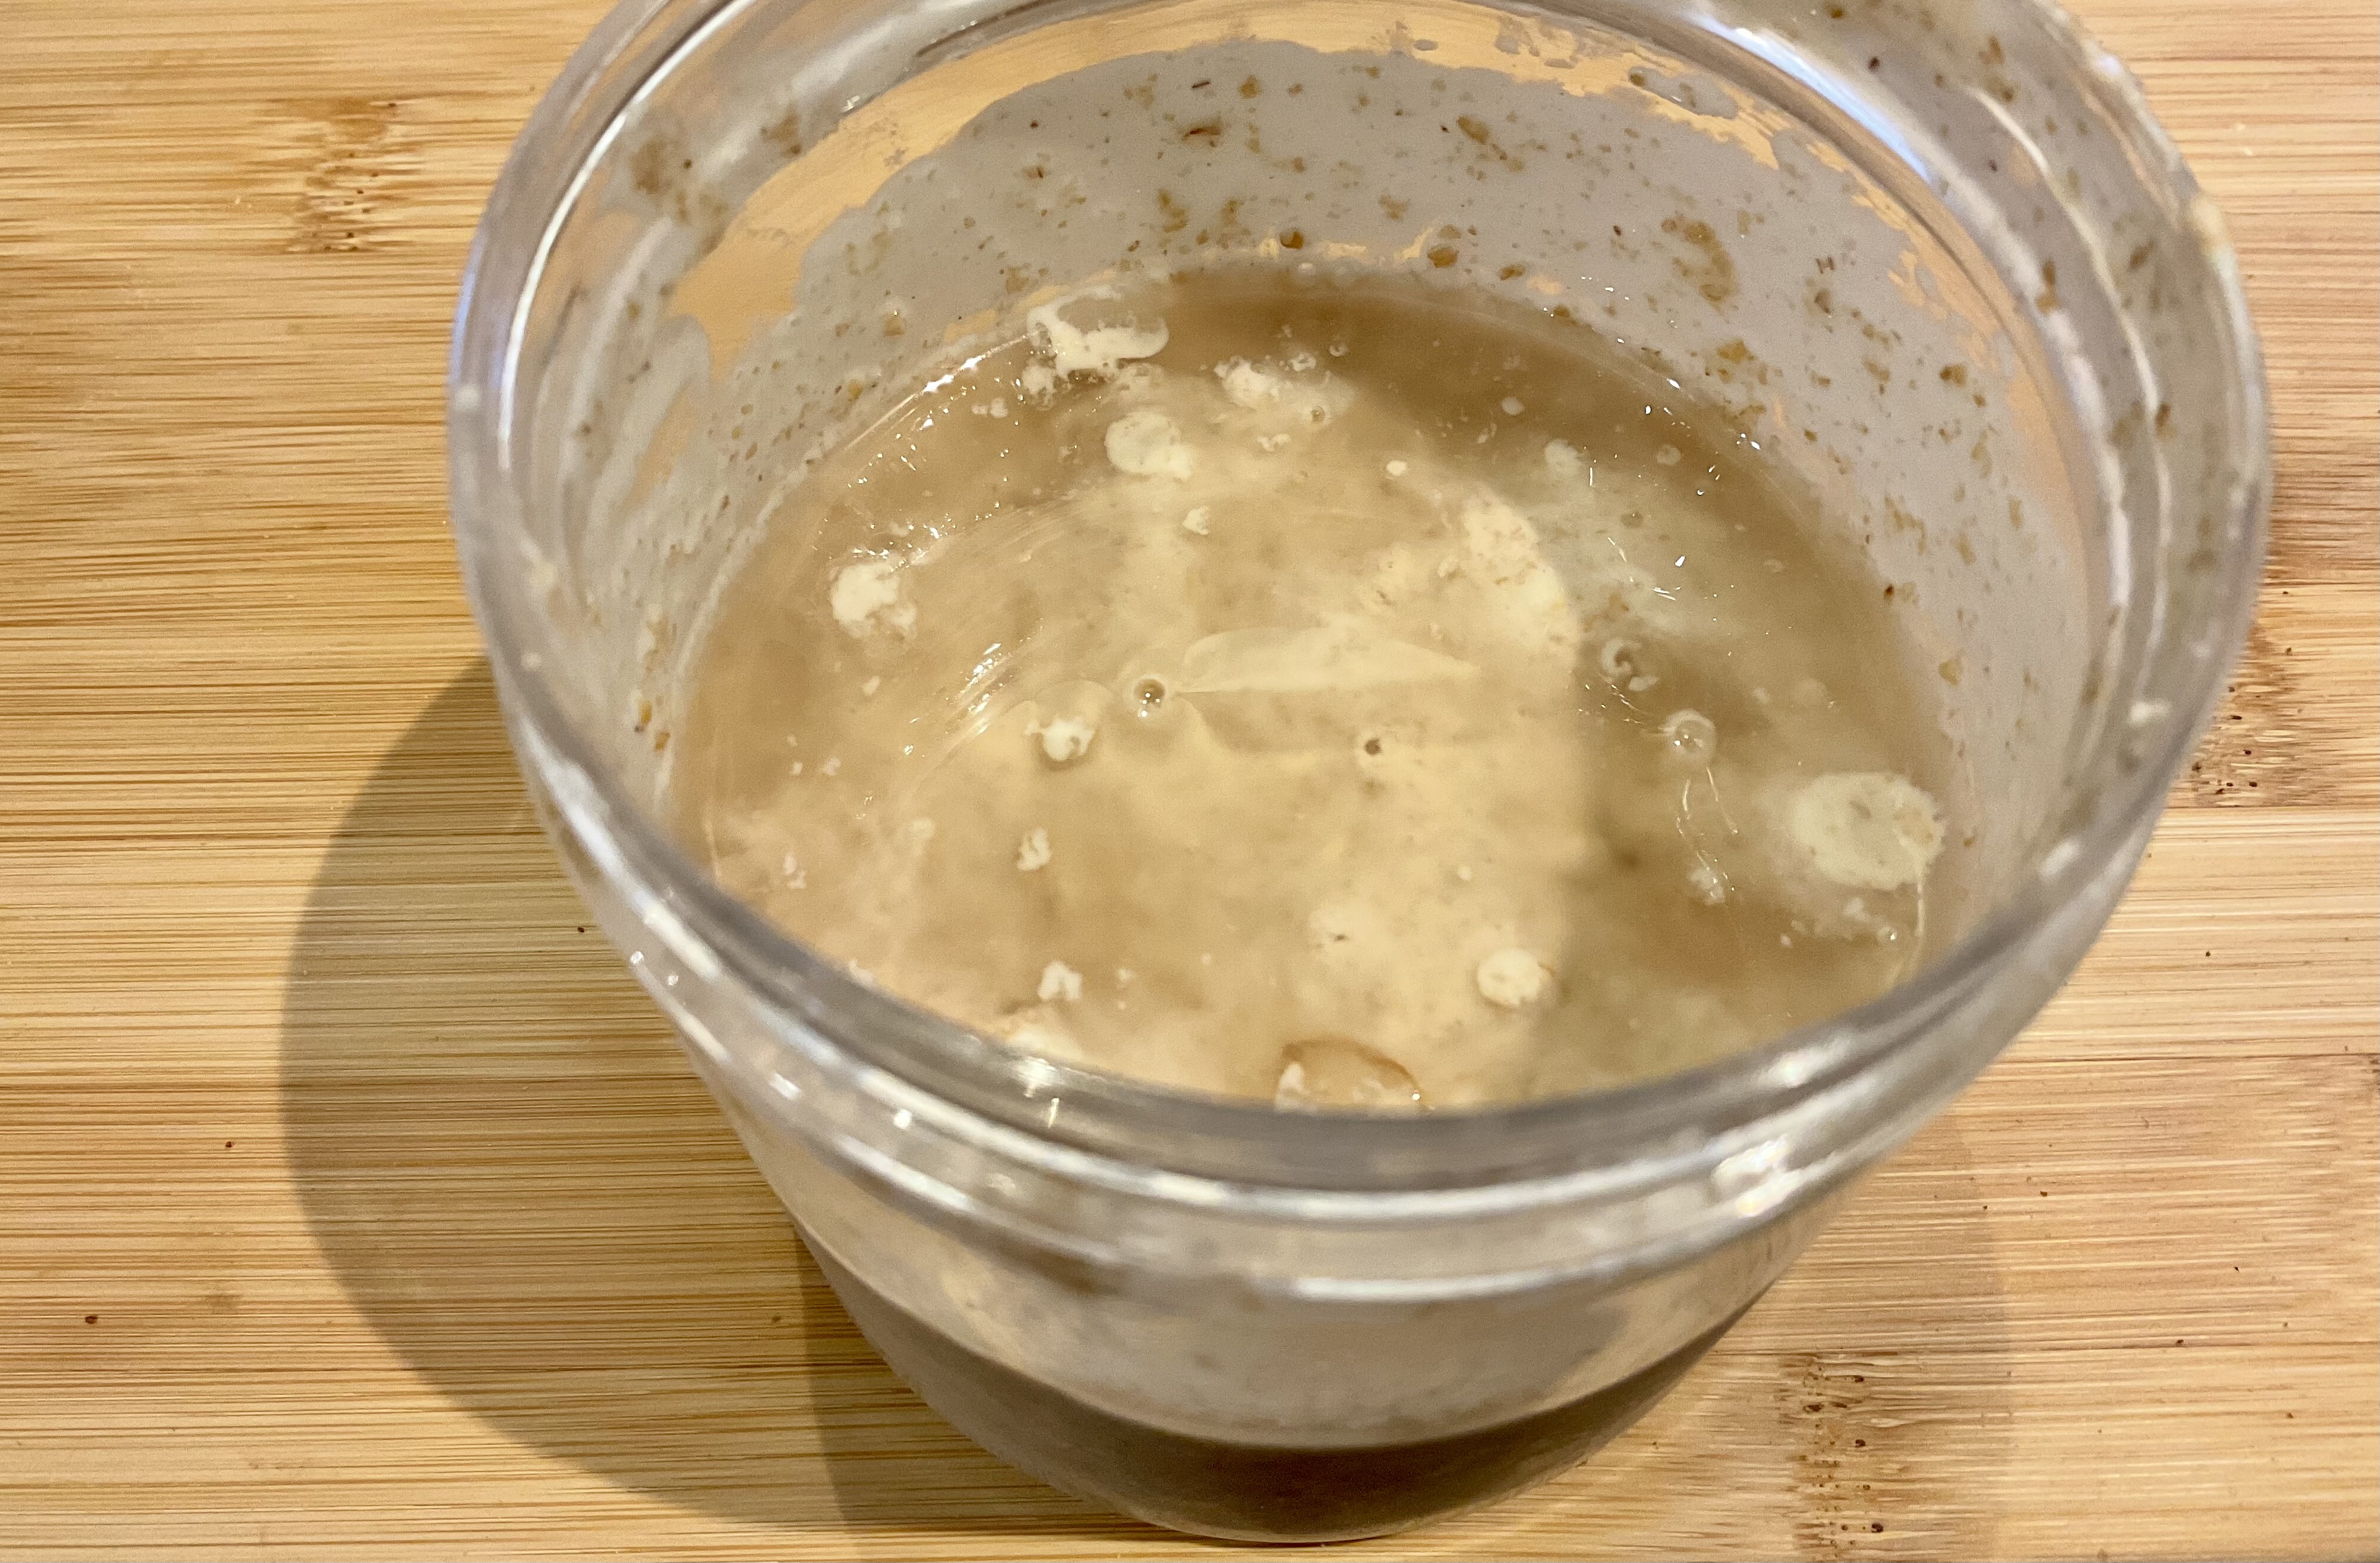
However, if it develops a very dark or even black liquid (for example if you’ve not fed it for many weeks) and it smells rank, simply pour that liquid away and discard the top centimetre of so of the remaining starter. Give the rest of the starter a few feedings to get it going again.
As you do not need much starter in a recipe, I now only keep about 50g of my mother starter in the fridge.
I give my starter a weekly feeding of around 20g each of flour and water: this is enough of a feed to keep her going gently. I then give her an extra feed the day before making up a dough. However, whereas I sometimes use starter as it is – as long as she has been fed a bit more so it is fully bubbly and active – I now tend to make a levain:
A levain
The levain is simply a bit of the mother starter fed with flour and water and left to ferment so it can then be used in a recipe. If I make a levain for a dough using 500g flour I typically go for a fairly stiff levain of 20g starter, 40g flour and 30g water: I find a stiff levain rather than a looser one gives a dough that is much easier to work with.
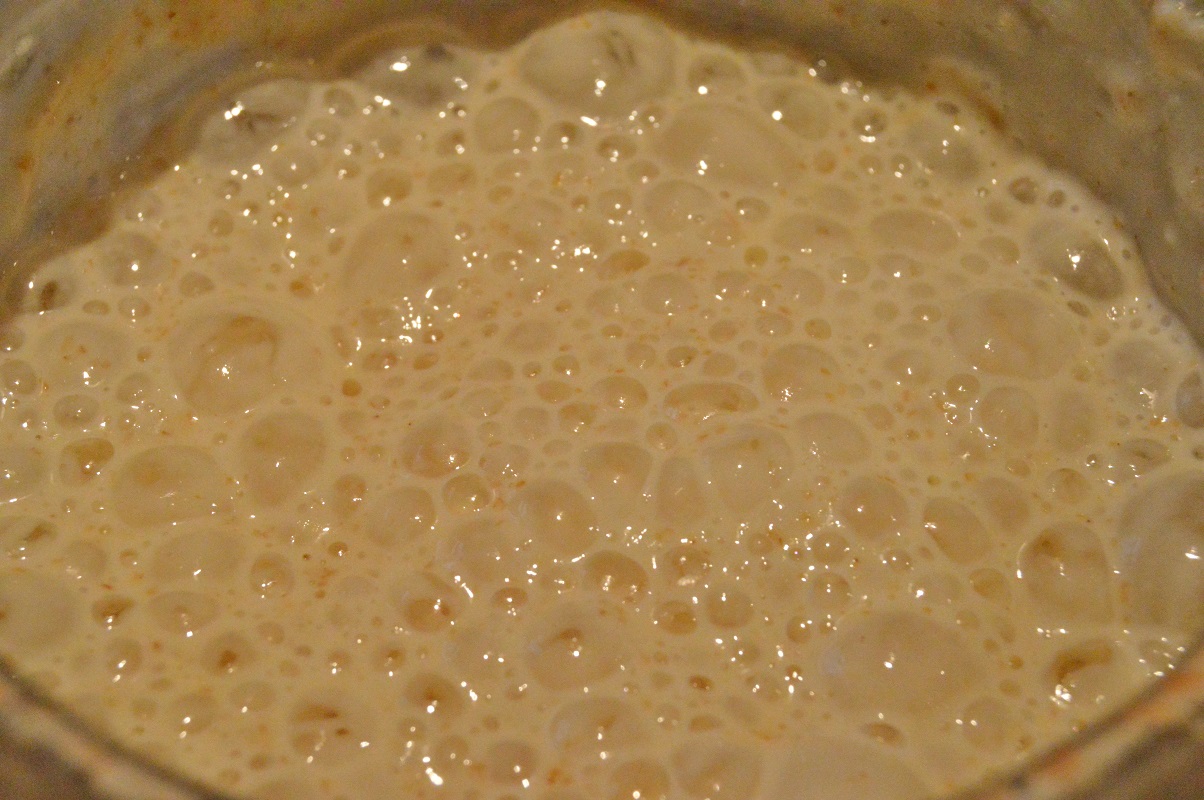
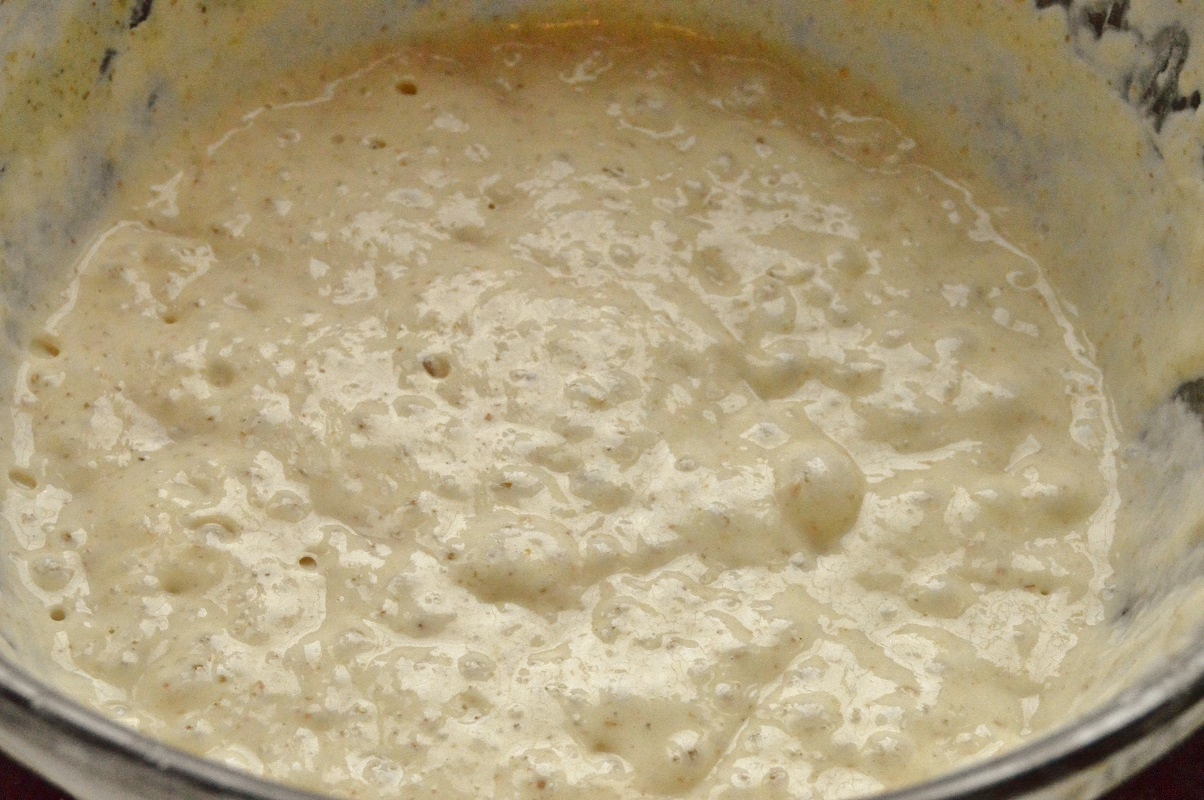
The levain or starter should be allowed to double in volume and become aerated before using (see photos below) but don’t worry if it is not quite there or if it has gone past this: it will still work well in your sourdough.
A key advantage of using a levain rather than your main or mother starter is that you are working with relatively small amounts of flour and water at a time and making up just what you need for a recipe. I find this easier to manage.
A levain is also less acidic than the mother starter; as gluten is weakened by acid, in the long duration for the dough to ferment, the gluten in the flour (which gives structure to the dough) does not break down so much. You therefore get a dough that is less likely to collapse into a flat and dense sourdough loaf.
A weakened starter
If you find that you are not getting much rise in the starter/levain, or if you have suddenly had a batch of loaves that, despite care at every stage to avoid over-proofing, still come out flat, it is possible your starter has become too weak. This has happened to me on a few occasions over the years.
If this is the case, discard all but about a tablespoon or so of the starter and mix in about 30g rye flour and 30g water. Repeat twice a day for a few days and the starter will become lively and ready to go again.
The “stretch and fold” method
When I started making sourdoughs all those decades ago I was frequently dismayed that once the dough had its final proving and was turned out for baking, it would start to spread out in front of my eyes: a very sad sight! This is because the acidity of the starter breaks down some of the gluten in the flour so it loses some of the structure it had earlier.

It is especially likely to happen if you have left the dough too long to overproof and/or have placed the dough in too warm a place.
For me, the “stretch and fold” method, in place of traditional kneading, gives me a dough that is easier to handle and very reliable loaves

The stretch and fold method is by no means labour intensive: you simply pop back to it every 30 minutes or so for just a few minutes of stretching and folding at a time. I have found this is by far the most reliable approach in terms of effective gluten development and the best overall structure.
The stretch and fold steps:
- using very lightly watered hands (wet hands don’t stick to dough!), hold part of the dough and then grab the other part of dough and stretch it upwards, to just above the bowl or so. Let it fall back over itself.
- give the bowl about a quarter-turn and repeat this process several times for a minute or so, or until the dough lifts out of the bowl easily as you stretch it. You don’t need to be brutal with it, just gentle stretches and folds work well.
- that is one stretch and fold session.

After this session, you repeat every 30 minutes or so to have given a total of 5 or 6 “stretch and fold” sessions. With subsequent sessions, you will feel the dough has gained strength as the gluten develops and it holds its shape easily.

With later stretch and folds, you’ll find the dough becomes smoother and silkier, as well as a little more aerated. When you stretch it, the dough hangs together in one piece, as it has built up strength as the gluten has developed.

The crucial bulk fermentation stage
This “first rise” – the bulk fermentation – starts during the stretch and folds and is important, not least for building up the strength and structure of the dough.
Once the dough has had its stretches & folds, it really is important to then let the dough go through the rest of the bulk fermentation stage properly: this is one of the trickiest stages of sourdough making as you don’t want to either underdo or, more crucially, overdo this:
- If you don’t allow enough time: the dough will be underproofed and the baked bread will be denser with a slightly sticky crumb, yet have random huge airpockets/caverns – as in the photo below. However, this is still delicious if toasted or made into croutons.

- If you overdo this: the dough will lose its structure and collapse when you turn it out, resulting in a flat sourdough. If, when you turn it out, you see the dough spread in front of you simply scoop it up, place it onto a well oiled flat baking tray and rub olive oil gently over the top. Leave about an hour or so before baking as a type of focaccia: it will be delicious!
The bulk fermentation takes several hours in a warm room or overnight if it is cooler. However, the timings are never going to be precise for sourdough given all the variables. Instead, you should look for the following to signify the bulk fermentation has finished:
- the dough has increased by between around 50% – 75% of its original volume
- a few bubbles appear on top of the dough
- the dough is very slightly domed
- the dough has a loose wobble when you gently shake the bowl without being runny or slack: if you gently touch it you can feel a light bounce to it
- there is a less sticky feel to the dough than previously: it will still have a slightly tacky feel to it, though
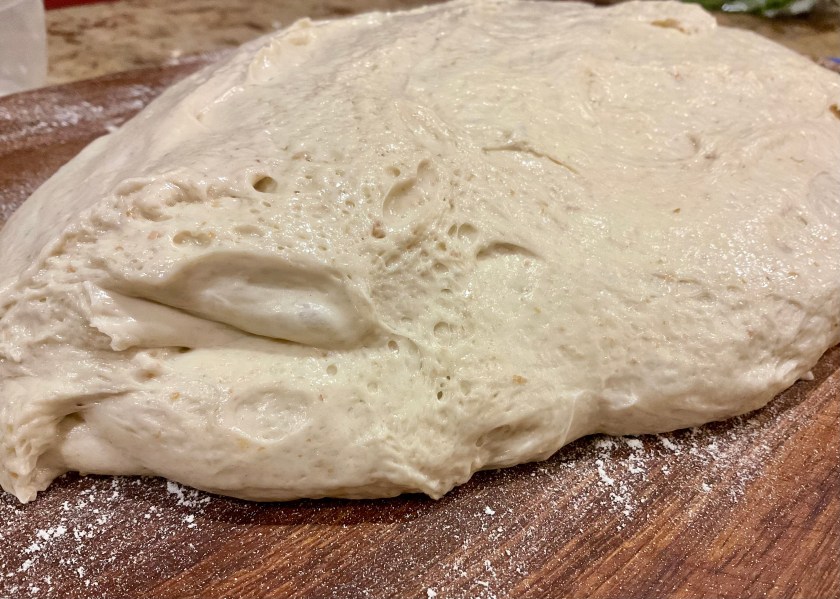
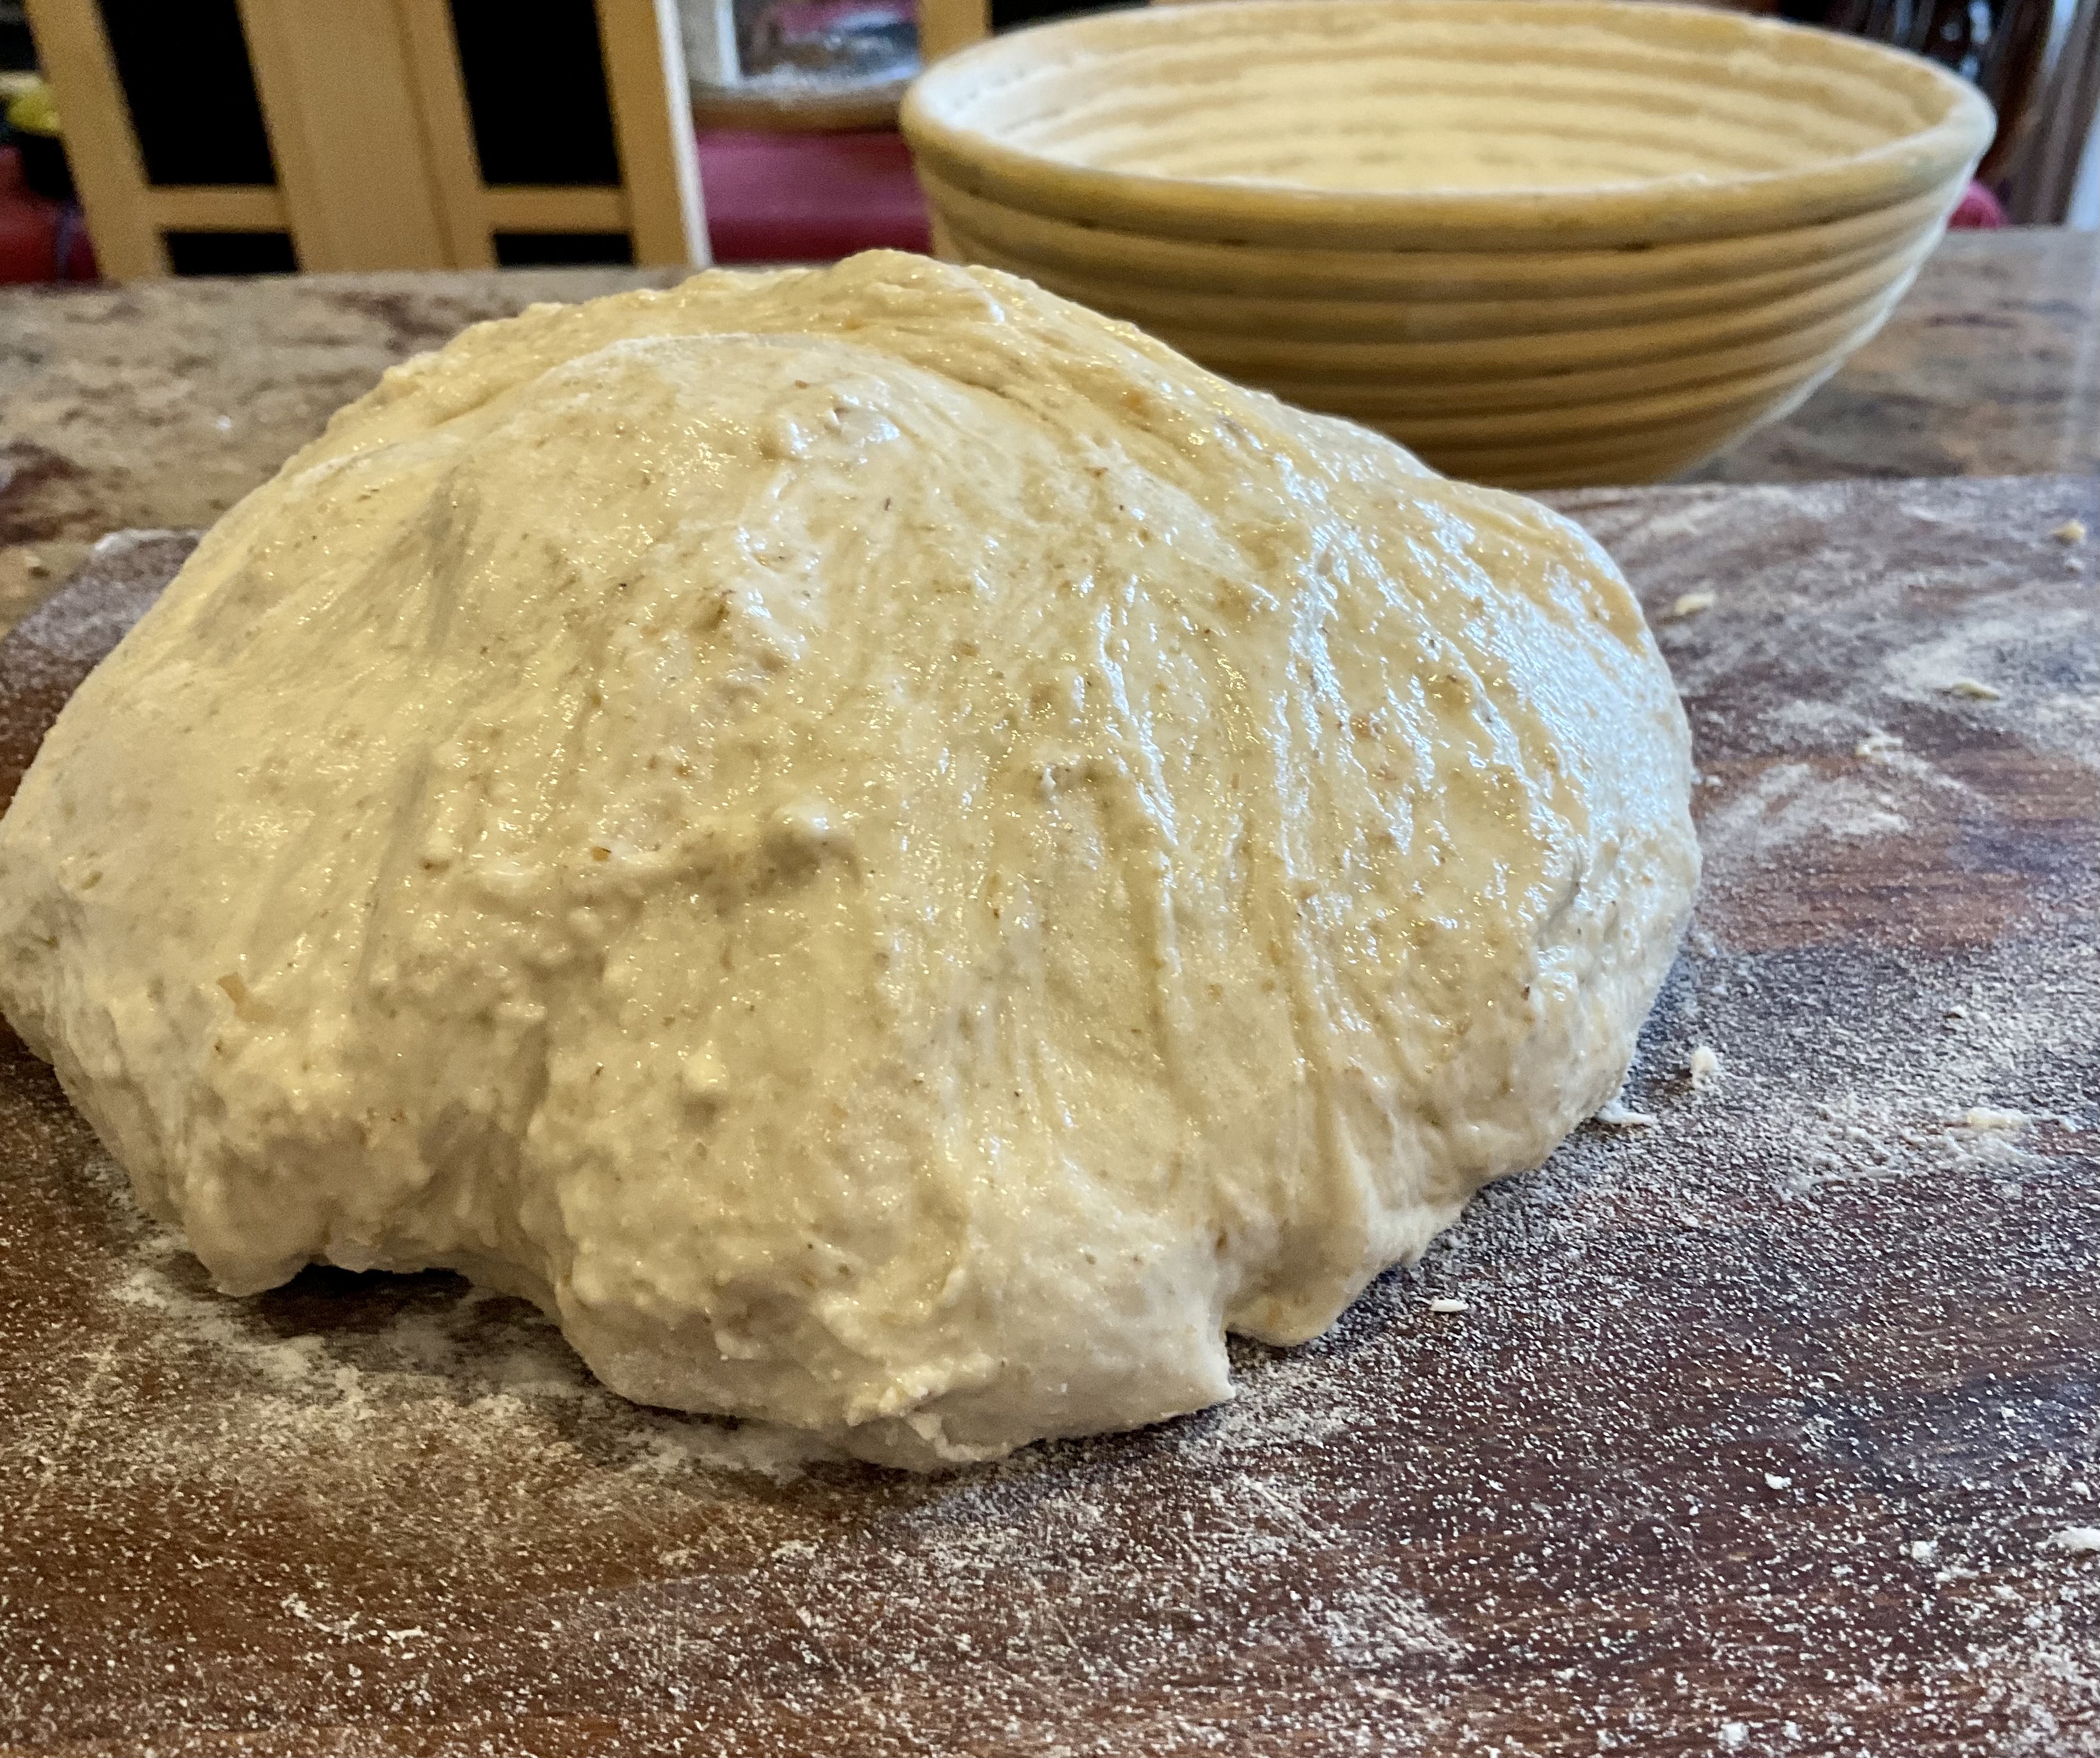
Nicely aerated dough after bulk fermentation

Preshaping (optional)
After the bulk fermentation you can go straight into the shaping, which I do for most of my sourdough, but if I have increased the water content I find I get the most reliable results if I preshape the dough first.
The preshaping helps the gluten relax just enough to make the main shaping easier to perform with a lightness of touch. Preshaping also adds extra strength to the dough and allows you to start to develop surface tension, so that when it is later turned out of its banneton, it holds its shape.
To preshape:
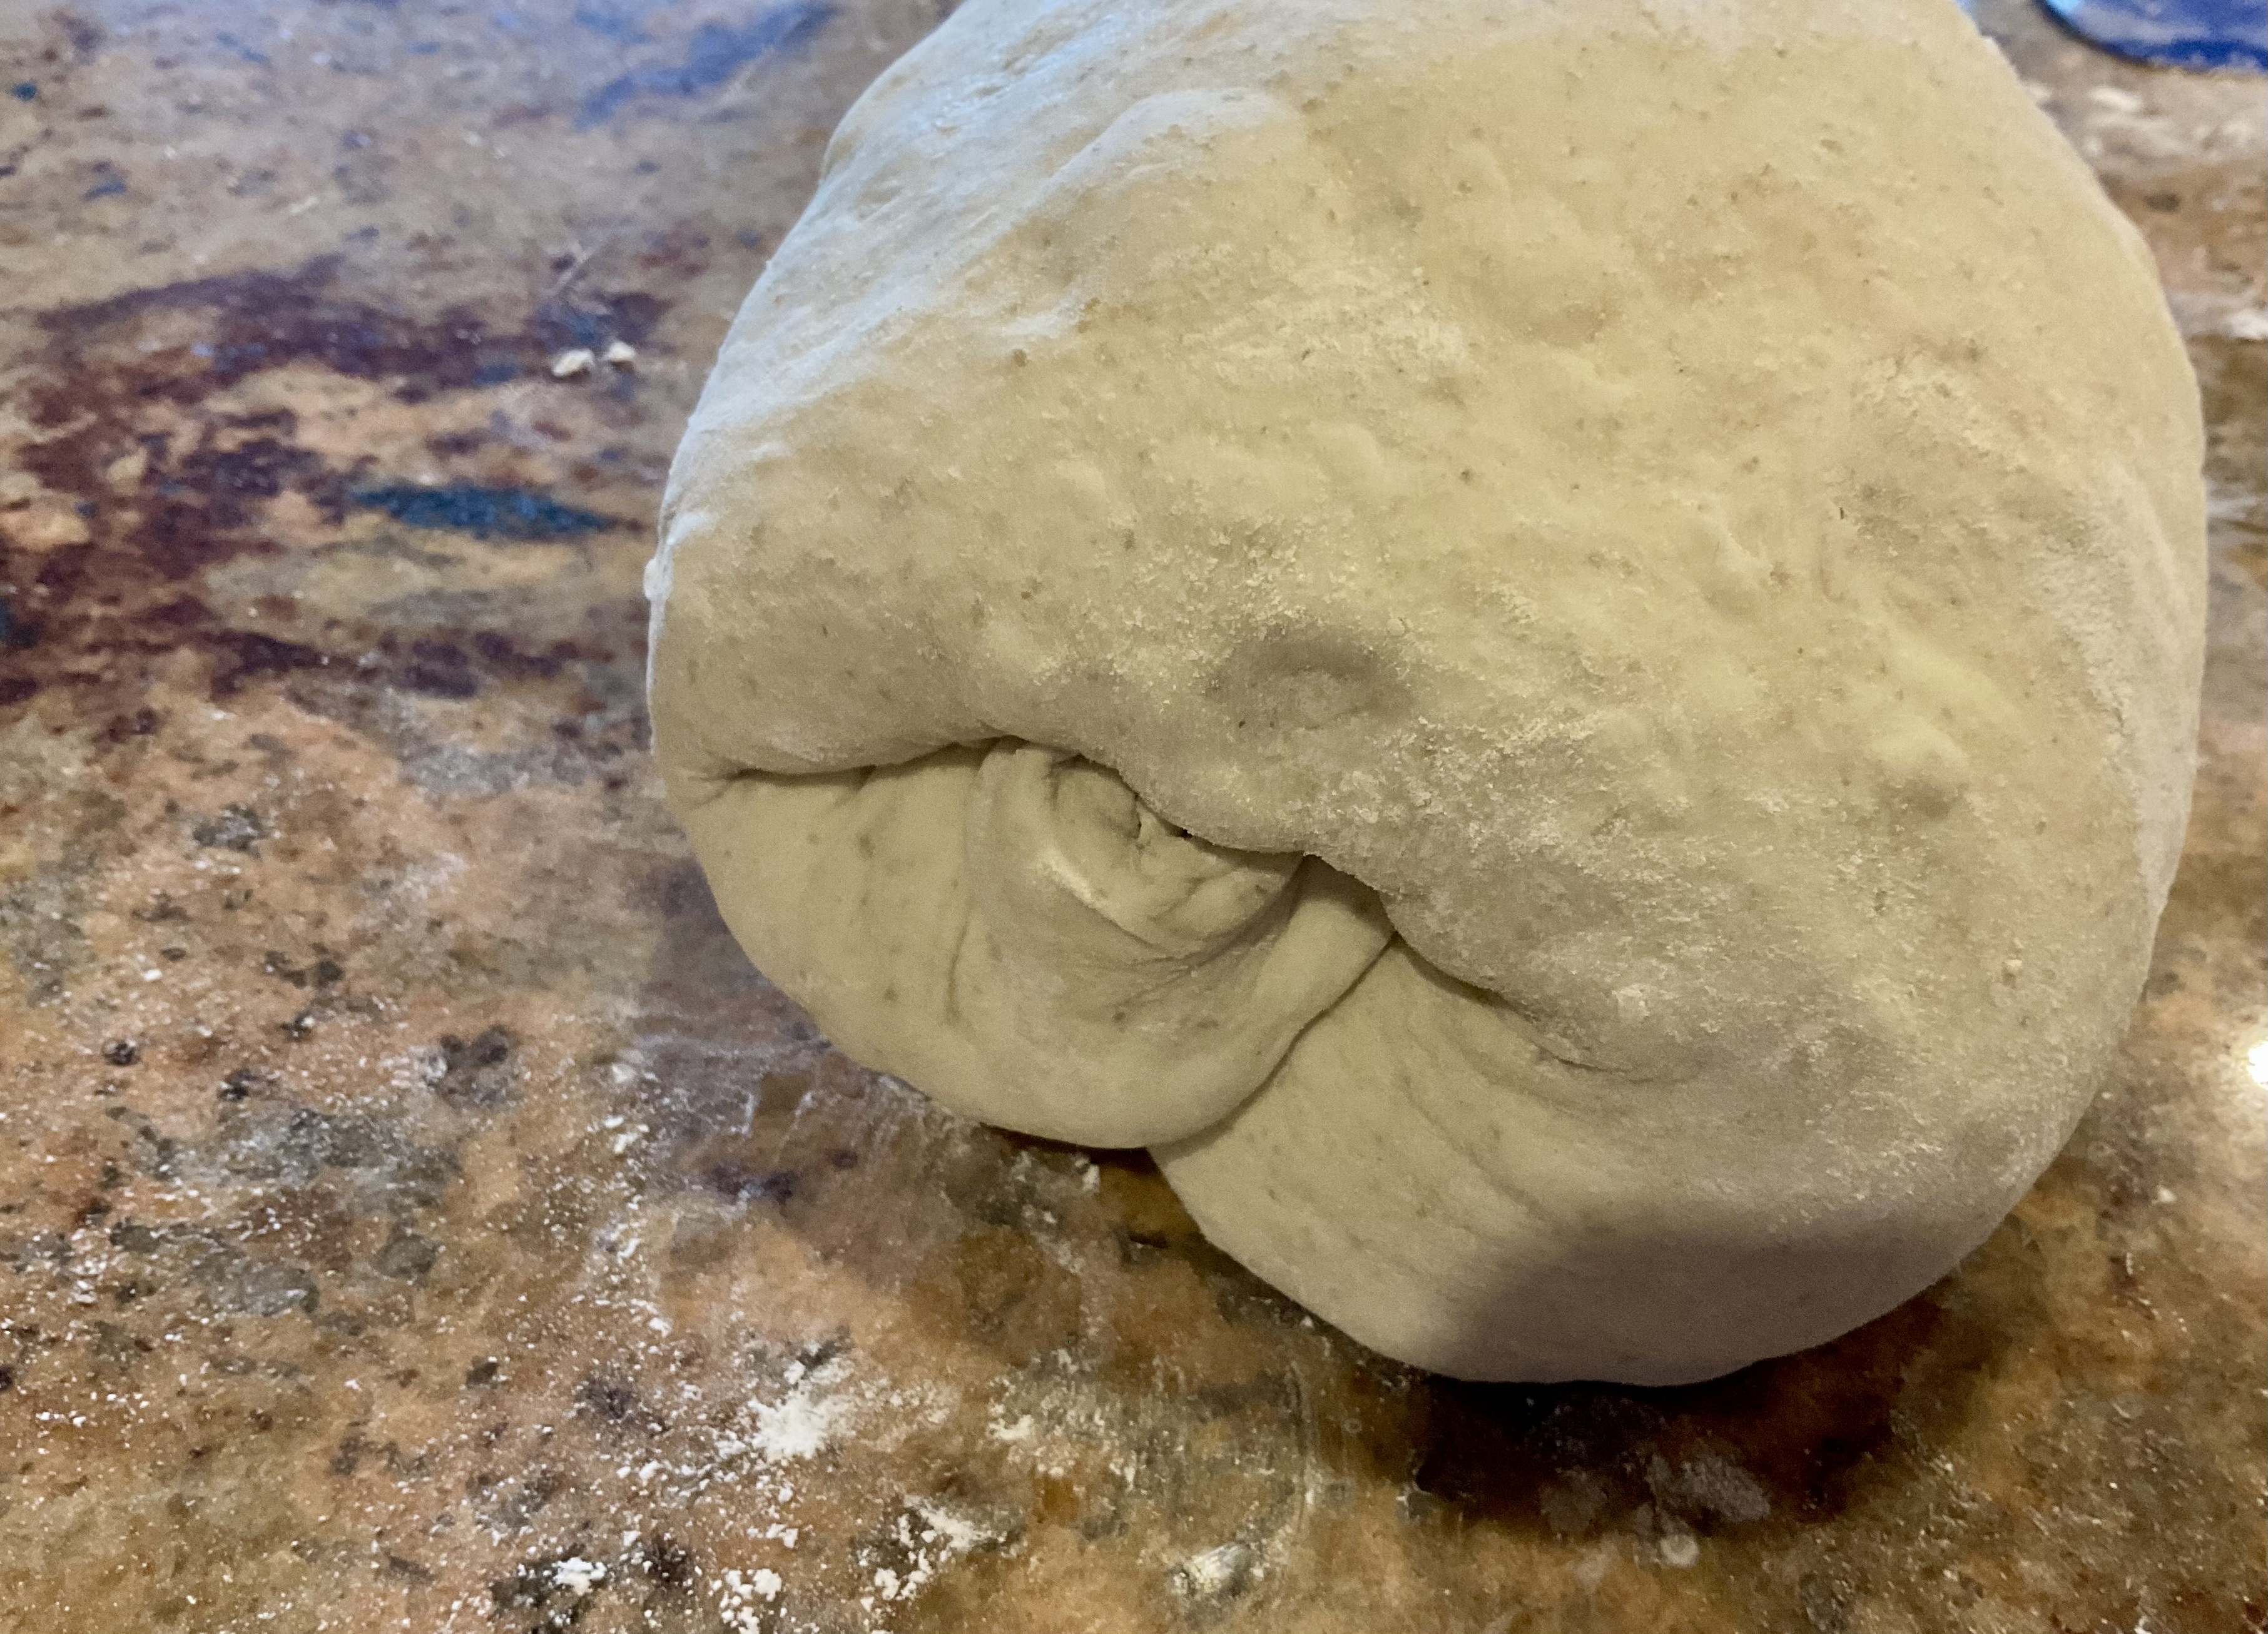
- turn the dough out onto a very lightly floured surface
- rotate the dough, tucking it in gently underneath as you go* until you get a rounded dome with some noticeable surface tension – it doesn’t need much surface tension, just enough to hold its shape.
- leave this preshaped dough for about 30 minutes, uncovered, to allow the dough to relax a bit before shaping fully
*NB: a dough scraper, sliding it underneath the dough as you rotate, helps with this.

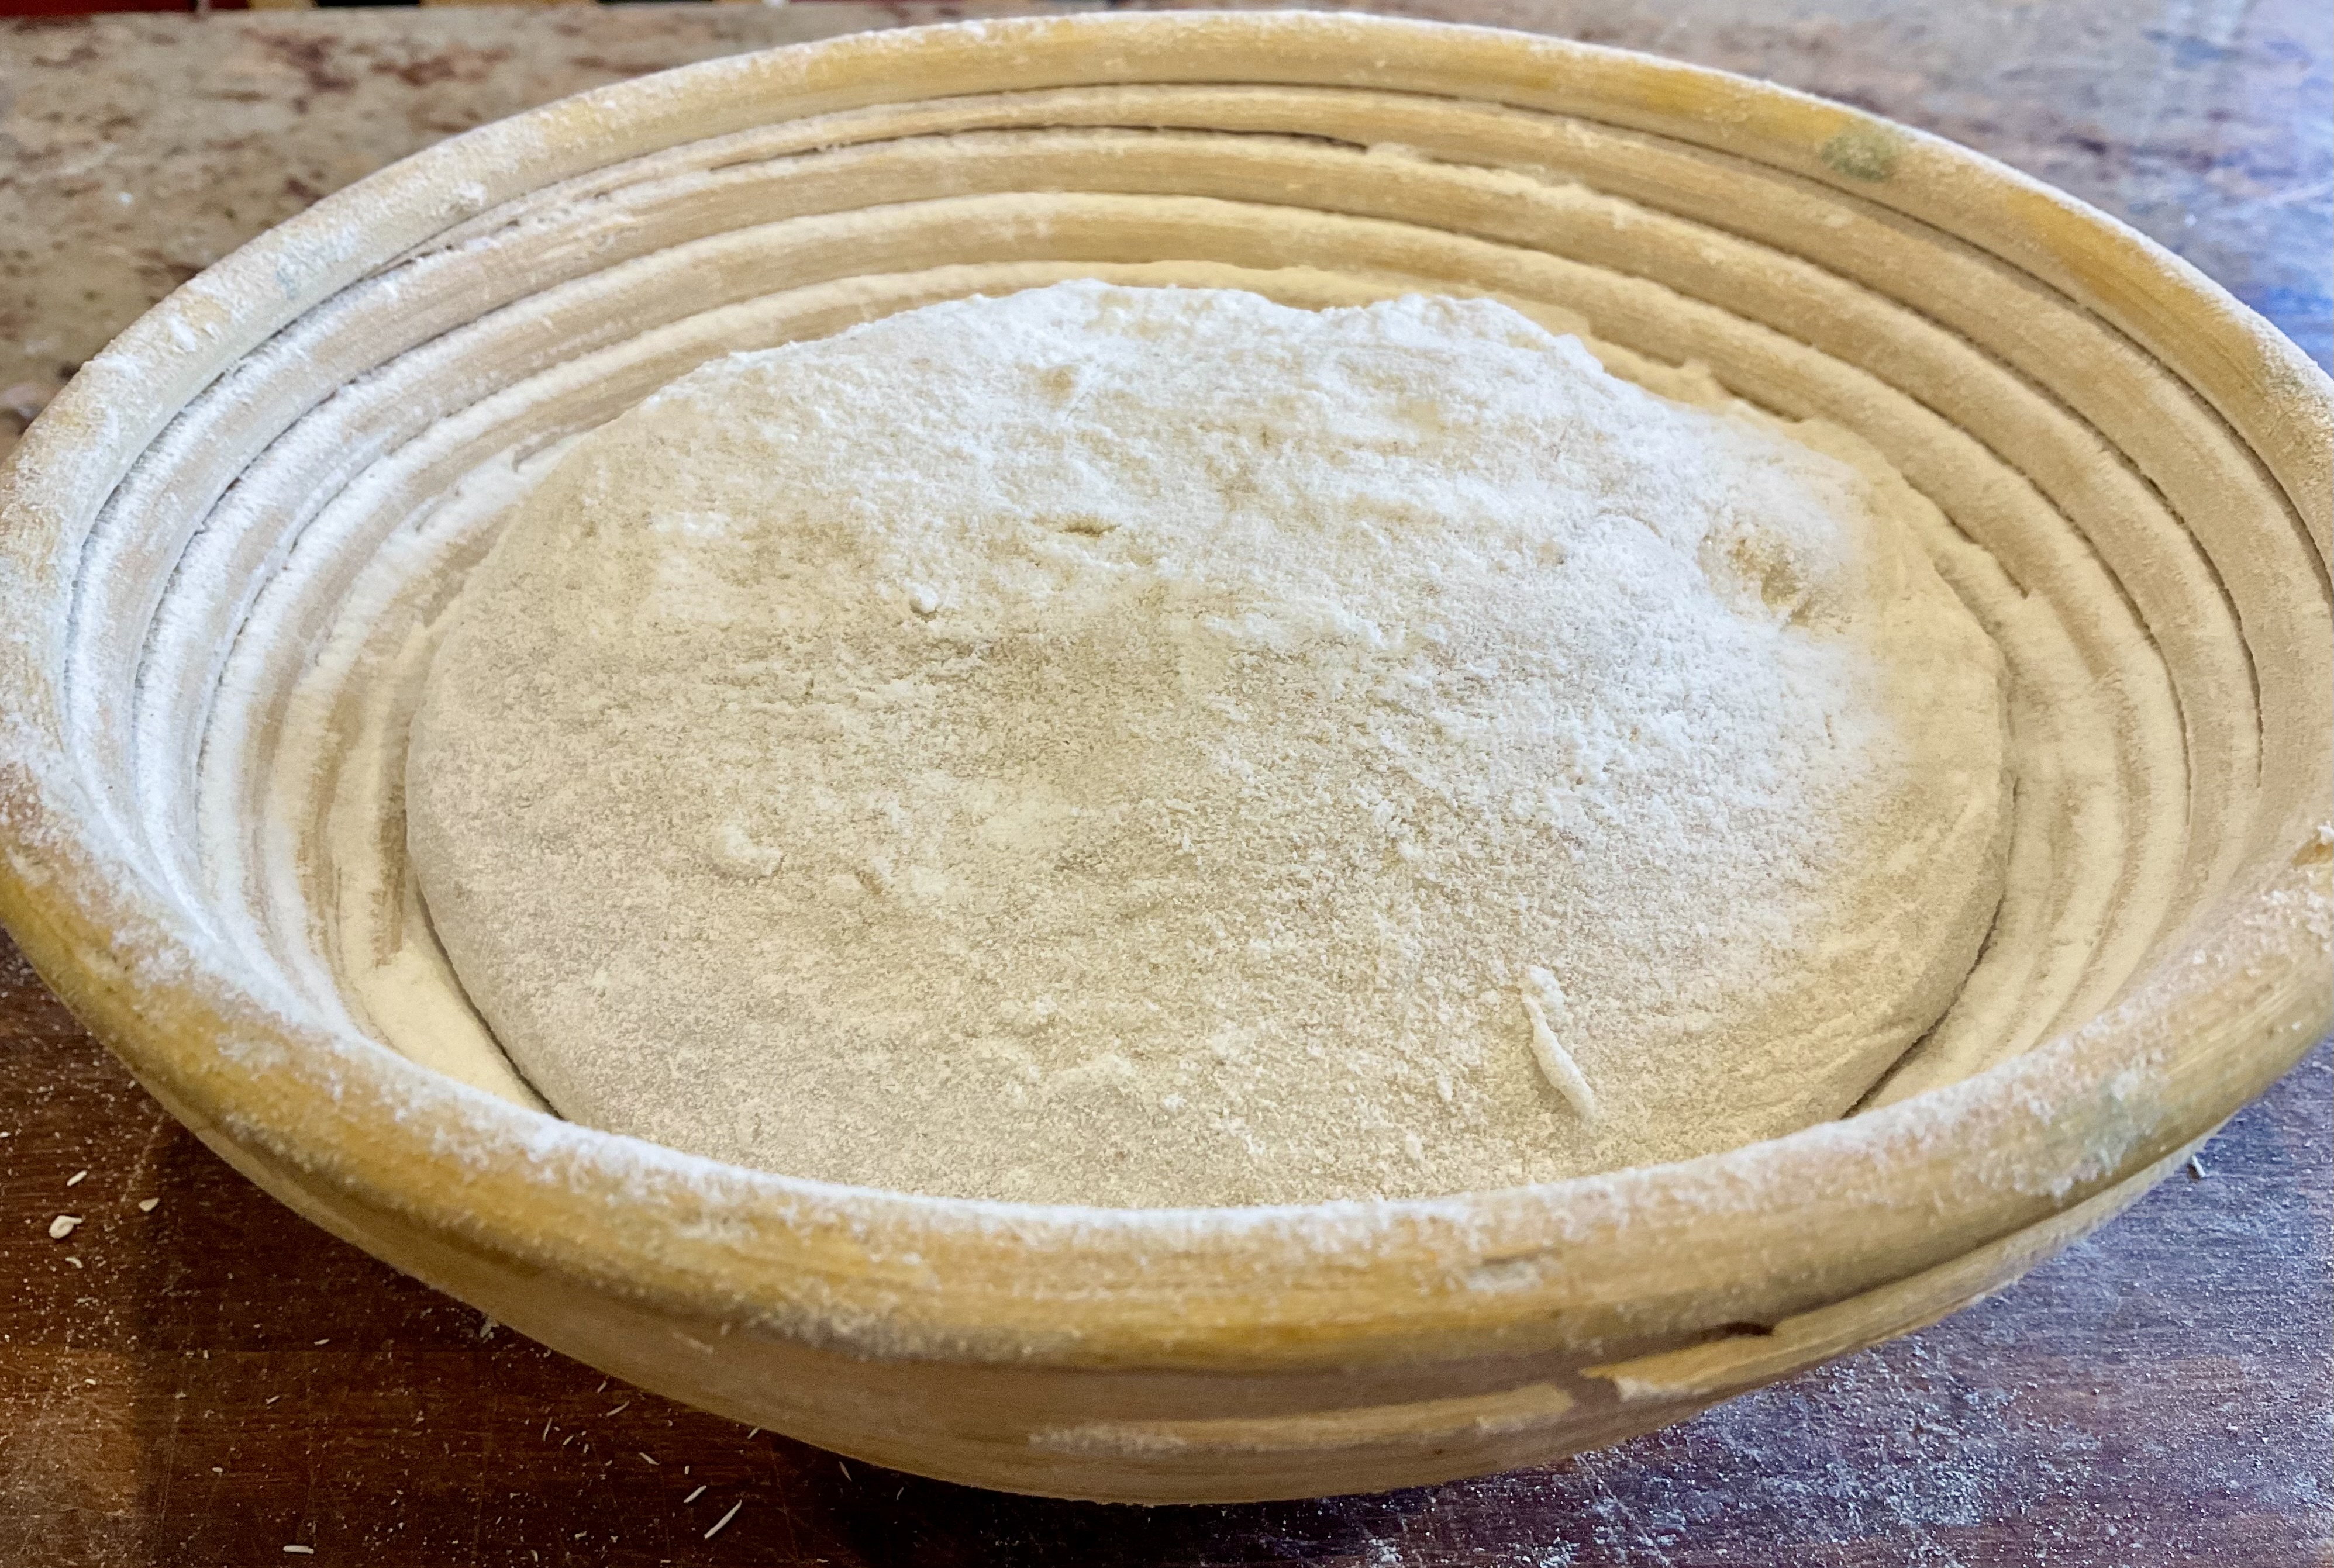
Bannetons
I tend to use wicker bannetons, which also give a lovely ridge to the surface of the bread.
The recipe above that uses 500g flour will be ideal for either one of the following bannetons:
- an oval banneton (21cm by 16cm at the top, about 8cm deep)
- a round banneton (22cm diameter at top, about 8cm deep).
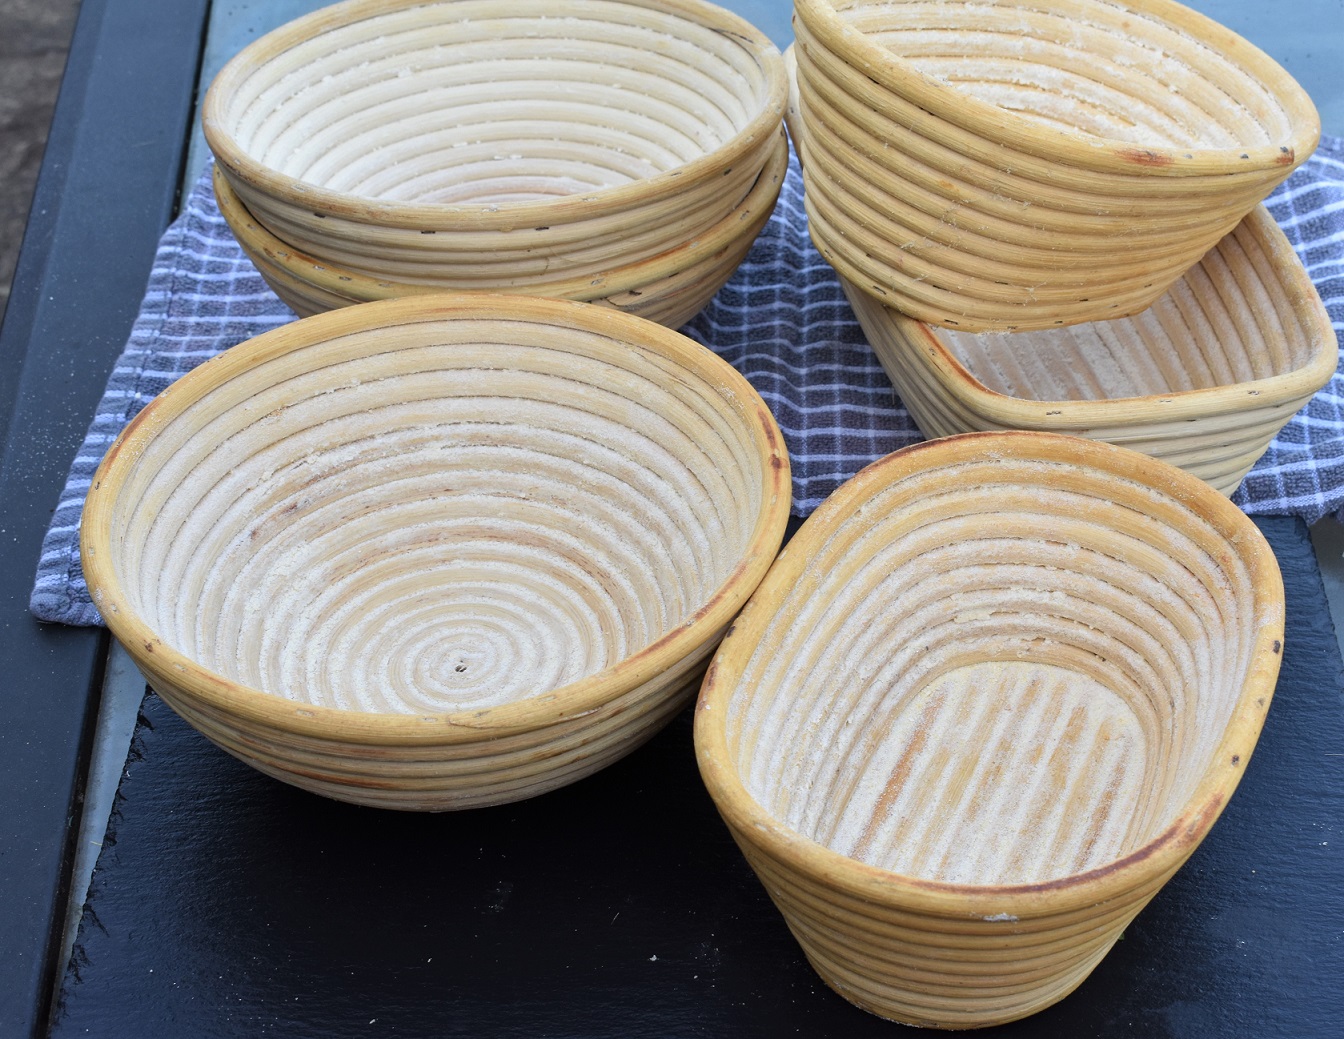
The bannetons need sprinkling generously with rice flour or fine semolina to stop the dough sticking to it. I have a container of rice flour that I also dip the shaped dough into in order to give a good coating.
If you use normal flour in the bannetons, it will absorb some of the moisure from the dough, become very sticky and make it hard to turn the dough out in one piece.

Shaping the dough
When handling the dough for shaping, aim not to deflate it too much.
If the bulk fermentation has been done well (see section above), the dough will feel light, airy and bouncy: almost like marshmallow! As you handle it, it will maintain its structure and allow you to shape it easily. Indeed, as you do this, you will notice its bounce being maintained.
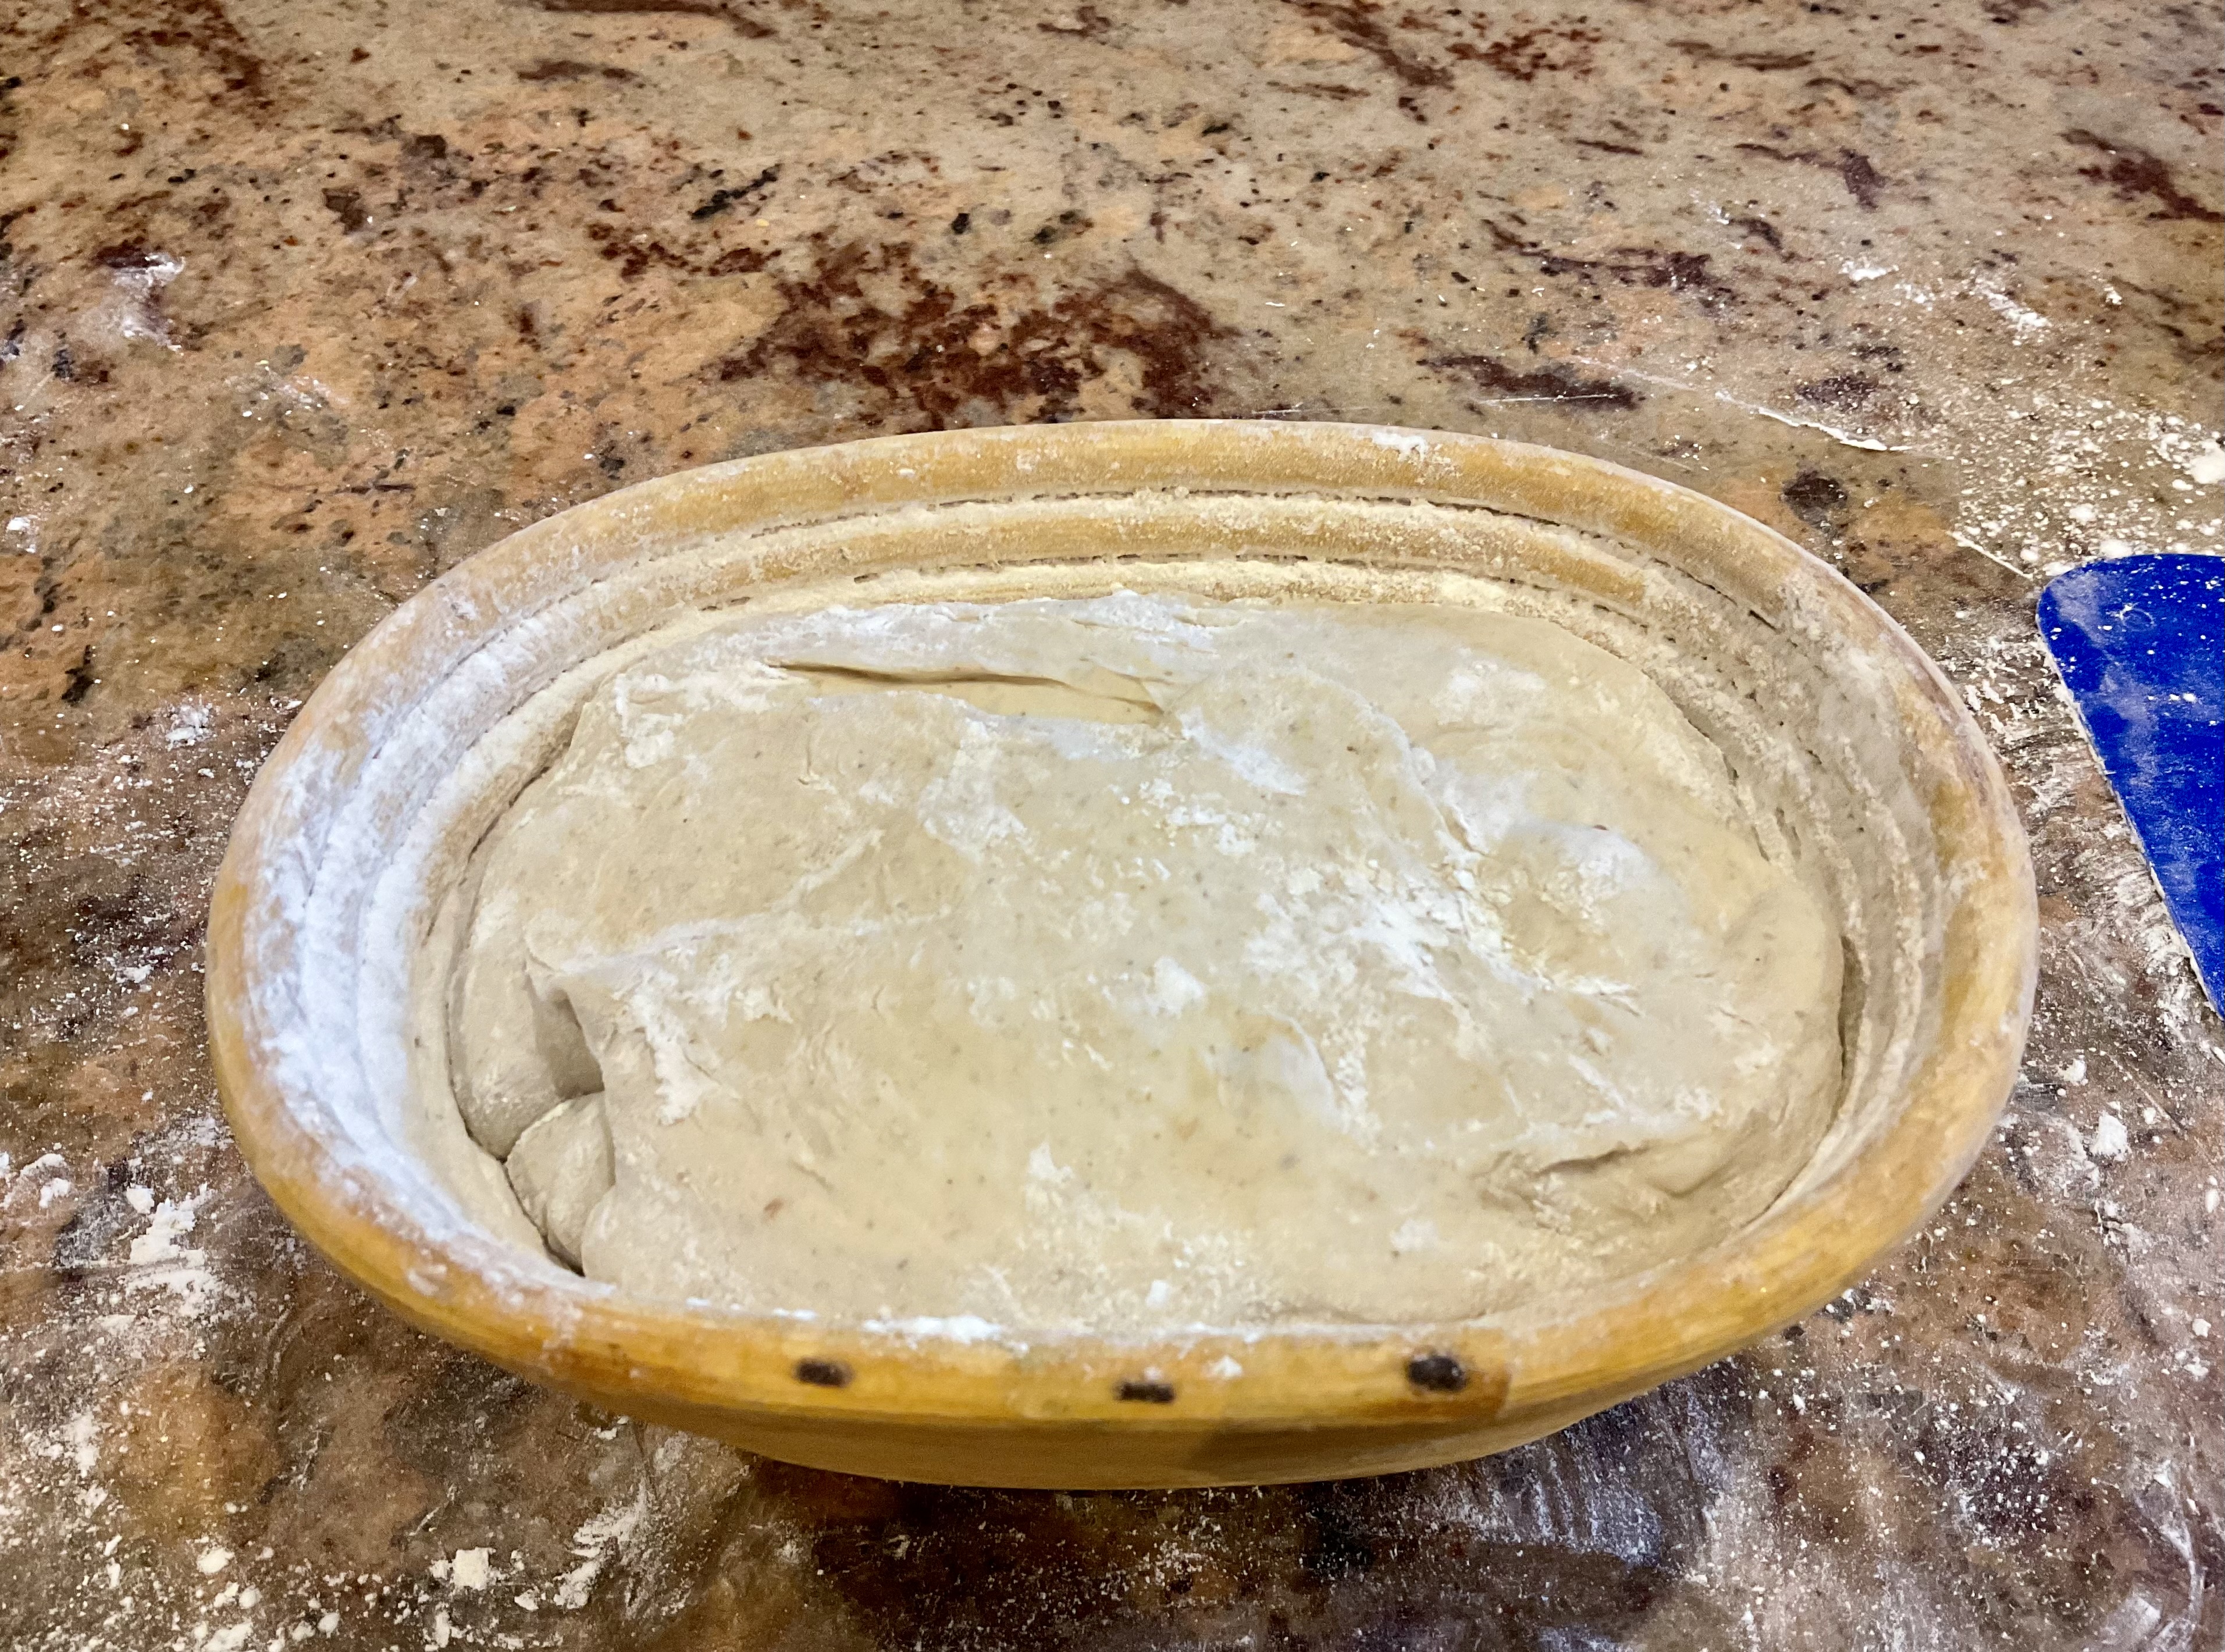
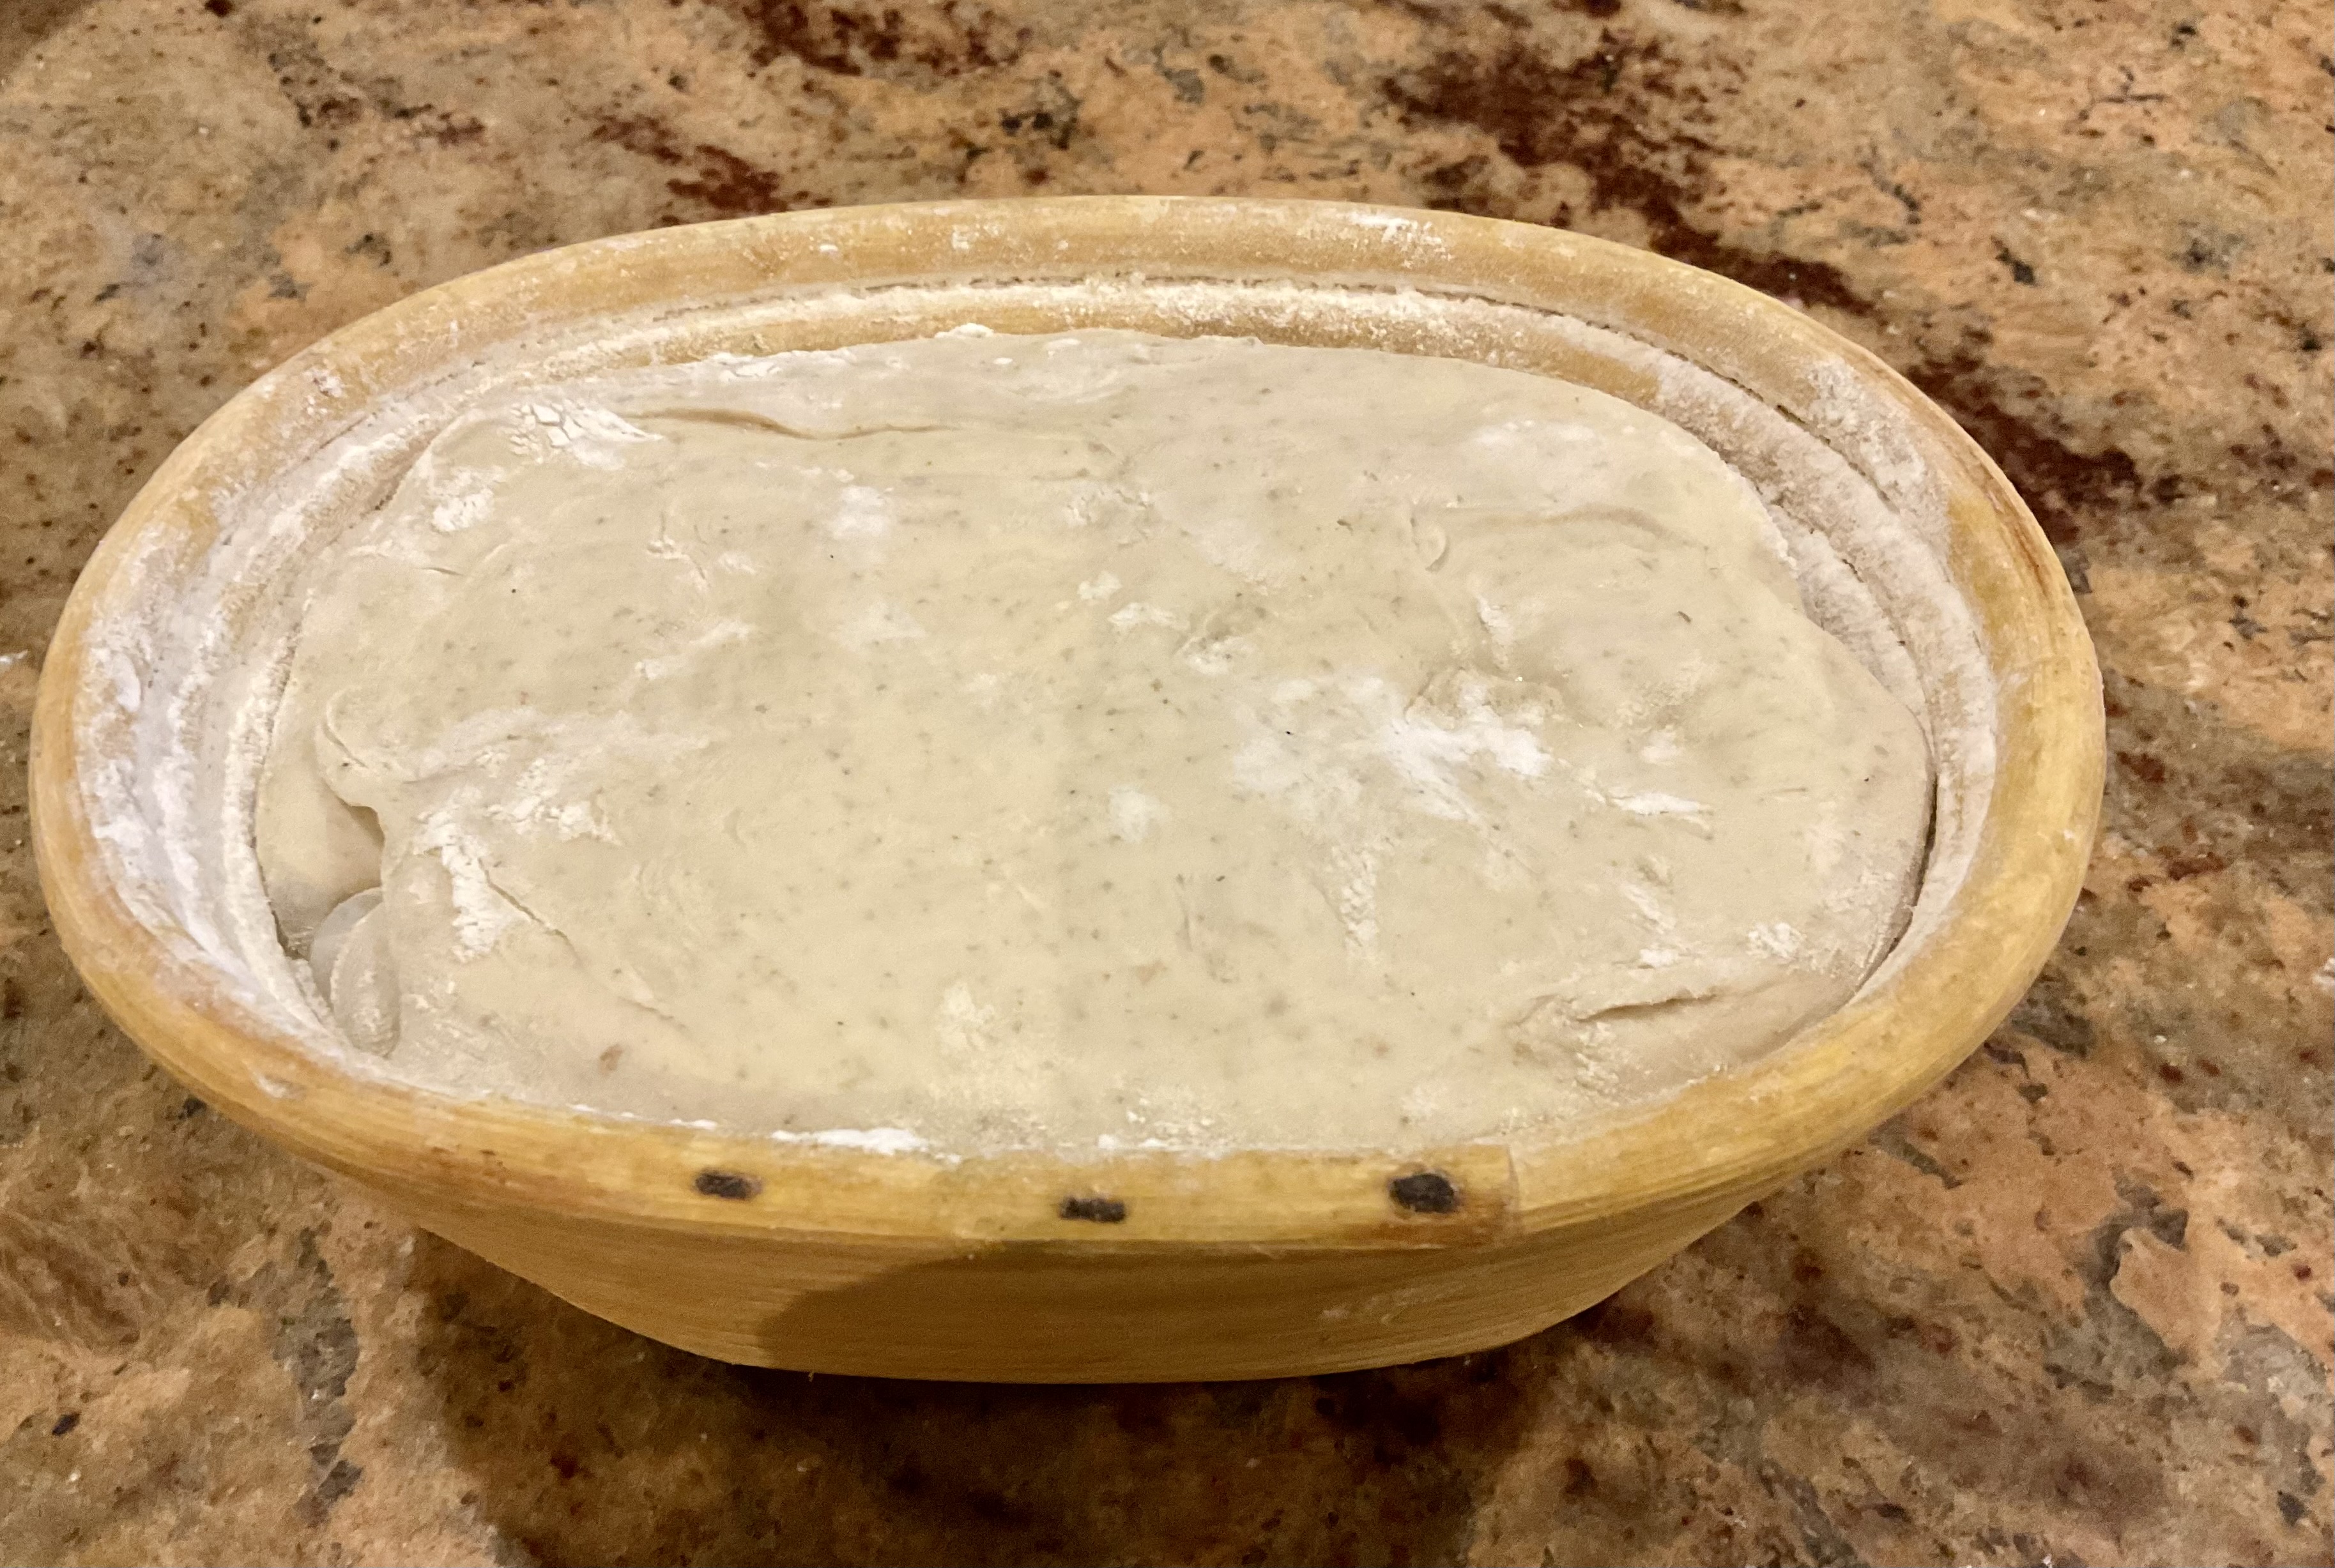
An oval loaf
The two sourdoughs below were placed into oval bannetons: the one on the right was a standard oval banneton; the one on the right was a larger banneton (scaling up the recipe above to use 750g flour)

For shaping for a standard oval/rectangular loaf, you need to gently turn the dough out of the bowl and onto a lightly floured surface. I find a flexible dough scraper easiest for this.
I have included photos and instructions for each stage:
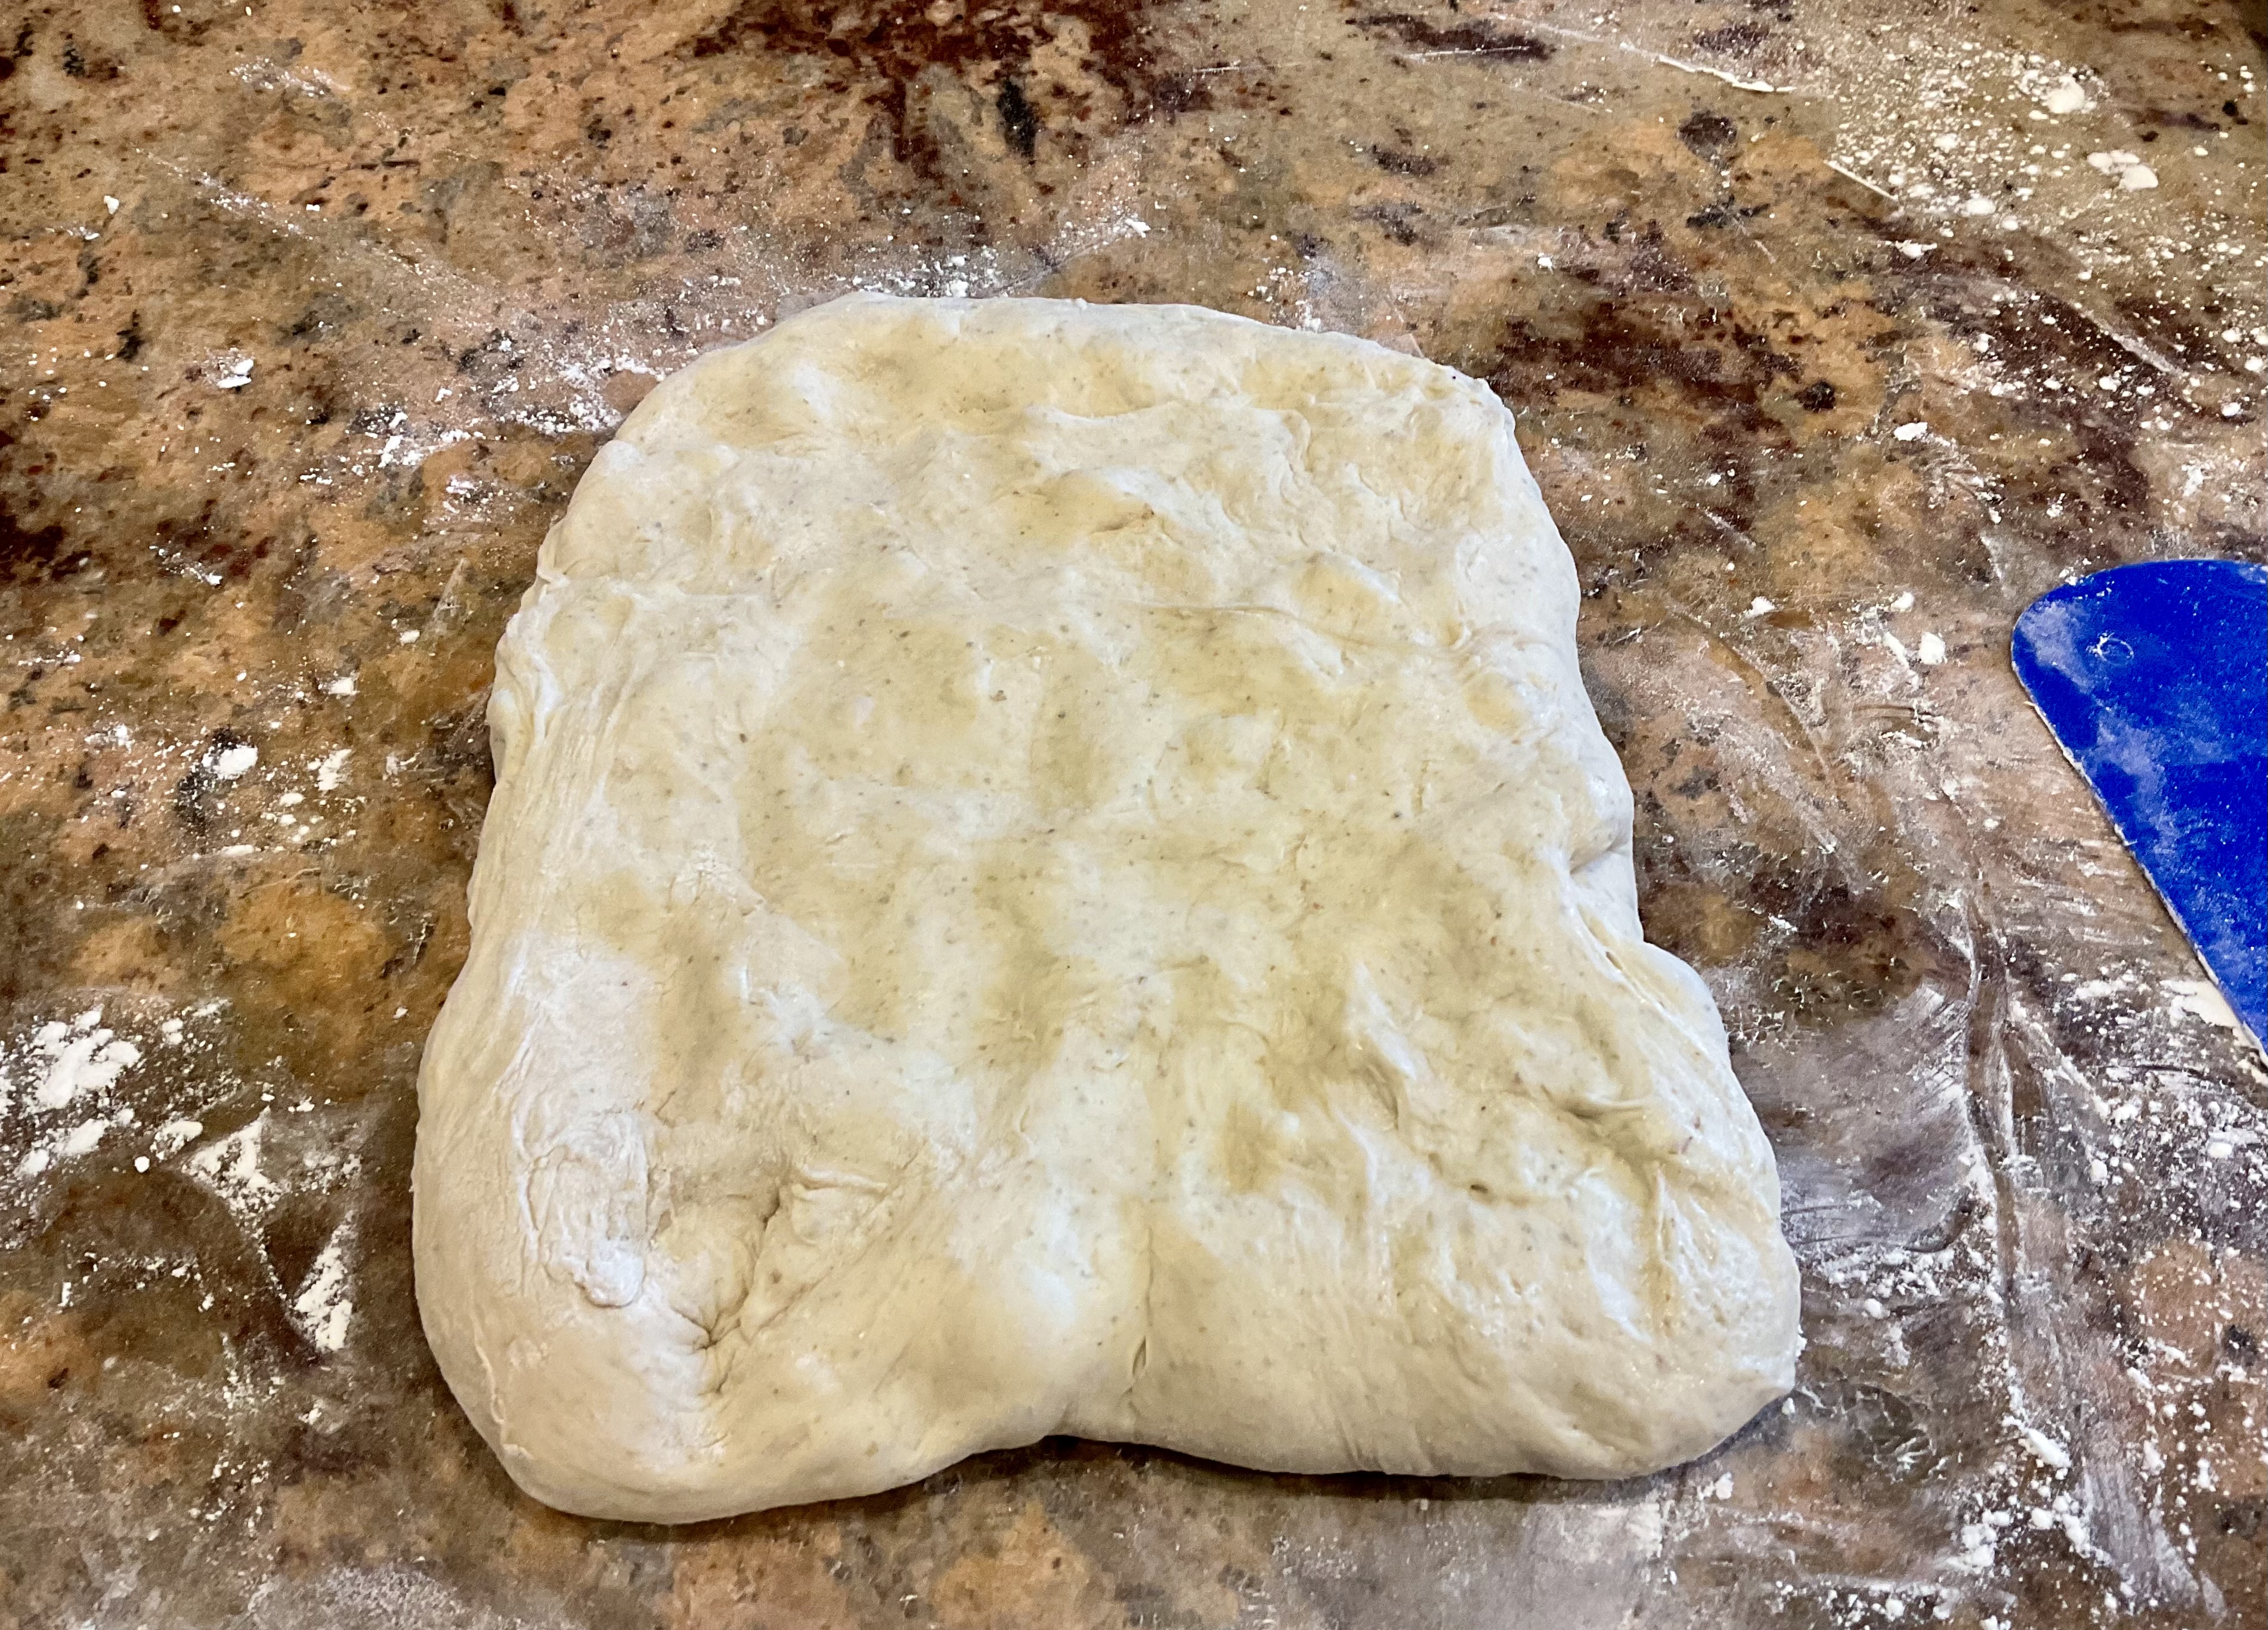


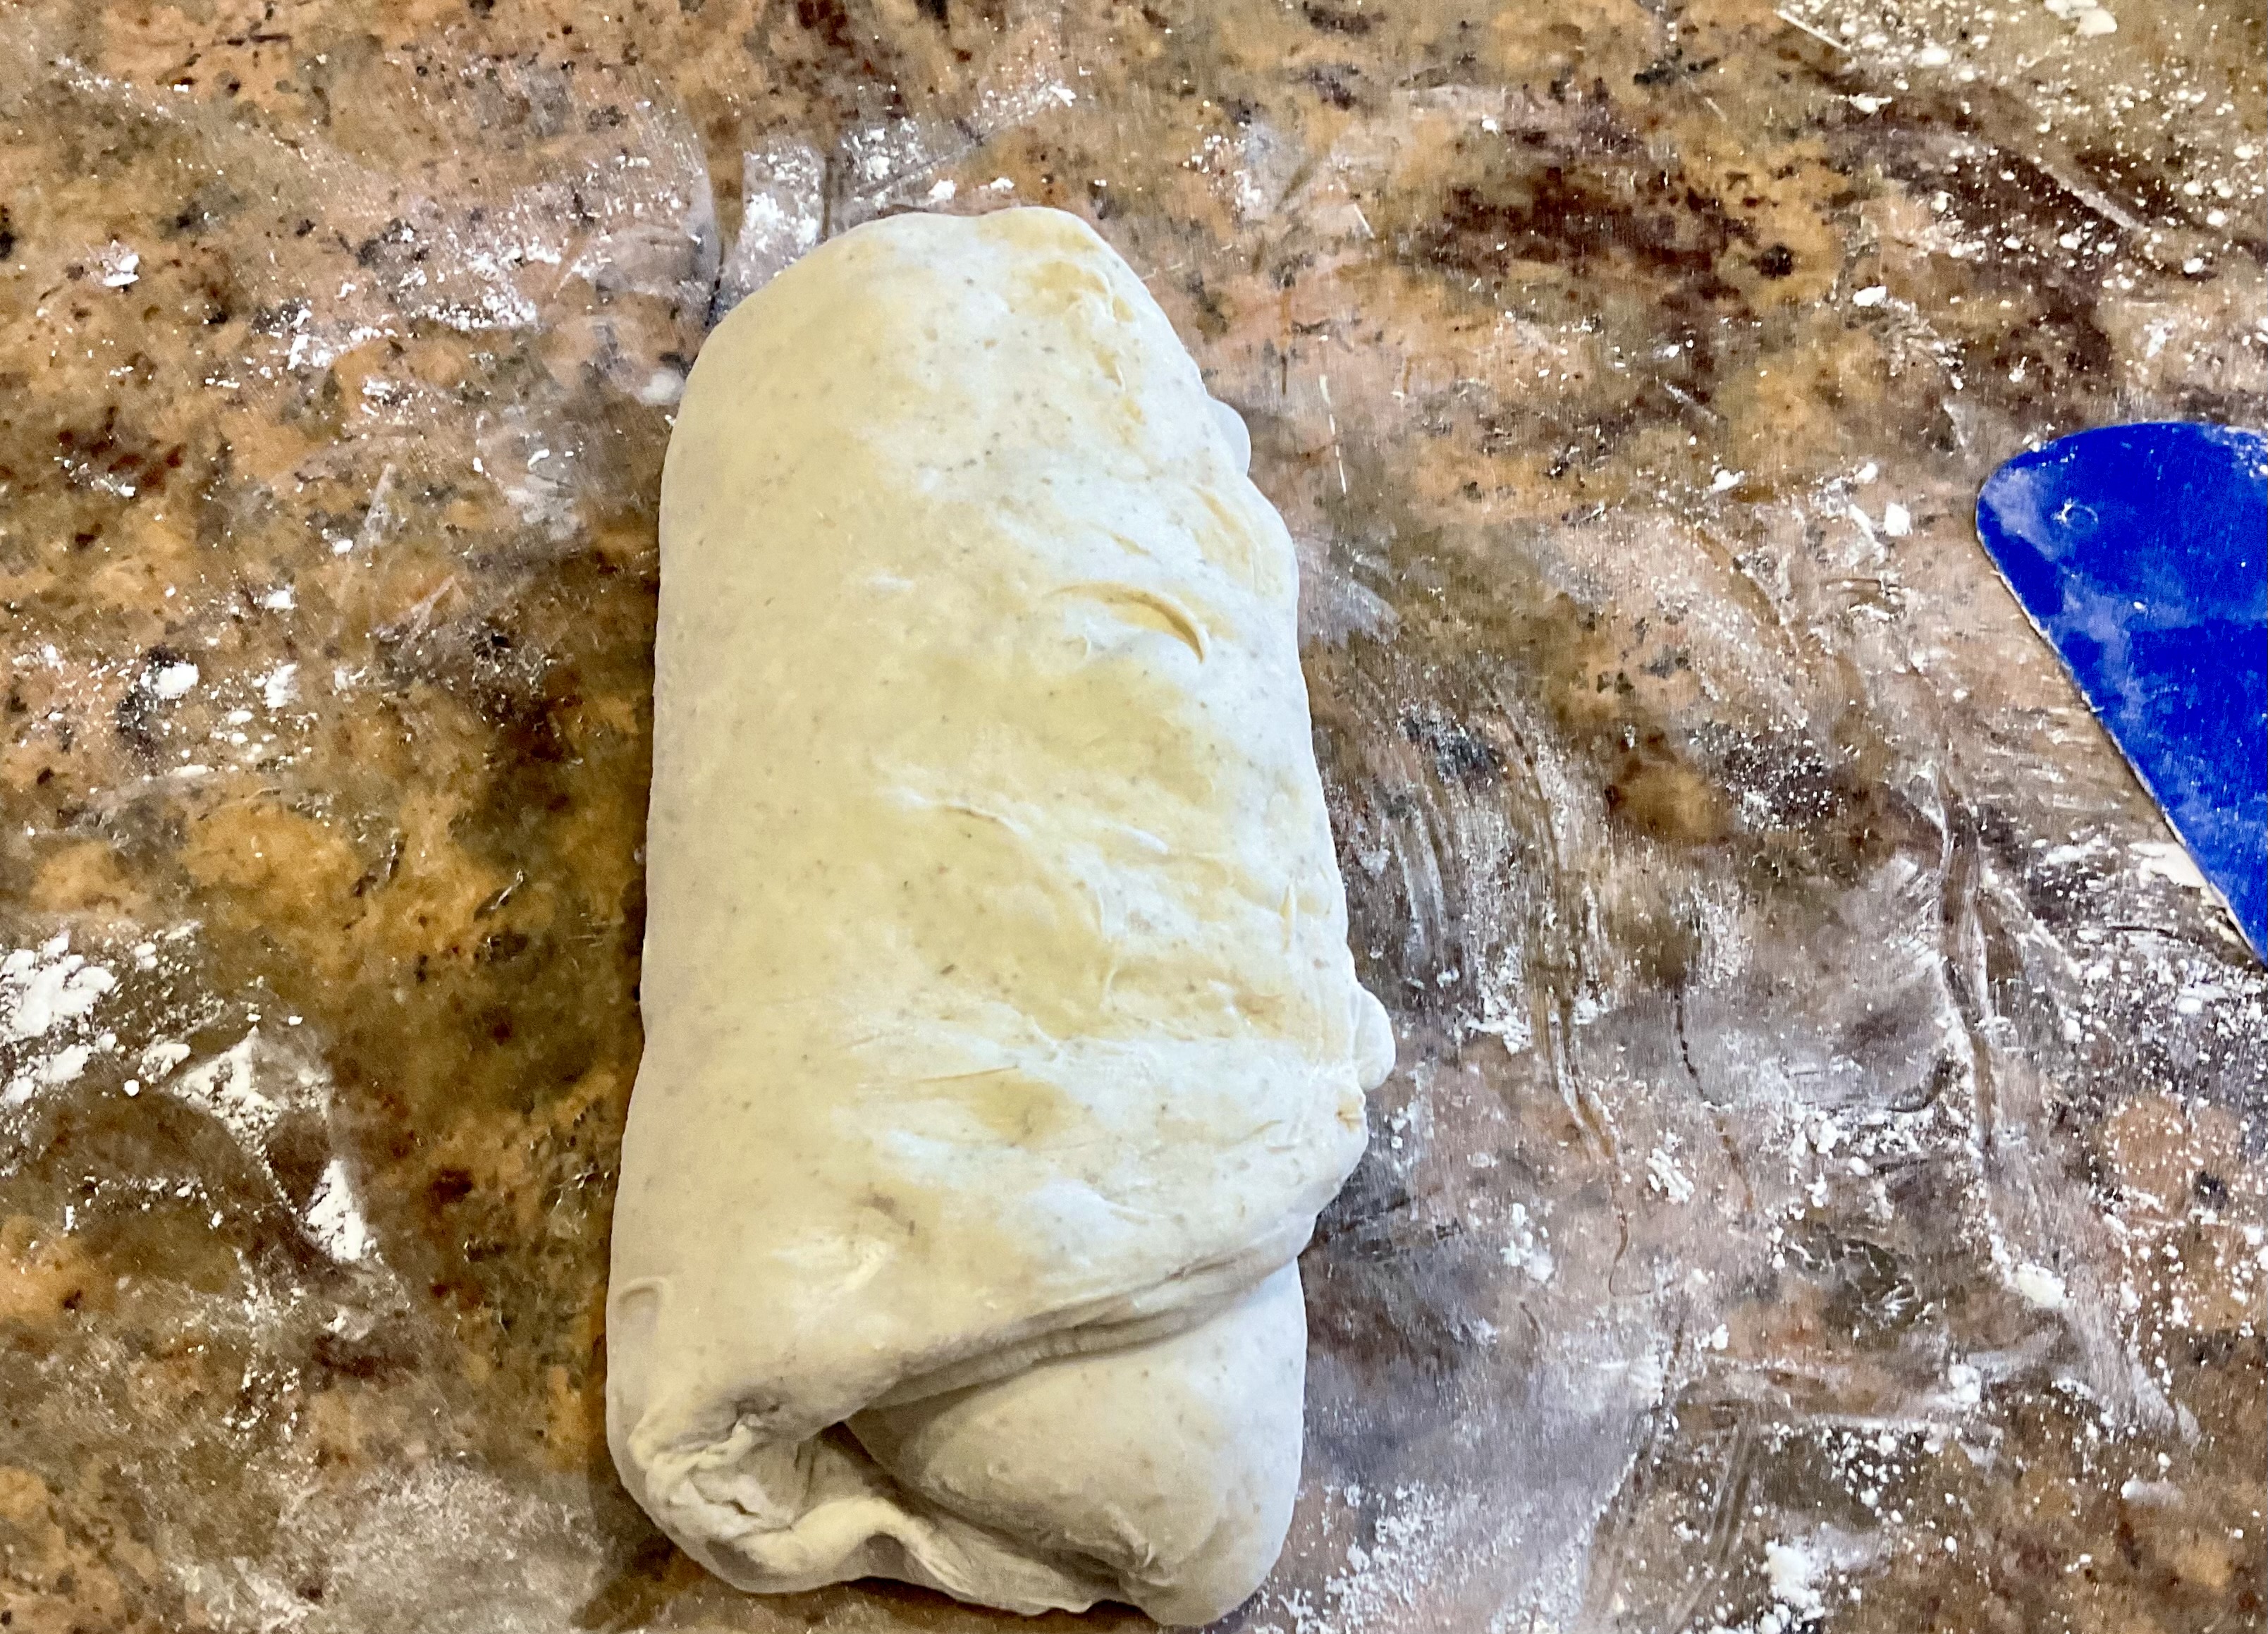
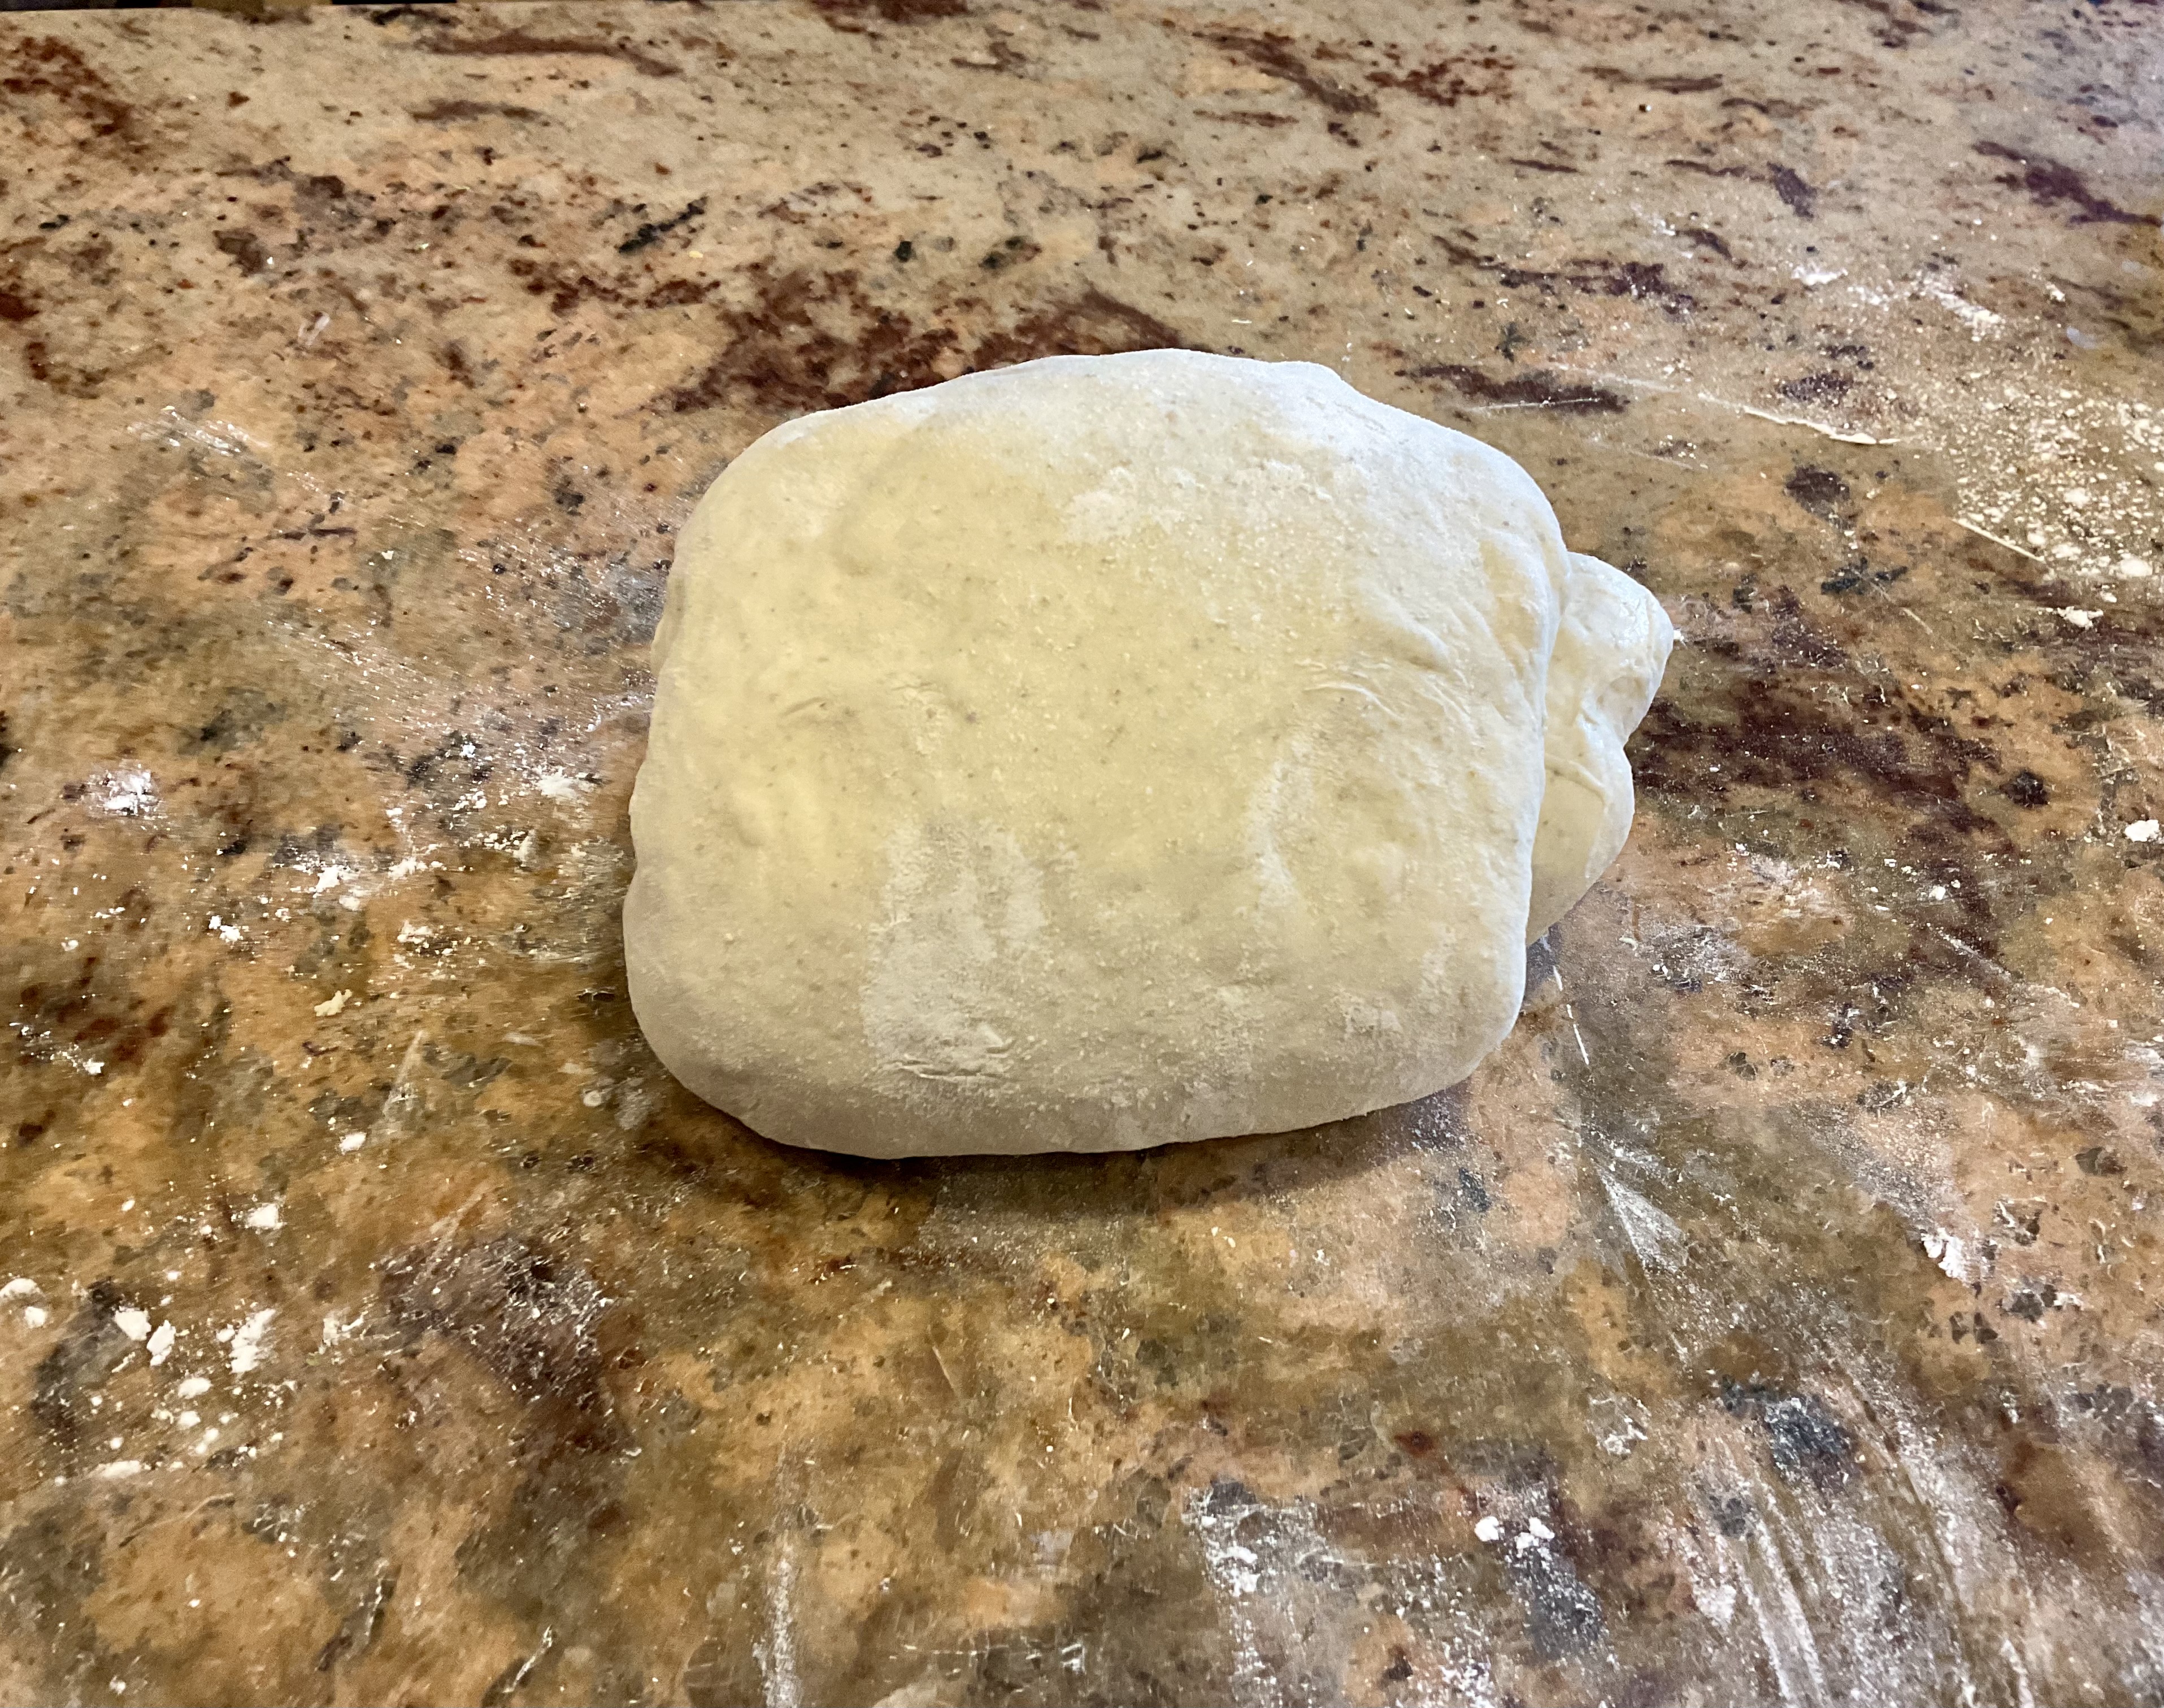
The dough is now ready to be lightly dusted with rice flour or fine semolina before being placed into the banneton, with the smooth surface facing down.

A boule
For a boule I shape as with an oval loaf, but I then cup my hands around the dough and rolling gently to form a smooth ball before popping into the banneton.
Baguettes:

- cut the dough into equal pieces.
- lightly flatten each piece into a rectangle a little shorter than the banneton or baking tray
- roll up the dough fairly tightly
- roll it gently on the work surface, putting a little more pressure at the ends to give a tapering effect.
- dust with rice flour or fine semolina
- place in baguette bannetons or baguette trays.
If using baguette trays, the shaped dough proves and bakes on the trays: I tend to place a strip of greaseproof along the trays to prevent any chance of sticking.

For bâtards (basically mini baguettes!) use a smaller amounts of the dough and shape as for baguettes.
Cold retardation: a natural flavour enhancer!
After the bulk fermentation and shaping, the dough needs to get chilled in the fridge. This is where the flavour really has a chance to develop, but it also ensures the dough is fully chilled before turning it out and scoring it: and scoring a chilled dough is much easier.
The shaped dough will rise just a little initially in the fridge, but the cold will slow down the fermentation with little danger of the dough overproofing.
You can leave the dough in the fridge for about 6 hours so that it is fully chilled all the way through. However, the longer you leave it, the better the flavour. 24 hours gives a gentle tang, but for a really tangy loaf I will go for around 36 hours.

Scoring the dough
Scoring the dough allows you, to some extent, to control the direction of the dough’s expansion in the oven. Without scoring, the dough can burst at random places. Mind you, that can often look charmingly rustic.

I use a razor blade making a few quick, purposeful cuts across the top of the turned out loaf, often cutting vertically and going about a centimetre in. Sometimes I simply do a quick slash in one direction, but at other times I do a few slashes crossing over.
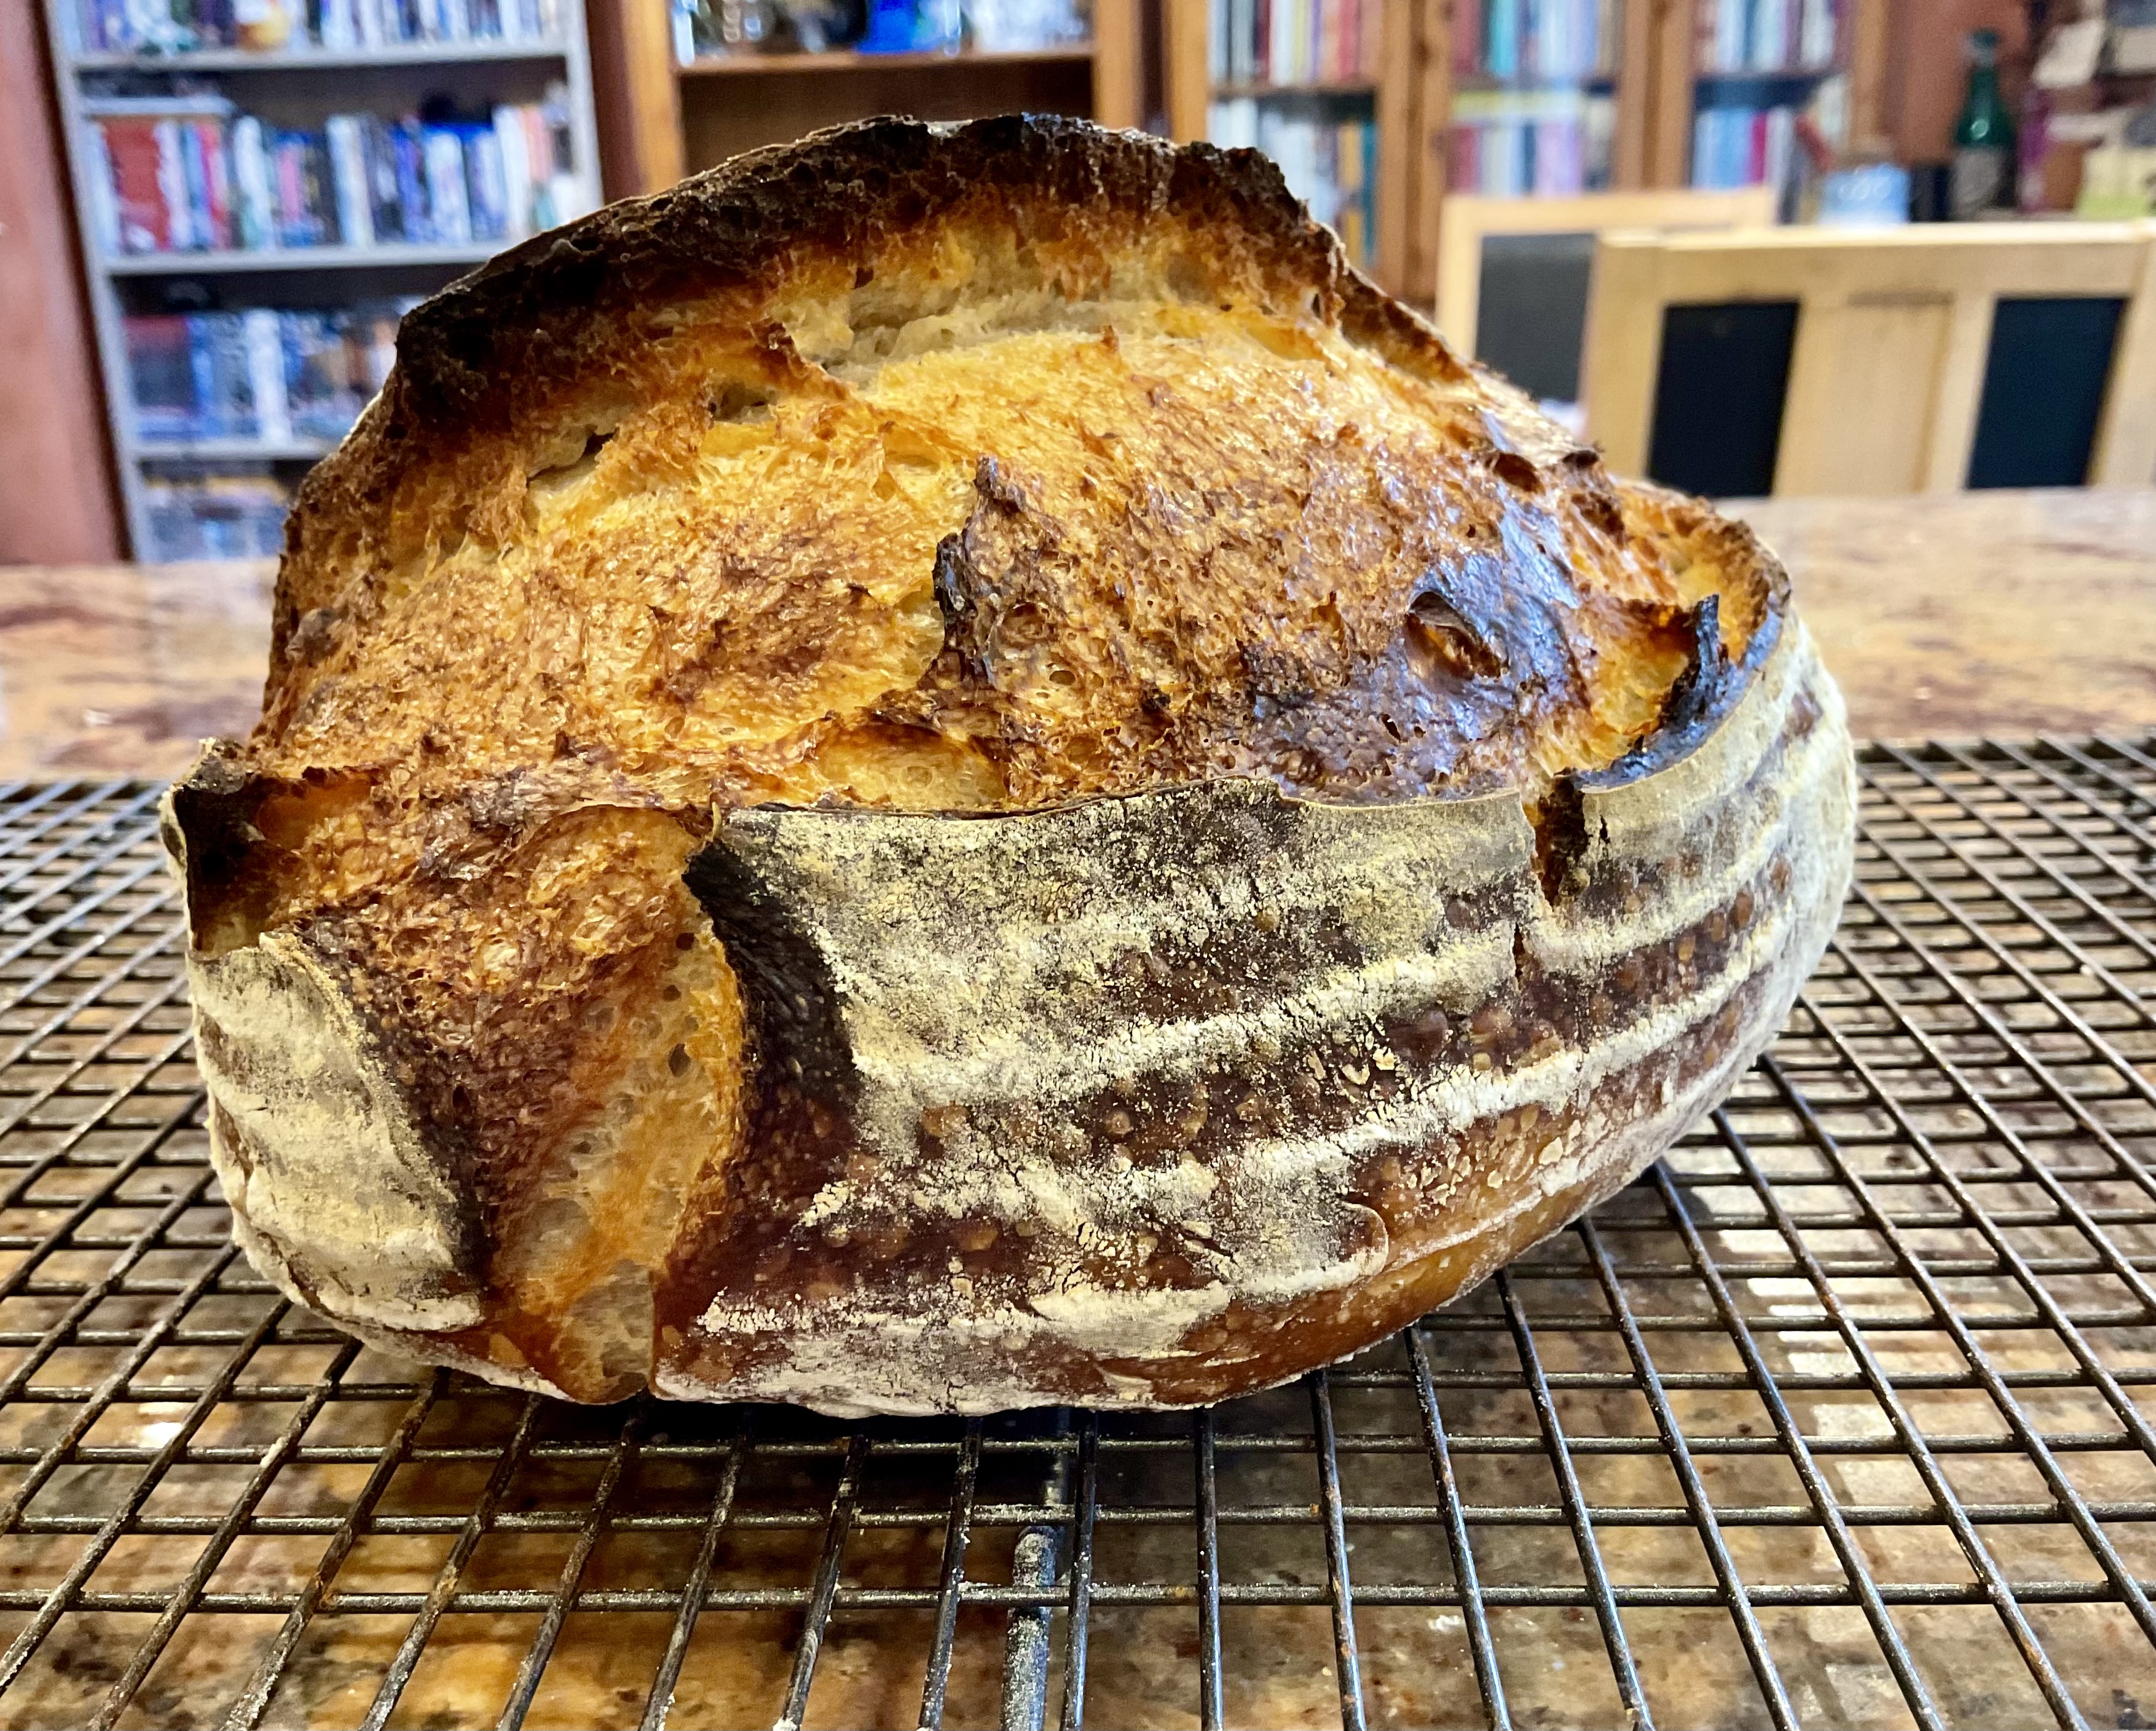
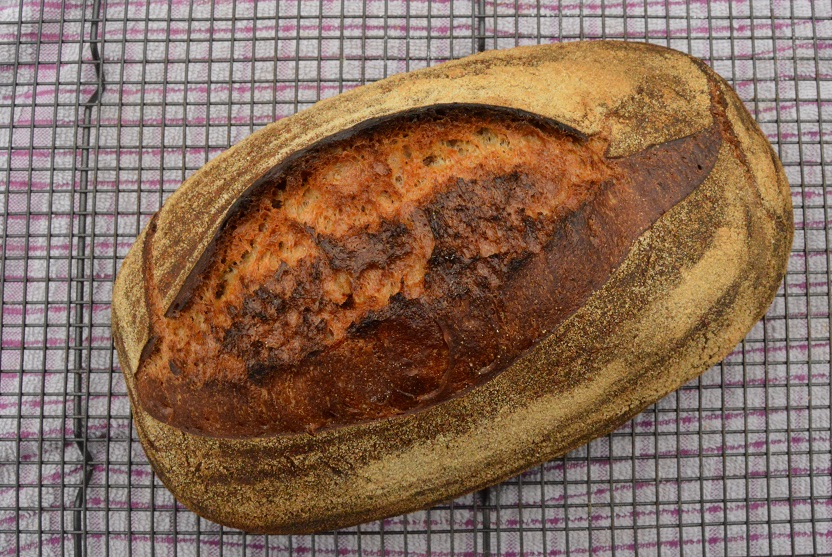
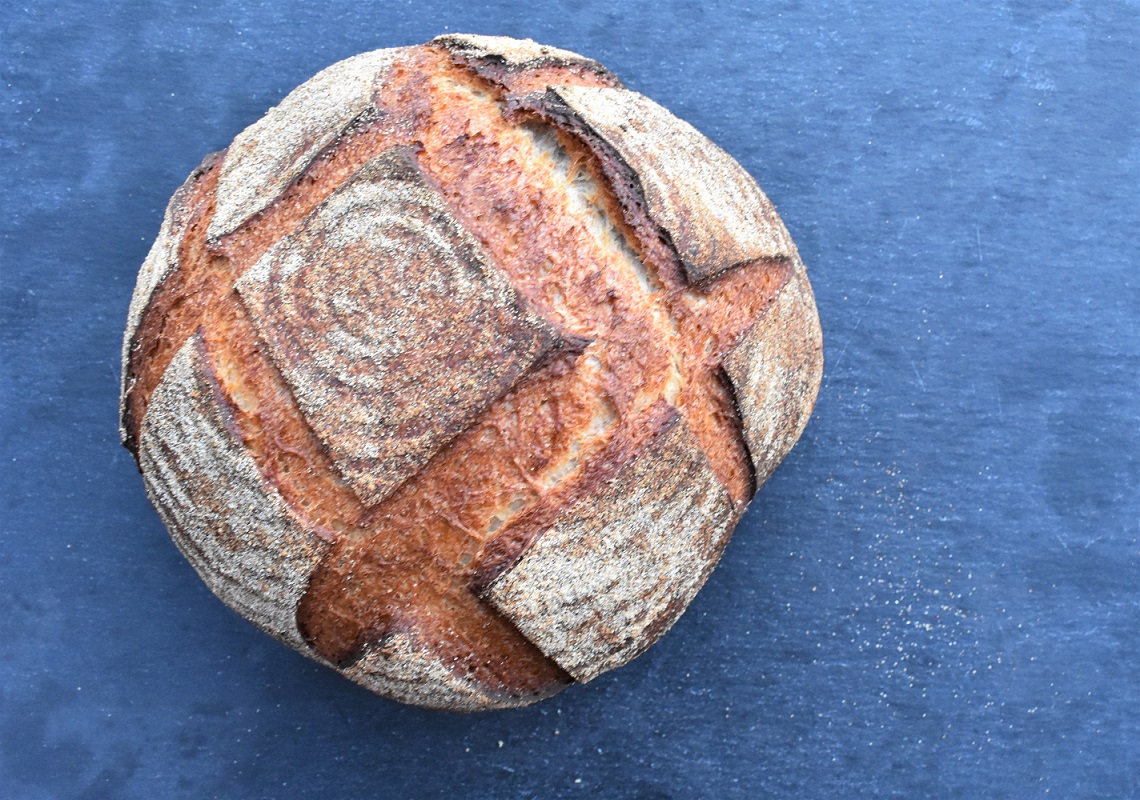
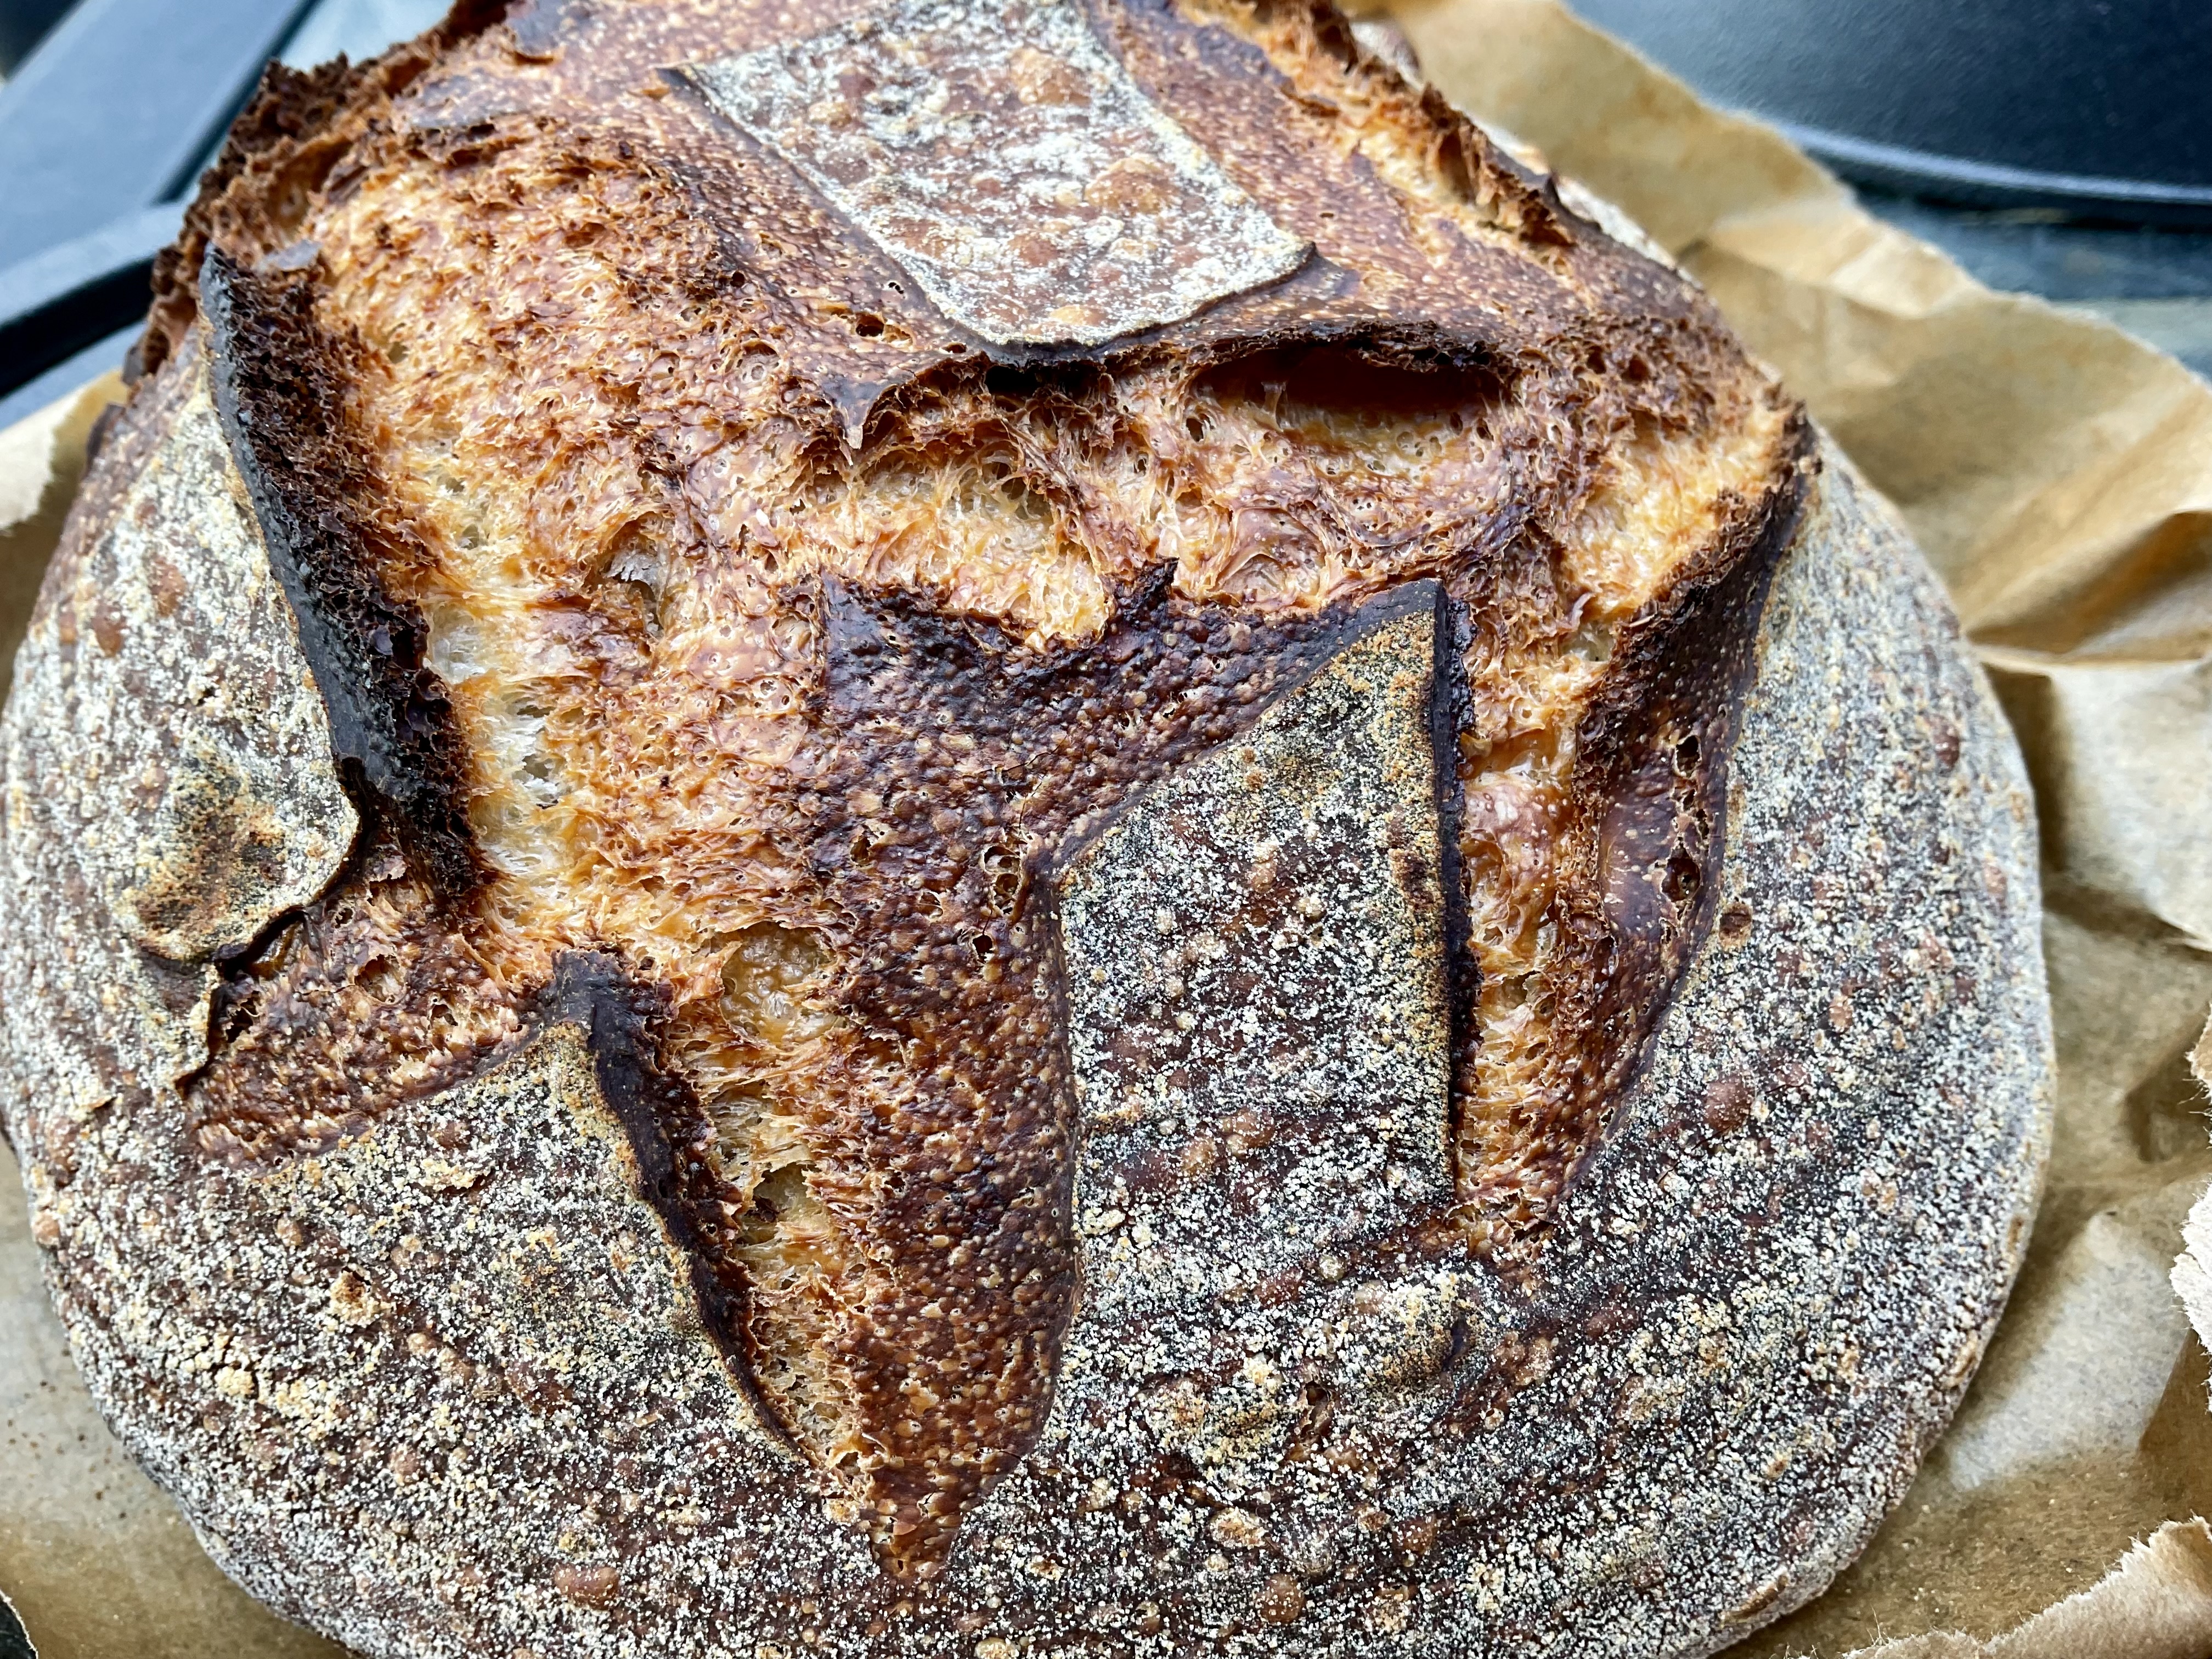
For ears I make the cut right down the far left of right side of the dough rather than down the centre of the top, going in at about 45°. This opens up the dough as it bakes – as in the loaf below.
Key scoring tips:
- a very well chilled dough is easier to score
- dust the top of the turned out dough with a little flour before scoring to help prevent tearing
- the blade has to be sharp and free of any bits of dough so that as you swipe it, it cuts quickly and effortlessly
A few of my typical scorings are in the bread below. One day I will get into more elaborate scoring but for now these suit me just fine!


To steam or not to steam
Incorporating steam when baking, both sourdough bread and bread using commercial yeast, gives the loaves the most wonderful crust. Steam also keeps the surface of the dough softer for longer in the oven so that it can keep rising: once the surface has firmed up and set, it won’t rise much more.

If cooking the dough in a Dutch Oven- effectively an “oven within the oven” – the steam from the dough is trapped inside so you don’t need additional water, although you can spray the dough liberally with water before putting the lid on which also helps give a lovely blistering effect. The Dutch oven can simply be a cheap, aluminium casserole, a stoneware pot or a solid cast iron pan: as long as it has a lid it will work well.


Without using a Dutch Oven, there are several ways to create the steam that helps the bake. I put a solid roasting tray on the base of the oven while the oven is getting up to temperature. When I put the dough into the oven I add a few handfuls of ice cubes to create the steam and then close the door and let the dough bake. I also spray the top of the dough liberally with water.

Craving a more tangy bread?
While a sourdough loaf does not actually need to taste sour or tangy, some sourdoughs have a sour tang. This level of sourness is down to personal choice.
In the recipe above, if the chilled dough (cold retardation) has only been in the fridge for about 6-8 hours you won’t get much tang – but it will still be a delicious sourdough loaf.
For a more sour loaf:
Any of the following will work towards giving you a more sour loaf:
- stir in any clear liquid that collects on top of the starter if it hasn’t been fed for a while
- use some wholemeal or rye flour in the starter
- use less starter in the recipe, not more as you might expect. You can reduce by about a third or so and the dough will still rise, albeit more slowly (thereby developing its flavour as it produced acetic acid, which gives the tang). If you add a lot more starter, the dough will rise too quickly and not produce enough acetic acid to give a good tang.
- once the shaped dough has been proofed, leave it in the fridge for longer: 24-36 hours will give a tangier loaf

Different flavours of sourdough
You typically add other ingredients such as cheese, onions, fruit and the like after the bulk fermentation as different ingredients can affect the fermentation of the dough. However, I often add them at the start but keep a keen eye on the progress of the dough at each stage.

- use a mix of strong plain flour and flours such as rye, wholemeal, spelt: 400g strong plain & 100g other flour is a good proportion to start with
- use a little smoked flour: I tend to oak-smoke some wholemeal or rye flour and use that. Not too much: up to 60g smoked flour to 500g unsmoked flour
- replace about half of the water with a good quality ale or cider.
- gently work roasted garlic cloves into the bread before shaping, or add these at the start with the flour so they crush throughout the dough
- add a generous handful of sultanas to the dough to give lovely sweet bursts to the finished loaf – especially when serving the bread with cheese
- add about 100g finely chopped walnuts and two grated cooking apples (peeled and cored) to the initial mixture
- work in some chopped ripe Camembert and cooled caramelised onions into the dough gently prior to shaping
- for sourdough focaccia, increase the water to about 700ml and after the bulk fermentation, gently tip the risen dough onto lined baking sheets, splash over some extra-virgin olive oil and any other flavours (rosemary, chunks of Parmesan, slices of garlic, roasted garlic cloves…..). Cover and leave to rise for a few hours at warm room temperature and bake.
- for a sweet sourdough, replace about 10% of the flour with cocoa powder, add about the same weight of caster sugar as cocoa powder to the flour before forming the dough. Gently work in about 150g of chopped dark chocolate to the risen dough before shaping. A few dried cherries (or cherries that have soaked in liqueur) or cranberries mixed into the dough is wonderful: perfect spread with salted butter!
Links to some of my favourite flavoured sourdoughs:


Beetroot & toasted walnut sourdough
Chocolate, cranberry & orange sourdough
Cheese, olive and tomato sourdough
Cheese & ale sourdough
Green olive and rye sourdough
Pear, walnut & Gorgonzola sourdough loaves
Saffron and poppy seed sourdough
Other recipes using sourdough starter
The list below gives some of my favourite ways of using starter: particularly if I feel that I am storing too much starter, these are delicous ways to use some up:
20-minute sourdough flatbreads
Sourdough bagels
Sourdough crumpets
Sourdough chocolate and cherry brownies
Sourdough English muffins

")


However, you can simply mix in some of the starter to a normal bread dough made with commercial yeast to boost its flavour.

Thanks for all the useful hints. I often have issues with it collapsing when it comes out of the banneton so I’ll have a go at the folding and shaping before popping it in there and hopefully that will help.
LikeLike
It is so frustrating when that happens. Yes the folding/shaping should work well and you will feel it form a tight ball which signals it is ready to go into the bannetons.
Also using very heavy flouring in the bannetons – more than seems natural – gives it a light crust around the dough when turned out which also helps prevent any collapsing. Any excess flour will dust off the baked loaf
LikeLike
Thanks for that. I’ve fed “Bertie” tonight so I’ll give this a go at the weekend. Fingers crossed I avoid a frisbee this time!
LikeLike
Ah it’s not just me who names his starter..phew!
LikeLike
Reblogged this on bakingfanatic.
LikeLike
Hi,
I have been making bread using your method for years now (thanks).
Always been complemented.
Just recently I can’t make a decent loaf, they are always flat. So I have re followed the instructions here carefully this time, still flat.
What could be going on?
Thanks
LikeLike
How strange it has just happened. It might be leaving the dough too long as it proves before turning it out – so it goes too slack to hold its shape. Or even the starter is not fully active. However, you could try letting them rise and then bake in loaf tins for support
LikeLike